Baked Chicken Tortellini


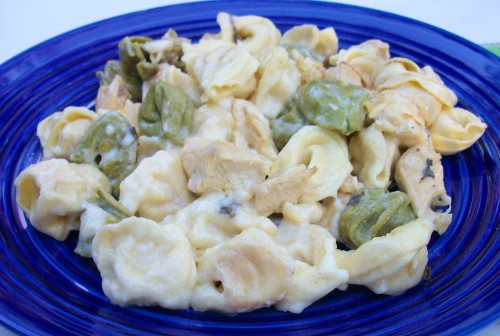
If you have kids and they are like mine, pasta could be eaten every single day without complaint. That is why I like to find new recipes for pasta. It gets boring eating the same things all the time. I found this recipe and wanted to see if we could add this to our arsenal of pasta recipes. The family loved it and now we have a new pasta recipe to go to.

I doubled the recipe and poured the sauce over the uncooked tortellini and baked it. Next time I make this, I will make more of the sauce then the recipe calls for. The pasta soaked up what sauce there was and it wasn’t as creamy as I would have liked. I’ve adjusted the recipe to show the changes.

Baked Chicken Tortellini

  • 2 16 ounce package of fresh cheese tortellini (found in the refrigerated section)
  • 2 tablespoon oil
  • 4 cups (about 4 chicken breasts) chicken cut up into bite size pieces
  • Salt and Pepper
  • 6 green onions finely chopped, white and green parts
  • 5 tablespoons flour
  • 24 or 26 ounces (3 cup) chicken broth
  • 1 3/4 cup sour cream
  • 4 Cups shredded Monterey jack or Mozzarella cheese
  1. Heat the oil in a large non-stick skillet over medium heat. Salt and Pepper the chicken and brown for 1-2 minutes. Add the green onions, cooking until chicken is done.
  2. Sprinkle flour over mixture and stir to combine. Cook for 1-2 minutes. Add chicken broth and stir until thickened. Mix in sour cream until mixture is creamy and slightly thickened.
  3. Spray a large baking dish with cooking spray and add the tortellini. Sprinkle half the cheese over tortellini. Put cooked chicken/sauce mixture on top and sprinkle remaining cheese over the top.
  4. Bake covered with tin foil at 350 for 30 minutes, uncover and bake for additional 15 minutes until bubbly and golden brown around the edges.

Source: My Kitchen Cafe
Homemade Chicken Stock

If you have never made chicken stock before, you don’t know what you are missing. I love making stock on a day I know that we will be home, since it does take several hours to make. But it’s well worth the waiting time. I make a huge pot and freeze the stock for when I need it. I’ll freeze it in 1 cup portions and up to 4 cups. That way if a recipe calls for a small amount of stock, I don’t have to thaw out 4 cups and have the rest go to waste.

There are so many ways to make stock and you really can’t screw it up. I’ve even taken this recipe and made it without the chicken so I have vegetable stock. When I do that, I add mushrooms to give the veggie stock another dimension. The original recipe calls for 3 whole chickens, but a lot of us don’t have an enormous stock pot to hold that many chickens. I will add the chicken and veggies to the pot and add enough water to fill almost to the top. I usually get about 16-18 cups of stock. You don’t have to defat the stock right away. I found that when you freeze the stock and thaw it in the fridge, the layer of fat will stay on top and can be easily removed before using.

This weekend my mother and Aunt will be visiting. I’m planning on making them a big meal that includes butternut squash risotto. In order to make a great risotto, you need to have great stock. So this past weekend I got the chicken and veggies together and made stock since I was out.

Chicken Stock:

  • 1 (5-pound) roasting chicken
  • 1 large yellow onions, unpeeled and quartered
  • 2 carrots, unpeeled and halved
  • 2 stalks celery with leaves, cut into thirds
  • 2 parsnips, unpeeled and cut in half, optional
  • 10 sprigs fresh parsley
  • 8 sprigs fresh thyme
  • 10 sprigs fresh dill
  • 1 head garlic, unpeeled and cut in 1/2 crosswise
  • 1 tablespoons kosher salt
  • 1 teaspoons whole black peppercorns
  1. Place the chicken, onions, carrots, celery, parsnips, parsley, thyme, dill, garlic, and seasonings in a stockpot.
  2. Add enough water to cover and come to 1 inch below the top and bring to a boil. Simmer, uncovered, for 3 hours.
  3. Strain the entire contents of the pot through a colander and discard the solids.
  4. Use immediately or pack in containers and freeze for up to 3 months

Source: adapted from Barefoot Contessa Ina Garten

Buffalo Chicken Wings

Wings are a staple during football season. I’ve made them several different ways and found Ina’s way to be the easiest. I am not a big fan of fried chicken wings and have always baked them. But I found with baking them they don’t crisp up like you would get with fried. Ina’s recipe calls for broiling the wings which gives it a nice crispy outside. When it came time to flipping the wings, I decided to put them on a new baking sheet due to all the fat that was on the first sheet. That helped with really crisping them up. I suggest putting on more sauce then you think it needs. I didn’t get a huge amount of the hot sauce flavor and ended up making some extra to dip them into. Overall they turned out great. Serve them with celery and blue cheese dressing (or ranch).

Buffalo Chicken Wings:

    • 16 chicken wings (about 3 pounds)

    • 1/4 pound (1 stick) unsalted butter

    • 4 teaspoons Frank’s Hot Sauce

    • 1 teaspoon kosher salt

  1. Preheat the broiler.
  2. Cut the chicken wings in thirds, cutting between the bones. Discard the wing tips.
  3. Melt the butter, hot sauce, and salt. Put the wings on a sheet pan and brush them with the melted butter.
  4. Broil them about 3 inches below the heat for 8 minutes. Turn the wings, brush them again with the butter, and broil for 4 more minutes or until cooked.

Source: Ina Garten via Food Network


Stuffed Chicken Breasts with Ham, Cheddar and Thyme

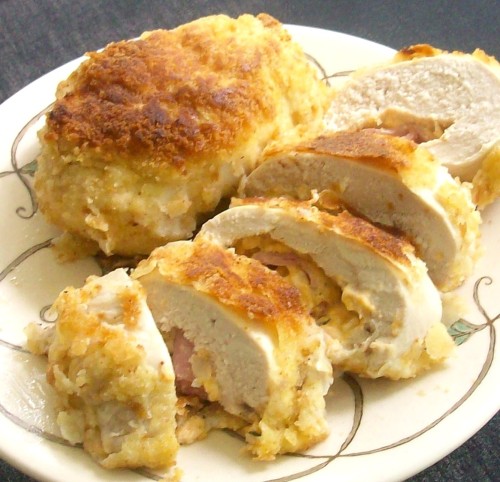
A few weeks ago I was in State College, PA doing a little shopping and ran across a special fall issue of Cooks Illustrated magazine. I love Cook Illustrated and with fall coming, I had to have it. In the issue was a stuffed chicken recipe that sounded so good I had to make it right away. The recipe calls for fresh bread crumbs and I decided to use fresh and dried to see if there was a difference. There really wasn’t a huge difference so if you don’t want to make the fresh bread crumbs, dried will work just fine. I didn’t pound the chicken breasts thin enough and wished I had. Some of the cheese mixture did end up leaking out of the chicken while it was baking. Make sure to pound the chicken thin so you can get a good seal on the filling. The cheese filling is really tasty and you don’t want to waste any of it.

What’s nice about this recipe is that you can make it ahead of time up to stage 4. When ready to cook you can continue stage 5-6.

Stuffed Chicken Breasts with Ham, Cheddar and Thyme

Chicken:

  • 8 boneless, skinless chicken breasts (5-6 oz each), tenderloins removed and reserved for another use
  • 4 slices high-quality white sandwich bread, torn into 1 inch pieces. (or 3 cups of dried bread crumbs)
  • 1 cup unbleached all-purpose flour
  • 4 large eggs
  • 1 cup plus 1 tbs vegetable oil

Filling:

  • 2 tbs butter
  • 1 onion, minced
  • 1 medium-garlic clove, minced or pressed through garlic press (1 tsp)
  • 8 oz cream cheese, softened
  • 2 tsp chopped fresh thyme leaves
  • 8 oz chedder cheese, shredded (2 cups)
  • salt and pepper
  • 8 slices (about 8 oz) thin-sliced cooked deli ham
  1. Place each chicken breast in a large ziplock bag or on a large sheet of plastic wrap, cover with second sheet and pound with meat pounder or rolling pin till 1/4 inch thick throughout. Each pounded breast should measure roughly 6 inches wide and 8 1/2 inches long. Cover and refrigerate while preparing filling.
  2. Heat butter in medium skillet over low heat until melted; add onion and cook, stirring occasionally, until deep golden brown, 15-20 minutes. Stir in garlic and cook until fragrant, about 30 seconds longer; set aside.
  3. In medium bowl using hand-held mixer, beat cream cheese on medium speed until light and fluffy, about 1 minute. Stir in onion mixture, thyme, and cheddar; season with salt and pepper and set aside.
  4. Place breasts skinned side down on work surface; season with salt and pepper. Fill with cheese and ham, roll and wrap each breast tightly in foil, twisting the foil ends in opposite directions. Refrigerate at least for 45 minutes or more.
  5. If not using dried bread crumbs: pulse bread in food processor until evenly textured, 8-10 one second pulses ( you should have 3 1/2 cups fresh bread crumbs). Adjust oven rack to lower-middle position and heat oven to 400 degrees. Spread flour in pie plate or shallow baking dish. Beat eggs with 1 tbs vegetable oil and 1 tbs water in second pie plate or shallow baking dish. Spread bread crumbs in third pie plate or shallow baking dish. Unwrap chicken breasts. Roll 1 stuffed chicken breast in flour; shake off excess. Using tongs, then roll breast in egg mixture; let excess drip off. Transfer breast to bread crumbs; shake dish to roll breast in crumbs, then press with fingers to adhere crumbs. Place breaded chicken breast on large wire rack set over baking sheet. Repeat with remaining breasts.
  6. Heat 3/4 cup oil in medium skillet over medium-high heat until shimmering but not smoking. Add 4 chicken breasts to skillet, seam side down, and cook until medium golden brown, about 2 minutes. Turn each breast and cook until medium golden brown on all sides, 2 to 3 minutes longer. Return chicken breasts, seam side down, to baking sheet. Add remaining 1/4 cup oil to skillet and repeat with remaining chicken breasts. Once all chicken breasts have been fried, place baking sheet in oven and bake breasts until deep golden brown and instant-read thermometer inserted into center of each breast registers 160 degrees, about 20 minutes, rotating pan halfway through cooking. Let stand 5 minutes before slicing each breast crosswise diagonally into 4 to 5 medallions; arrange on individual dinner plates and serve.

Source: Cook’s Illustrated Special: Fall Entertaining

Oven-Fried Chicken

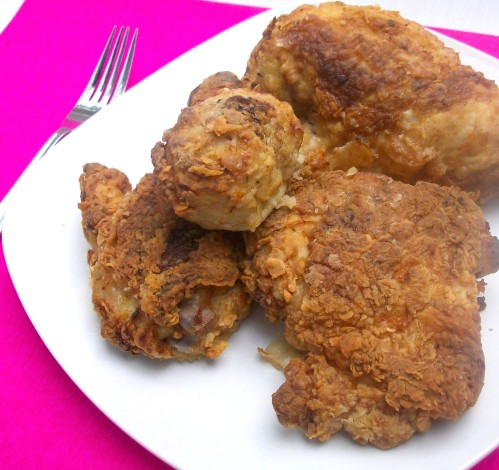
I have always wanted to make fried chicken but I tend to shy away from making things that needs to be deep fried for a long time. When I saw this recipe in one of my favorite Ina Garten cookbooks, I knew this was up my alley. The chicken soaks overnight in buttermilk and then floured and lightly fried in oil. The rest of the time the chicken spends in the oven crisping up and the oil drips right off. This is the way I like my fried chicken. I don’t feel as guilty eating it cause I know it didn’t spend 15-20 minutes in oil. I made the chicken and served the BBQ Baked Beans with it. Delicious!

Oven-Fried Chicken

  • 2 chickens (3 pounds each), cut in 8 serving pieces
  • 1 quart buttermilk
  • 2 cups all-purpose flour
  • 1 tablespoon kosher salt
  • 1 tablespoon freshly ground black pepper
  • Vegetable oil or vegetable shortening
  1. Place the chicken pieces in a large bowl and pour the buttermilk over them. Cover with plastic wrap and refrigerate overnight.
  2. Preheat the oven to 350 degrees F.
  3. Combine the flour, salt, and pepper in a large bowl. Take the chicken out of the buttermilk and coat each piece thoroughly with the flour mixture. Pour the oil into a large heavy-bottomed stockpot to a depth of 1-inch and heat to 360 degrees F on a thermometer.
  4. Working in batches, carefully place several pieces of chicken in the oil and fry for about 3 minutes on each side until the coating is a light golden brown (it will continue to brown in the oven). Don’t crowd the pieces. Remove the chicken from the oil and place each piece on a metal baking rack set on a sheet pan. Allow the oil to return to 360 degrees F before frying the next batch. When all the chicken is fried, bake for 30 to 40 minutes, until the chicken is no longer pink inside. Serve hot.

Source: Barefoot Contessa Family Style by Ina Garten

Chicken Parmesan


Chicken Parmesan is my husbands favorite dinner. I am not a huge chicken fan but love chicken parmesan because it’s moist and flavorful. This is a little time consuming so I don’t make it very often. We recently moved to PA and had a lot of help unpacking from my mother-in-law, father-in-law, sister-in-law, her husband, and a good friend of theirs. I wanted to make them something nice and decided chicken parm was the way to go.

You can make this ahead of time by breading the chicken and letting it sit in the fridge till you are ready to brown it. I’ve also baked it and then stored it till the next day. I think it tastes better the next day, the flavors all start to become one happy family.

Chicken Parmesan

  • 4-6 boneless, skinless chicken breasts
  • 2 eggs
  • 2 cups flour
  • 2 cups Italian style breadcrumbs
  • 1 cup shredded parmesan cheese, plus more for sprinkling
  • 4 cups marinara sauce or 2 jars of favorite sauce
  • 2 cups shredded mozzarella cheese (or more if you like it cheesy)
  • salt and pepper
  • 1/4 cup olive oil
  1. Preheat oven to 350 degrees. Place one piece of chicken at a time in a big ziplock bag or between two pieces of saran wrap. With a meat mallet or rolling pin, pound the chicken flat to about 1/2 inch thickness.
  2. Using three different shallow bowls (I use pie plates) place the flour in one bowl and season with salt and pepper. Second bowl, whisk the 2 eggs with 1tbs of water. Last bowl, mix the breadcrumbs and 1 cup parmesan cheese.
  3. Working with one piece of chicken, dredge it in the flour, coating both sides and shake off excess. Next, put it in the eggs and coat both sides, letting excess drip off. Then put it in the breadcrumb mixture, making sure that both sides are well covered and place on baking sheet or plate. Continue till all the chicken breasts are breaded.
  4. In a large baking dish place 1 cup of the marinara sauce on the bottom and spread around.
  5. In a 12 inch skillet or saute pan set over medium high heat, add the olive oil and place chicken in pan. You will need to work in batches so you don’t overcrowd the pan. Cook till golden browned on both sides, about 4-5 minutes each side. (you might need to add more oil to the pan if it looks dry)
  6. When chicken is done take it out and put in the baking dish. Continue till all the chicken is cooked and in the baking dish.
  7. Cover the chicken with the rest of the sauce and top with parmesan cheese and the mozzarella cheese. Cover with foil and bake for 1 hour. You can take the foil off in the last 15 minutes of baking if you want the cheese browned. Serve immediately.

Source: Gina Marie Original

Chicken Milanese with Arugula Salad

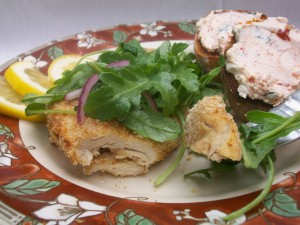
My kids had a lot of fun in helping me make this dinner. They love the breading process since it allows them to get messy fingers. I love it because it’s light and perfect for a summer dinner/lunch. I have to say that I am in love with arugula. It’s got a peppery bite that goes well with the lemon dressing. I have also made this salad to put it on top of white pizzas.

The recipe calls for homemade bread crumbs; I didn’t do that this time and didn’t notice any difference. I will include the recipe as is but have no fear with buying the store bought bread crumbs. It does make your life easier.

*note: If you use store bought bread crumbs start the recipe with placing the flour, eggs and bread crumbs in separate shallow bowls.

Chicken Milanese with Arugula Salad

1 ¼ cups plain dried bread crumbs, homemade or store bought

¼ cup plus 2 tbs olive oil

1/3 cup all purpose flour

2 large eggs, lightly beaten

Coarse salt and freshly ground pepper

4 boneless, skinless chicken breast halves (1 ½ to 2lbs)

2tbs fresh lemon juice, plus lemon wedges for serving

5 ounces baby arugula

1 small red onion, halved lengthwise and thinly sliced

1. Preheat oven to 425F. On a rimmed baking sheet, toss bread crumbs with ¼ cup oil until well combined; spread evenly on sheet. Cook, tossing once, until golden brown, 6-8 minutes. Place flour, eggs, and bread crumbs in separate shallow bowls (like pie plates) season each with salt and pepper. Place a wire rack on the baking sheet.

2. Working with one at a time, place chicken breasts between two large pieces of plastic wrap. Using the flat side of a meat mallet or the bottom of a small heavy pan, pound each piece until ½ inch thick. Pat chicken dry with paper towels. Dredge chicken in flour, turning to coat both sides, then shake off excess. Dip chicken in eggs, coating completely and allowing excess to drip back into bowl. Coat entirely in bread crumbs, pressing firmly to adhere.

3. Place breaded chicken on rack, and bake (without turning) until browned and just cooked through, 10-15 minutes.

4. When chicken is almost finished cooking, whisk together remaining 2tbs oil and the lemon juice in a salad bowl; season with salt and pepper. Add arugula and onion; toss to coat. Serve salad over chicken, with lemon wedges on the side.

Source: Everyday Food; Fresh Flavor Fast