Cherry Cheesecake Cookies

Cherry Cheesecake Cookies

I really wanted to get these recipes posted sooner, but we had some personal issues come up and I’ve been very preoccupied with that. But I haven’t forgotten about you! So today, I will be posting two recipes in hopes that gives you enough time to gather the ingredients and make these wonderful treats this weekend. My plan for the weekend is to get together with family and make some more goodies for Christmas Day. I hope you get to do the same.

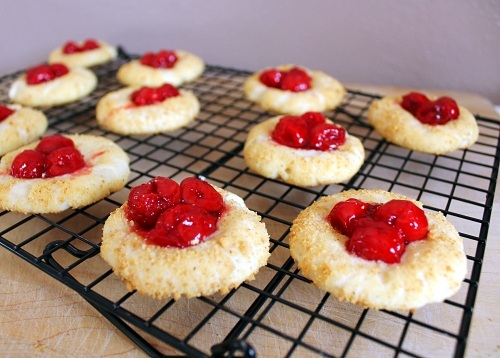
These cookies taste exactly like the name says, cherry cheesecake! They take some time to make but they are well worth all the work. I did find draining the cherries was a bit of a hassle. Use a good mesh strainer set over a large bowl, the filling slowly does separate from cherries. Just be patient and take out one cherry at a time and you’ll have yourself perfect cherry toppings!

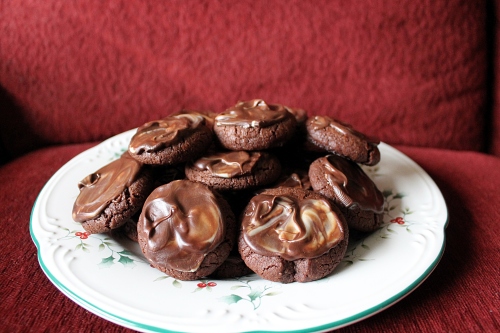
Check back in a few hours for my next treat: Salted Caramels, Yummm!

Cherry Cheesecake Cookies:

  • 3 1/2 cups all-purpose flour
  • 2 tsp baking powder
  • 1 tsp salt
  • 2 (8oz) pkg cream cheese, softened
  • 20 tbs (2 1/2 sticks) unsalted butter, softened
  • 1 1/2 cups granulated sugar
  • 2 large eggs, room temperature
  • 2 tsp vanilla extract
  • 1 cup graham cracker crumbs
  • 3 (20oz) cans cherry pie filling, drained
  1. Combine flour, baking powder, and salt in a bowl. With electric mixer on medium-high speed, beat cream cheese, butter, and sugar until smooth and creamy, 2 minutes. Add eggs and vanilla, and mix until incorporated. Reduce speed to low, add flour mixture, and mix until the just combined. Divide dough in half, wrap in plastic wrap, and refrigerate until firm, 2 hours. 
  2. Adjust oven racks to upper-middle and lower-middle positions and heat oven to 350 degrees. Line 2 baking sheets with parchment paper. Place graham cracker crumbs in shallow dish. Working with one dough half, roll into 1 1/2 inch balls, then roll in graham cracker crumbs. Place balls 2 inches apart on prepared baking sheets. Using rounded tablespoon measure, make indention in center of each ball. Place 3 cherries (don’t be afraid of how large they are compared to cookie, it’ll puff up) in each dimple. Bake until cookies have cracked and are set, 12 to 14 minutes, switching and rotating sheets halfway through baking. Cool 10 minutes, then transfer to wire to cool completely. Repeat with remaining dough.  The cookies will last in the refrigerate for a few days.

Source: Americas Test Kitchen Holiday Cookies 2010


Chocolate Mint Cookies

Chocolate Mint Cookies

I’ve been having a lot of fun the past week with baking up a whole bunch of goodies for you. First up are these amazing Chocolate Mint Cookies. These cookies are very easy to put together. But you will need to plan to make these ahead of time since the dough will need to be refrigerated before you bake them. What I ended up doing was making the dough the night before I wanted to bake them and it worked out great. How these cookies get their mint flavor, is by placing an Andes chocolate mint on top of the cookie as soon as they come out of the oven. The heat coming from the cookie will soften the mint and will easily spread over the top. Let me just say, these will knock your socks off! They are sooo good. Happy Holiday Baking!

Chocolate Mint Cookies:

  • 1 1/4 cup all-purpose flour
  • 1/2 tsp baking soda
  • 1/4 tsp salt
  • 6 tbs (3/4 stick) unsalted butter
  • 3/4 cup packed light brown sugar
  • 6 oz bittersweet chocolate, chopped
  • 1 large egg
  • 36 pieces Andes chocolate mints, unwrapped

To Make Dough Ahead of time:

  1. Combine flour, baking soda, and salt in a medium bowl. Melt butter and brown sugar in a medium saucepan over low heat. Add bittersweet chocolate, cover pan with lid, and let stand off heat until chocolate melts, about 4 minutes. Stir until smooth, transfer chocolate to bowl of electric mixer, and let cool, about 10 minutes.
  2. With electric mixer on medium speed, beat the egg into cooled chocolate mixture until thoroughly combined. Reduce speed to low and mix in flour mixture until just combined, about 1 minute. Cover dough with plastic wrap and refrigerate until firm, about 1 hour or overnight.

Baking cookies:

  1. Adjust oven racks to upper-middle and lower-middle positions and heat oven to 350 degrees. Line 2 baking sheets with parchment paper.
  2. Roll 2 tsp dough into 1-inch balls and place 2 inches apart on prepared baking sheets. Bake until cookies are just set, 10 to 12 minutes, rotating and switching baking sheets halfway through baking time. Remove from oven, top each hot cookie with 1 mint, and allow chocolate to soften, about 1 minute. Using knife, spread softened mint over top of cookies and transfer to rack to cool completely, about 30 minutes. Store cookies in airtight container at room temp for up to 1 week.

Source: Americas Test Kitchen Holiday Cookies 2010

Tea Cake Cookies

Cookies

The great thing about living close to my parents again is that I can drop by their house and then leave with some goodies. My dad made these amazing tea cake cookies and I stole a whole bunch so I could take their photo and of course eat them. These cookies taste a little like a snickerdoodle cookie but have a cake like quality to them. They are soft and chewy, which is my favorite kind of cookie. This recipe makes 6 dozen cookies, which makes it a perfect cookie for the Holiday’s.

On a side note: I am in the process of baking up a whole bunch of goodies for the blog. Be ready in the coming weeks for some great Holiday recipes. Happy Baking!

Tea Cake Cookies:

  • 1 cup butter, softened
  • 1 1/4 cup sugar
  • 3/4 cup cane syrup
  • 1 tbs vanilla extract
  • 1 1/2 tsp fresh lemon juice
  • 3 large eggs
  • 4 1/2 cups self-rising flour
  • 1 1/2 tsp cinnamon
  1. Preheat oven to 350 degrees. Line cookies sheets with parchment paper.
  2. Whisk flour and cinnamon together in a medium size bowl, set aside. Beat butter and sugar at medium speed with an electric mixer until creamy. Add cane syrup and next 2 ingredients  beating just until blended. Add eggs, 1 at a time, beating just until blended after each addition.
  3. Gradually add flour, beating at low speed just until blended after each addition. Drop dough by rounded spoonfuls 2 inches on prepared baking sheets. (you can use a cookie scoop)
  4. Bake at 350 for 8-10 minutes or just until edges begin to turn golden brown. Cool on baking sheet for 1 minute then transfer to wire rack to completely cool. Cookies can be stored in airtight container for up to a week.

Source: Slightly adapted by Southern Living Magazine Nov 2012

Peanut Butter and Jelly Cookies

To me, peanut butter and jelly is comfort food. It takes me back to being a child and eating them for lunches. Even though my pallet has evolved and grown as I have grown, I still enjoy eating a peanut butter and jelly sandwich for lunch. I love desserts that will incorporate the two ingredients that are meant to always be together. I’ve made peanut butter and jelly bars that everyone loves, so I figured these cookies have to be good. Not only were they good, they were fantastic!

The cookies are easy to make and quick to whip up. I’m not a fan of cooking with shortening and the recipe called for butter flavored shortening. I was able to substitute that with real butter and the results were great. It’s up to you and your preference which one you would like to use. Either way, you are going to have a fantastic cookie that everyone is going to love.

Peanut Butter and Jelly Cookies:

  • 1 1/2 cups all-purpose flour
  • 1 tsp baking soda
  • 1 tsp salt
  • 1/2 cup unsalted butter, softened or 1/2 cup butter-flavored shortening
  • 1 cup creamy peanut butter
  • 1 cup dark brown sugar
  • 1/3 cup granulated sugar
  • 3 tbs milk
  • 1 tsp vanilla extract
  • 1 large egg
  • 1/2 cup grape jelly
  • 1/2 cup creamy peanut butter
  1. Preheat oven to 375 degrees F.
  2. In a medium bowl, combine flour, baking soda and salt; set aside. In a large bowl, combine butter (or shortening if using), peanut butter, both sugars, milk and vanilla.
  3. With a hand-held mixer, beat on medium speed until just combined. Add egg and beat until incorporated. Gradually add flour mixture and mix until combined.
  4. Roll heaping tablespoons of dough into balls with hands. Place on parchment lined baking sheets and press into the centers with thumbs to form divots. In each divot, place 1/2 teaspoon of jelly and 1/2 teaspoon of peanut butter. Bake in the preheated oven for 10-12 minutes. Let cool.

Source: slightly adapted by Pip and Ebby 

Baby Boy Onesie Cookies

I love making onesie cookies. I previously made girls ones for my niece and now it’s time to make boy ones for my nephew. I was unable to make my sister-in-laws shower down in Orlando, so I made these and sent them down.

I used the same sugar cookie dough that I have in the past. I tried doing a new technique with the royal icing but got a little frustrated when it wasn’t turning out how I wanted it. So I went back to the squeeze bottle way of filling in the cookies. Bake at 350 has tutorials on each of her decorated sugar cookies.

I am still having a hard time writing on the cookies. As with anything, practice makes perfect. I just have to keep doing it and not be so scared.

I know they had a great time at the shower and they enjoyed the cookies.

Red Velvet Cookies

Normally I like to make things from scratch, but sometimes even I am not in the mood to get a ton of ingredients out. This is where these cookies come into play. All you need is a cake mix, eggs, oil, vanilla extract and a little extra flour. You can easily make them with a hand mixer or go ahead and pull out your stand mixer.

Originally I was hoping to make these like the recipe, which are red velvet crinkle cookies. But my dough was very oily and sucked up the powdered sugar so the first batch didn’t look like crinkles. I decided to do the rest of the cookies without rolling them in the powdered sugar. When I tasted them I decided they needed a little extra something, so I whipped up a glaze of powdered sugar and water. I drizzled that over the cookies and they looked beautiful and tasted great. These are quick and easy to whip up for your Valentines.

Red Velvet Cookies:

  • 1 box red velvet cake mix
  • 2 tbs all-purpose flour
  • 2 large eggs
  • 1/2 cup canola oil
  • 1 tsp vanilla extract
  • Powdered sugar, for rolling the cookies or for glazing
  1. Preheat oven to 350 degrees F. Line a large baking sheet with parchment paper set aside.
  2. In a large bowl, combine cake mix and flour. Whisk until clumps disappear. In the bowl of a stand mixer, or with a hand mixer, mix together cake mix, flour, eggs, oil and vanilla extract. Mix until smooth. Take about 1 tablespoon of cookie dough and form into a ball. *NOTE* If your cookies look oily and shiny, omit the rolling in the powdered sugar and place cookie dough balls on prepared baking sheet, flatten slightly with your palm. Bake for 10-12 minutes. 
  3. Roll the ball in powdered sugar until fully coated. Place cookie dough balls on prepared baking sheet. Bake for 10 minutes, or until edges are set and cookies begin to crack.
  4. Let cookies sit on baking sheet for 2 minutes. Transfer to cooling rack and let cool completely.
  5. If wanting to use glaze… Take 1 cup of powdered sugar and add 1 tsp of water. Whisk till it’s smooth and it’s at a drizzle consistency. You may need to add a bit more water or powdered sugar to get the right consistency. You really can’t mess it up.

Source: Slightly adapted from Two Peas and their Pod

Strawberry Shortcake Cookies

I am so happy to be back blogging. My husband is doing great and we got the news we were looking for on his tumor, it was benign! A weight has been lifted off our shoulders and I am back in the kitchen cooking good stuff. I originally had planned to share another recipe with you, but I just made these cookies and had to give them to you right away.

During the winter months we get together with our neighbors the first Wednesday of the month for soup night. One of our neighbors graciously cooks up two different soups and the rest of us will bring breads or desserts. It’s a great time to get together with everyone and enjoy great food. This past soup night really snuck up on me. I realized the night before that I had not thought about what to bring. So I started researching all my saved recipes for something. I like to try and do something that fits the month or the season. This is the time of year I love going to the grocery store and getting fresh strawberries from my home state of Florida. It takes me back to going to the Strawberry Festival in February. So, when I was looking through my saved recipes, I saw these strawberry shortcake cookies and knew this was what I was making.

The cookies are very delicate and should be eaten the day they are made. Strawberries are very juicy and the cookies will become soggy after sitting for more than a day. The taste of strawberry shortcake in cookie form is pure heaven and makes me miss Florida this time of year. Enjoy!

Strawberry Shortcake Cookies:

  • 12 ounces strawberries, hulled and diced into 1/4-inch pieces (about 2 cups)
  • 1-2 tsp freshly squeezed lemon juice
  • 1/2 cup plus 2 Tablespoons granulated sugar
  • 2 cups all-purpose flour
  • 2 tsp baking powder
  • 1/2 tsp kosher salt
  • 6 tbs cold, unsalted butter, cut into small pieces
  • 2/3 cup heavy cream
  • Sanding sugar, for sprinkling
  1. Preheat the oven to 375.  Line 2 baking sheets with parchment paper.
  2. Combine strawberries, lemon juice, and 2 Tablespoons of granulated sugar in a medium bowl.  Set aside.
  3. Whisk together the flour, remaining sugar, baking powder, and salt in a large bowl.  Using a pastry cutter or your fingers, cut in the butter to the flour mixture until coarse crumbs are formed. Stir in the heavy cream until the dough starts to come together, then gently fold in strawberries. (The dough will not be smooth but a bit crumbly)
  4. Using a 1-1/2 inch cookie scoop, drop dough onto cookie sheets, evenly spaced apart.  Sprinkle with coarse sugar.  Bake for 22-27 minutes, or until cookies are golden brown. (Mine were done at 20 minutes) Transfer to a wire rack to cool completely. Enjoy the day of baking.

Source: Pink Parsley via Martha Stewart Living June 2009