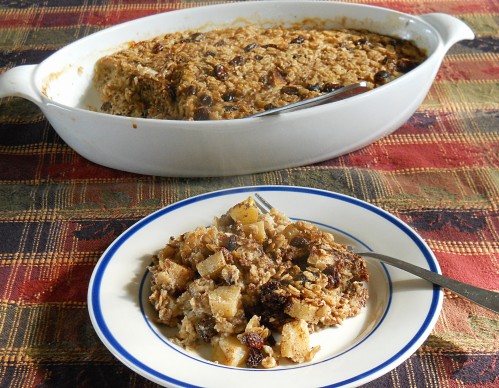
Baked Apple Cinnamon and Raisin Oatmeal

The holiday’s are fast approaching and most of us will either be visiting family or family will be visiting you. If it’s the latter, you will want a fast and easy breakfast to put together for your crowd.

This baked oatmeal is just the thing. If you aren’t a huge fan of oatmeal, I think you might like this. It does not taste like your typical bowl of flavorless oatmeal. It takes only minutes to put together and the combination of oatmeal, cinnamon, apples and raisin’s makes it taste amazing.


On a side note: I don’t do this sort of thing but in light of the recent events surrounding my beloved Penn State, I feel compelled to post this. I am truly sad and heartbroken about the abuse and cover-up of the sex-abuse allegations. I believe we need to keep remembering the victims in all of this and I am proud to see a movement by Penn State alumni to raise money for abuse victims. I am providing a link to the organization of RAINN which provides help to sexual abuse victims. If you want to donate, please do. If not, that’s ok too. Please keep all victims in your prayers. Thank you.

#ProudPSUforRAINN

Baked Apple Cinnamon and Rasin Oatmeal:

  • 1 cup old fashioned oats
  • 1.25 tsp. cinnamon
  • 1/4 tsp. cloves
  • 1/8 tsp. ginger
  • a couple grates of whole nutmeg or 1/8 tsp. ground nutmeg
  • pinch of salt
  • 1/2 tsp. baking powder
  • 1/4 cup Tbsp. maple syrup
  • 1 cup milk (I used skim)
  • 1 large egg
  • 2 Tbsp. unsalted  butter, melted and slightly cooled
  • 1 tsp. vanilla
  • 1 apple, peeled, cored and diced into 1/2 inch pieces
  • 1/2 cup raisins
  1. Preheat oven to 375 degrees.  Grease or spray a 2-quart casserole dish with either butter or cooking spray.
  2. In a medium bowl, toss together the oats, baking powder, cinnamon, and salt.  In a separate small bowl, whisk together the maple syrup, milk, egg, the melted butter, and the vanilla.
  3. Place the diced apples in a single layer in the bottom of the prepared casserole dish.  Sprinkle about two-thirds of the raisins over the top of the apples, then cover the fruit with the oat mixture.  Drizzle the milk mixture over the oats, making sure to distribute the milk as evenly as possible.  Sprinkle the remaining raisins over the top of the oats.  Bake the oatmeal for 35-45 minutes, until the top is golden brown and the oats have set.
  4. Remove the oatmeal from the oven and serve hot with more maple syrup.

Source: Ella Says Opa via Supernatural Everyday by Heidi Swanson, and Smells Like Home


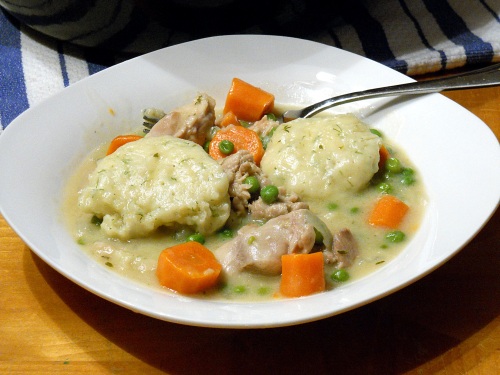
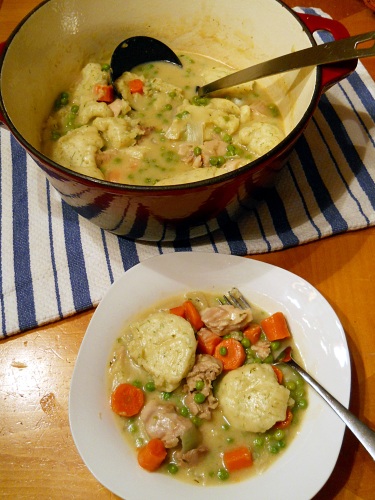
Chicken and Dumplings

I’ve been on a sweet kick lately so it’s time for something savory. The weather has turned cold and we even had our first big snow storm of the season last week. When there is 5-6 inches of snow in your yard you want something warm and comforting. This is where chicken and dumplings comes into play. Most chicken and dumplings can be very bland and not at all impressive. I’ve found a recipe that is neither one of those. Everything is full of flavor even down to the dumplings. I was impressed how the dill dumplings complimented the chicken stew. My whole family loved this and it’s now a regular in our house.

Chicken and Dumplings:

  • 3 tablespoons butter
  • 1 medium onion, cut into 1-inch pieces
  • 5 medium carrots, cut crosswise into 1 1/2-inch pieces
  • 1/2 teaspoon dried thyme
  • 1 cup (spooned and leveled) all-purpose flour
  • 1 can (14.5 ounces) reduced-sodium chicken broth
  • Coarse salt and freshly ground pepper
  • 1 1/2 pounds boneless, skinless chicken thighs, cut into 2-inch pieces
  • 2 tablespoons chopped fresh dill, or 3/4 Teaspoon dried dill weed
  • 1 3/4 teaspoons baking powder
  • 1/2 cup plus 2 tablespoons milk
  • 1 package (10 ounces) frozen peas
  1. In a Dutch oven (or a 5-to-6-quart heavy pot with a tight-fitting lid), heat butter over medium. Add onion, carrots, and thyme. Cover and cook, stirring occasionally, until onion is soft, about 5 minutes. Add 1/4 cup flour and cook, stirring, 30 seconds. Add broth and bring to a boil, stirring constantly; season with salt and pepper. Nestle chicken in pot; reduce heat to medium-low. Cover and cook, stirring occasionally, 20 minutes.
  2. Meanwhile, make dumplings: In a medium bowl, whisk together remaining 3/4 cup flour, dill, baking powder, and 1/2 teaspoon salt. With a fork, gradually stir in 1/2 cup milk to form a moist and soft batter. It should be just a little thicker than pancake batter and should easily drop from the tip of a spoon. (Add additional 2 tablespoons milk if too thick.) Set aside.
  3. Stir peas into pot. Drop batter in simmering liquid in 10 heaping tablespoonfuls, keeping them spaced apart (dumplings will swell as they cook). Cover, and simmer until chicken is tender and dumplings are firm, 20 minutes. Serve.

Football! Football! Football!

Are you ready for some football? I know I am! It’s officially my favorite time of the year. I’ve already had my first pumpkin spice latte and I have pumpkin spice scentsy burning. I am seriously ready for fall! I am also ready to start cooking up football food. You can’t watch a football game without having great food. In the next several weeks I’ll be posting all sorts of goodies to eat while you watch your favorite teams.

Here is a link that will take you my previous Football Food Roundup.

And here are a few new added recipes that will be perfect for the game.

Stuffed Mushrooms

Spinach Dip

Shrimp Mousse

Chicken Enchilada Wraps

Italian Pasta Salad

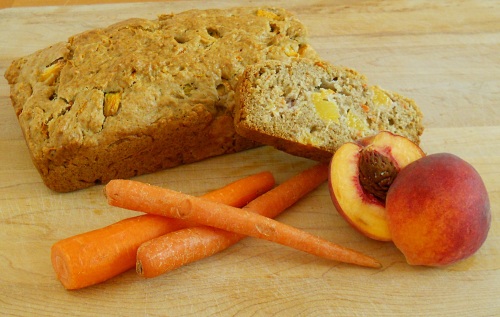
Spiced Peach and Carrot Bread

The past two weeks have been fun and fast. My son and I were spending time in the Chicago area celebrating my beautiful mother’s 60th birthday during the first week. Then last week I spent every moment I could with my kids since it was the last week of their summer vacation. That’s right, today I sit in a silent house while they are at school. I’m actually kind of sad. I’ve had so much fun with them this summer. I’m also a little sentimental because my daughter has started High School. But it’s going to be an exciting year, because she made Varsity Cheerleading. I am so proud of my baby girl! I could keep going on and on about my kids. But you aren’t here for that.

Let’s begin with our regularly scheduled recipes. Today I bring you this wonderful spiced peach and carrot bread. This was in the July issue of Southern Living magazine. My grandmother was in town when it came in and she saw it and asked that it be made. I had to agree with Nana because the recipe sounded wonderful. Plus I knew it would work with splenda. Both my husband and Nana are diabetics, so anything I can bake with splenda, I will. It turned out just as good as I figured it would. It was moist and best served warm with butter. You can reheat it in the microwave for a few seconds to warm it up. I did omit the nuts because I’m not a big fan of nuts in baked goods. Spiced Peach and Carrot Bread is a great way to use up what’s left of summer peaches!

Spiced Peach and Carrot Bread:

  • 3/4 cup chopped pecans(optional)
  • 2 1/2 cups all-purpose flour
  • 1 cup granulated sugar or Splenda
  • 1 tsp ground cinnamon
  • 1/4 tsp ground nutmeg
  • 3/4 tsp baking soda
  • 1/2 tsp baking powder
  • 1/2 tsp salt
  • 1 1/2 cups peeled and chopped fresh, ripe peaches (about 2-3 medium peaches)
  • 3/4 cup freshly grated carrots (about 2 carrots)
  • 2/3 cup vegetable oil
  • 1/2 cup milk (buttermilk would be really good)
  • 2 large eggs, lightly beaten
  1. Preheat the oven to 350 degrees. Toast pecans in a single layer on a baking sheet 8-10 minutes, or until toasted and fragrant, stirring halfway through. Cool 15 minutes.
  2. Whisk together the flour and next 6 ingredients in a large bowl. Add peaches and next 4 ingredients, and toasted pecans, stirring just until dry ingredients are moistened. Spoon the batter into a lightly greased 9×5 inch loaf pan (the batter will be very thick).
  3. Bake at 350 for 55-65 minutes, or until a wooden toothpick inserted in the center comes out clean.
  4. Cool the bread in the pan for 5-10 minutes, then run a knife around the edges and invert onto a cooling rack to cool completely.
Source: Southern Living, July Issue

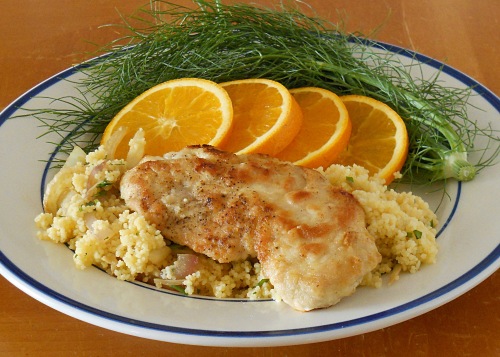
Chicken and Couscous with Fennel and Orange

I would first like to apologize for not posting in almost 2 weeks. We have had some hiccups with the house and I’ve had my main focus on those. Hopefully, we won’t be having many more hiccups and I can get back to blogging. Now, onto the food.

This dish is full of flavors. My favorite one being the fennel. I LOVE fennel! And anytime I can use it in a dish, I will. For those not familiar with it, it’s got a licorice taste. I personally don’t like the candy licorice, but fennel makes me swoon. I could go on and on about fennel, but there are other elements to the dish too. The couscous gets cooked in chicken broth and orange juice to give a wonderful flavor. The chicken gets a great browned exterior from the dredging in flour. But what’s best of all about this whole thing is that it’s all done 1 skillet! No need to dirty several pans. I am looking forward to making this recipe again. Enjoy!

Chicken and Couscous with Fennel and Orange:

  • 4 boneless, skinless chicken breasts, tenderloins removed and breasts trimmed. (I bought cutlets and used 6 cutlets)
  • 1/2 cup unbleached all-purpose flour
  • Salt and ground black pepper
  • 1/2 cup olive oil
  • 1 medium onion, sliced thin
  • 1 fennel bulb, trimmed, cored and sliced thin
  • 1 cup plain couscous
  • 3 medium garlic cloves, minced or pressed through a garlic press (about 1 tbs)
  • Cayenne Pepper
  • 1 cup orange juice
  • 3/4 cup low-sodium chicken broth
  • 1/4 cup minced fresh cilantro leaves
  1. If you are not using cutlets, pound each chicken breast between 2 sheets of plastic wrap to a uniform 1/2 inch thickness. Place the flour in a shallow dish. Pat the chicken breasts dry with paper towels and season with salt and pepper. Working with 1 chicken breast at a time, dredge in the flour, shaking off the excess.
  2. Heat 2 tbs of the oil in a 2 inch nonstick skillet over medium high heat until just smoking. Carefully lay the chicken breasts in the skillet and cook until well browned on the first side, 6-8 minutes.
  3. Flip the chicken breasts over, reduce the heat to medium, and continue to cook until the thickest part of the chicken registers 160-165 degrees on an instant-read thermometer, 6-8 minutes longer. Transfer the chicken breasts to a plate, tent loosely with foil, and let rest while cooking the vegetables and couscous.
  4. Add 1 tbs more oil to the skillet and return to medium-high heat until shimmering. Add the onion, fennel, and 1/2 tsp salt and cook until the onion is softened, 5-7 minutes. Stir in the couscous, garlic, and a pinch cayenne and cook until fragrant, about 30 seconds.. Stir in the 3/4 cup of the orange juice and broth, scraping up any browned bits. Bring to a simmer, cover, and let sit off the heat until the liquid is absorbed, about 5 minutes.
  5. Whisk the remaining 5 tbs oil, remaining 1/4 cup orange juice, 2 tbs of the cilantro, and a pinch of the cayenne together in a small bowl.
  6. Gently fold the remaining 2 tbs cilantro into the couscous with a fork and season with salt and pepper to taste.. Drizzle the oil-orange juice mixture over the chicken and couscous before serving.
Source: The Best Skillet Recipes by Cook’s Illustrated

Independence Day Goodies

A lot of us are planning big gatherings with family and friends this weekend. I’ve made a list of dishes that would be perfect for your parties. I’m very excited for the weekend, I am going to be surrounded by family and friends at my new house. We have gotten a lot accomplished and I am now able to start thinking about cooking and my blog again.

I hope everyone has a terrific 4th of July and that you are safe and surrounded by loved ones.

P.S. I am coming up on the 1 year Anniversary of Gina Marie’s Kitchen. I can’t believe it’s been almost a year. To thank you for all the support I am planning a little giveaway to one of my readers. Please stay tuned…

Pasta Mozzarella Salad has all the best summer has to offer.

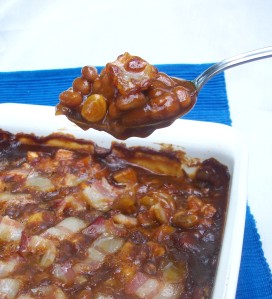
What cookout would be complete without Baked Beans

Another great use for tomatoes is this Tomato and Goat Cheese Tart

This Potato Salad will be at our cookout this weekend. It’s a must have!

Want some ribs?

Stuffed Strawberries are the perfect 4th of July treat

Another use for berries is this Strawberry and Blueberry Crostata


Chili Cheese Pasta Bake

My husband has started his job 2 hours away from us and once the kids are done with school we will be joining him. Till then, we get to see him on the weekends. I worry about what he would be eating during the week I’m not around. He can cook if he has to, but he’s not comfortable with it. I’ve spoiled him way too much.

So, I’ve been making dinners on the weekends with enough to give him extra for dinners throughout the week. I love finding recipes that are great make-ahead dinners. I doubled this recipe to make sure I had enough for dinner that night and for hubster to have dinner later in the week.  The kids and I really enjoyed it. It had the perfect chili flavor one would expect and the pasta and cheese made it even better. I ended up freezing the dish I set aside for my husband and sent it off with him that way. When he was finally able to get around eating it, he said he loved it. This makes a great make-ahead dinner as it froze really well and tasted even better doing it that way.

Chili Cheese Pasta Bake:

*I doubled this recipe with no issues

  • 1/2 pound elbow macaroni or any other twisty shaped pasta
  • Salt
  • 3 tablespoons vegetable oil
  • 1 1/2 pounds ground beef (85% lean)
  • 2 medium onions, chopped
  • 1 red bell pepper, stemmed, seeded and chopped
  • 6 garlic cloves, minced
  • 1 1/2 tablespoons chili powder
  • 1 tablespoon ground cumin
  • 1 (28 oz) can crushed tomatoes
  • 1 (14.5 oz) can diced tomatoes
  • 1 tablespoon light brown sugar
  • 12 oz Colby Jack cheese, shredded (about 2 1/2 cups)
  1. Preheat the oven to 400 degrees.
  2. Bring 4 quarts water to a boil in a large pot over high heat. Stir in 1 tablespoon salt and add dry macaroni; cook until al dente. Reserve 3/4 cup pasta water and drain pasta. Transfer to a large bowl and set aside.
  3. Using the same large pot, wipe dry and heat over medium heat. Add 1 tablespoon oil and heat until shimmering. Add ground beef and break it up in pieces to brown. Once browned, remove from pot and discard drippings. Set beef aside.
  4. Add remaining oil to the same large pot and return to medium heat until shimmering. Add onions, garlic, red pepper, chili powder, and cumin; cook, stirring occasionally, until vegetables are softened and begin to brown.
  5. Add the crushed tomatoes, diced tomatoes, brown sugar, reserved 3/4 cup pasta water and beef to the pot. Bring to a simmer and cook for 20 minutes, stirring occasionally until flavors have blended.
  6. Stir in the cooked pasta, 1/2 cup of shredded cheese and season with salt and pepper to taste. Transfer mixture to a 9×13 baking dish and smooth over with a spatula. Bake in the preheated oven for 30-35 minutes or until the mixture is hot and bubbling.
  7. Remove from oven and sprinkle the top of the dish with the remaining shredded cheese. Return the dish once again in the oven and bake for 5-10 minutes until the cheese begins to melt and brown. Cool for 10 minutes before serving.
Source: Joelen Blog via Cook’s Illustrated