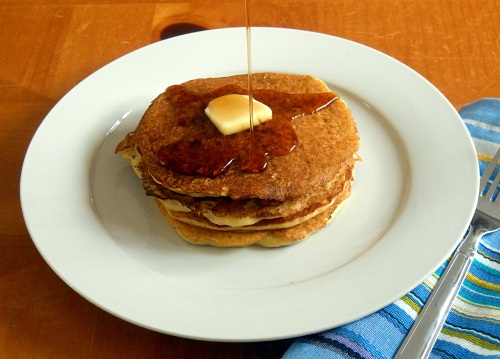
Whole-Grain Pancake Mix

I am a pancake girl and I will always pick pancakes over waffles. One thing I can promise you right now, I will only give you pancake recipes that I truly love. The past couple months I have tried making pumpkin pancakes and cake batter pancakes. But they have not lived up to my standards. I am still on the lookout for that perfect pumpkin pancake and I hope to find it by fall.

Since we have been eating a bit healthier, I wanted to get a pancake mix I could use on the weekends and not feel guilty about eating. I’m so happy I was able to find it on the first try. This recipe makes a mix that you can keep in your refrigerator for a long time and use it as you need it. It couldn’t be any simpler. I usually always have buttermilk in my refrigerator, but if you don’t, you can easily make a substitute at home. I’ll include that in the recipe. I hope you enjoy these pancakes as much as we did.

Whole-Grain Pancake Mix:

For the mix:

  • 4 cups white whole wheat flour (I use King Arthur)
  • 1 cup Unbleached All-Purpose Flour (I use King Arthur)
  • 3 1/2 cups old-fashioned or rolled oats
  • 3 tbs sugar
  • 3 tbs baking powder
  • 1 tbs salt
  • 1 tbs baking soda
  • 1 cup vegetable oil
  1. Grind the oats in a food processor until they’re chopped fine, but not a powder.
  2. Put the flour, oats, and all other dry ingredients into a mixer with a paddle. (A hand mixer could also be used) Mix on slow speed, and drizzle the vegetable oil into the bowl slowly while the mixer is running.
  3. Store in an airtight container for up to two weeks at room temperature, or indefinitely in the refrigerator or freezer.

For the pancakes: serves 4

  • 2 cups pancake mix
  • 2 cups buttermilk*
  • 2 large eggs
  1. Whisk together the pancake mix, buttermilk, and eggs till just combined. (The batter will be thin but will thicken up as it sits.) Let sit for 20 minutes.
  2. Preheat oven to 180 degrees and set a baking sheet in the oven.
  3. Heat a non-stick skillet or griddle pan over medium-high heat for 3-5 minutes. If using an electric griddle, set temperature to 350 degrees. Lightly grease the pan with some butter.
  4. Drop 1/4 cup of the batter onto heated pan. Cook pancakes till the edges look dry and bubbles come to the surface without breaking , about 2 minutes. Flip and cook an additional 2 minutes, till done. Transfer the pancakes to the warmed oven and continue the process till the batter is gone. Enjoy!

*Buttermilk Substitute… Stir together 2 cups milk with 2 tbs of white vinegar or fresh lemon juice. Let stand for 5 minutes until thickened.

Source: King Arthur Flour
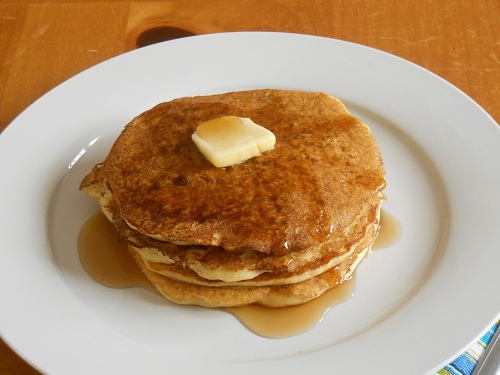
Lean Mean Green Smoothie

Can you believe that all those ingredients above can make a delicious smoothie? I know I couldn’t when I had seen versions of it pop up all over the blogosphere. I finally decided it was time to try it. I have always needed more iron in my diet and figured this would be a good way to get it. I was very surprised at how great it tasted, it was more like an orange and banana smoothie than a spinach tasting one. I do think the smoothie tastes better once it’s really chilled. I ended up shoving the smoothie into the freezer for about 10-15 as I cleaned up my mess. It was nice and cold when I was done and I downed it in no time. I really think you will enjoy this drink!

Green Smoothie:

Yield: 2 servings

  • 2 cups cold water
  • 1 banana, cut into chunks
  • 1 orange, peeled and separated into segments
  • 1/2 apple (your favorite variety), peeled, cored, and cut into chunks
  • 1/2 lemon, peeled and separated into segments
  • 1/2-inch piece of fresh ginger, peeled and minced
  • 2 cups baby spinach
  1. Add all ingredients to a blender and puree until smooth and completely combined.
  2. Drink all at once, or separate into two servings. The smoothie can be stored in an airtight container in the refrigerator for up to one day. It will be thick when coming out of the refrigerator, whisk/stir before drinking.

Source: Brown Eyed Baker

Pasta Salad with Arugula and Sun Dried Tomatoes

I’ve been eyeing up this recipe for quite sometime now and decided that it would be great to serve at our 4th of July cookout. The peppery arugula and the sweet sun dried tomatoes really balance out nicely with the tangy dressing. If you make this ahead of time, you will need to freshen it up with a few drops of red wine vinegar and olive oil. The other thing I would recommend would be to wait and add the arugula until you are ready to serve. If added to early, the arugula will begin to wilt from the vinegar dressing. You could even change up the cheese, instead of using provolone, I think feta would go nicely. What’s fun about pasta salads is that you can create or change things to your personal taste.


Pasta Salad with Arugula and Sun Dried Tomatoes:

  • 1/4 cup oil-packed sun-dried tomatoes, rinsed, patted dry and minced
  • 2 tbs minced red onion
  • 3 tbs red wine vinegar
  • Salt and Pepper
  • 8 ounces whole-wheat penne (about 2 1/2 cups)
  • 2 ounces arugula (about 2 cups)
  • 1/3 cup shredded provolone cheese (about 1 1/2 ounces)
  • 1 tbs minced fresh parsley
  • 2 tbs extra-virgin olive oil
  • 2 tsp Dijon mustard
  • 1 garlic clove minced to a paste*
  • 1/8 tsp red pepper flakes
  1. Toss the sun-dried tomatoes, onion, 1 tbs of the vinegar, and 1/4 tsp salt together in a large serving bowl; set aside.
  2. Bring 4 quarts water to a boil in a large pot. Add the pasta and 1 tbs salt and cook, stirring often, until tender. Drain the pasta, rinse with cold water to cool and drain again thoroughly. Add the cooled pasta, arugula, provolone and parsley to the bowl with the vegetables and toss to combine.
  3. Whisk the remaining 2 tbs vinegar, oil, mustard, garlic, and red pepper flakes together until combined, then pour over the pasta salad and toss to coat. Season with salt and pepper to taste before serving.
*To make garlic into a paste… Mince the garlic and then sprinkle it with a pinch of salt. Scrape the blade of a chefs knife across the garlic, mashing the garlic into the board. After a few scrapes, the garlic will turn into a sticky paste.

Strawberry Pretzel “Salad” Dessert

I had never tried this kind of dessert before but apparently it’s very popular among the potluck world. I have been to many potluck dinners but somehow missed this dessert. The salty pretzels and the sweet cream cheese mixture and jello really go well together. My brother-in-law said he’s had this with raspberries and I think it would be awesome with frozen raspberries and raspberry jello. I plan to make it with raspberries next time I make this. Either way, it’s a nice refreshing dessert that would go great with your spring gatherings.

Strawberry Pretzel “Salad” Dessert:

Crust:

  • 2 cups crushed pretzels (Do not put in processor)
  • 3/4 cup melted butter
  • 3 tablespoons sugar

Filling:

  • 1 (8-ounce) package cream cheese
  • 3/4 cup sugar
  • 1 (8-ounce) container whipped topping

Topping:

  • 2 (3-ounce) packages strawberry gelatin dessert mix
  • 2 cups boiling water
  • 2 (10-ounce) packages frozen strawberries
  • 1 (8-ounce) can crushed pineapple
  • Whipped topping or whipped cream, to garnish
  1. Preheat oven to 400 degrees F.
  2. For the Crust: Grab a medium bowl, add the pretzels, butter and 3 tablespoons of sugar, and mix them together. Press this mixture into a 9 by 13-inch pan. Bake for 7 minutes. Set aside to cool.
  3. For the Filling: In a mixing bowl, beat together the cream cheese and 3/4 cup of sugar. Fold in the whipped topping, and spread over the cooled crust. Refrigerate for at least 2 hours, until well chilled.
  4. For the Topping: In a small bowl, dissolve the gelatin in boiling water, and allow to cool slightly. Add the strawberries and pineapple, and pour over the cream cheese mixture. Refrigerate until serving time.
  5. Serve slices with a dollop of whipped topping.

Source: Ezra Pound Cake via Paula Deen Food Network

Italian Pasta Salad

I made this pasta salad for the bridal shower I catered several weeks back. I can’t even begin to stress how easy it is to make and how versatile it is. You can put whatever veggies you want in it; asparagus, mushrooms, cucumber, green onions, yellow squash, etc… I made it so it was vegetarian friendly, but you could add diced ham, pepperoni or salami, if you want.  Try feta cheese instead of cheddar or mozzarella. It’s better made a day ahead of when you want to serve it. I like to keep a little extra of the dressing on the side, so when I’m ready to serve, I toss it with a tablespoon or two of the dressing to freshen it up. I also don’t add the tomatoes till ready to serve, if added to early they won’t taste fresh.

This is a basic pasta salad recipe, take it and add what you want to make it your own.


Italian Pasta Salad:

  • 2lbs Pasta (any shapes you want)
  • 3 small zucchini, diced small
  • 2 red or green bell peppers, diced small
  • 1 pint cherry tomatoes, sliced in half
  • 1 can black olives, drained
  • 1 8oz block cheddar cheese, diced small
  • 1 8oz block mozzarella cheese, diced small

Dressing:

  • 1 package Good Seasons Italian dressing
  • 1/2 cup red wine vinegar
  • 3/4 cup olive oil
  • 3 tbs water
  • 2 tbs fresh lemon juice
  1. Boil pasta according to package directions, till Al dente. Drain and drizzle with a little olive oil to keep the pasta from sticking, set aside.
  2. In a very large bowl, whisk together the Good Seasoning, vinegar, water and lemon juice. Continue to whisk and slowly pour the oil, till combined.
  3. Add the pasta and all veggies but the tomatoes, to the bowl with half of the dressing, mix to combine; reserve the leftover dressing.
  4. Once the pasta has cooled down, add the cheese and refrigerate till ready to serve. Before serving, add tomatoes and a tablespoon or two of dressing to freshen up the salad.

Source: Gina Marie

Oven Baked Fries

I am not exaggerating when I say these are the best oven fries I’ve ever had. I’ve had my eye on these babies for awhile. So, when the weather got nice for one day we grilled burgers and I made these fries.  The hardest thing about making your own fries in the oven, is getting them cooked to perfection. Soft and creamy on the inside and crispy on the outside. I could never get them to turn out that way. Thankfully the test kitchen at Cook’s Illustrated was able to figure out how to get them cooked perfectly. The ingredients are very simple and there is one important step in creating the perfect oven fries. The step may sound silly, but if not done you won’t have the creamy/crispy fries you long for. Soaking the potatoes in very hot tap water for a good 20 minutes is the key. I learned never to doubt Cook’s Illustrated and once I bit into a fry; I knew they had the winning recipe.

*Important Note* Make sure you use a heavy-duty baking sheet. If you use a lighter baking sheet the heat from the oven could cause it to warp.

Oven Baked Fries:

*Serves 3-4

  • 3 Russet Potatoes (about 8 oz each) peeled, each potato cut lengthwise into 10 to 12 even wedges
  • 5 tbs vegetable or peanut oil
  • Salt and ground black pepper
  1. Adjust an oven rack to the lowest position; heat the oven to 475 degrees. Place the potatoes in a large bowl and cover with hot tap water; soak 20 minutes. Meanwhile, coat an 18 by 12 inch heavy-duty rimmed baking sheet with 4 tbs of the oil and sprinkle evenly with 3/4 tsp salt and 1/4 tsp pepper; set aside.
  2. Drain the potatoes. Spread the potatoes out on a triple thickness of paper towels and pat throughly dry with additional paper towels. Rinse and wipe out the now-empty bowl; return the potatoes to the bowl and toss with remaining 1 tbs oil. Arrange the potatoes in a single layer on the prepared baking sheet; cover tightly with foil and bake for 5 minutes. Remove the foil and continue to bake until the bottoms of the potatoes are spotty golden brown, 15 to 20 minutes, rotating the baking sheet after 10 minutes. Using a metal spatula and tongs, scrape to loosen the potatoes from the pan, then flip each wedge, keeping the potatoes in a single layer. Continue baking until the fries are golden and crisp, 5 to 15 minutes longer, rotating the pan as needed if the fries are browning unevenly.
  3. Transfer the fries to a second baking sheet lined with paper towels to drain. Season with additional salt and pepper to taste and serve immediately.

Source: The New Best Recipe by Cook’s Illustrated

Stuffed Mushrooms

Last week I catered a Bridal Shower and served these stuffed mushrooms. I apologize for the photo. After I plated them and put them out, I realized I hadn’t taken a picture. The mushrooms were very popular and before they were gone I had to run out and grab a photo of what was left. I made a double batch and by the time I was able to take a photo these 5 were the only ones left. That just shows you how popular and wonderful they are.

I was very excited to make these, I have had this recipe bookmarked for a long time and was waiting for the right time to make them. My kids and I are the only ones in the family who really like mushrooms, so I don’t usually buy them. After making the mushrooms, I told myself that I will make these again for us, I know my son would go crazy over them.

The Bridal Shower was a success and along with the mushrooms I made chicken salad in phyllo cups, pasta salad, meatballs, stuffed strawberries and cupcakes. I can’t wait to show you the cupcake stand I made. I’ll be posting that later this week.

Stuffed Mushrooms:

  • 24 whole fresh button mushrooms
  • 3-4 cloves garlic, coarsely chopped
  • 2 tsp. vegetable oil
  • 8 oz. cream cheese, softened
  • ¼ cup grated Parmesan cheese
  • ¼ tsp. pepper
  • ¼ tsp. onion powder
  • ¼ tsp. cayenne pepper, or less if you don’t want a big kick
  • 2 tbs Bread crumbs
  • minced herbs, for garnish (optional)
  1. Preheat the oven to 350° F.  Lightly grease a baking sheet with cooking spray.  Clean mushrooms with a damp paper towel. Carefully remove the stems from the mushroom caps, setting the caps aside for later.  Add the stems to the bowl of a food processor.  Add the garlic to the food processor as well, and pulse in brief bursts until them mushroom stems and garlic are finely chopped.
  2. Heat the oil in a large skillet over medium heat.  Add the chopped mushroom stems and garlic and cook until all the moisture has disappeared, about 5-7 minutes.  Lower the heat to medium-low.  Stir in the cream cheese, Parmesan cheese and spices.  Stir together until the mixture is smooth and creamy; remove from the heat.  Using a small spoon, fill each mushroom cap with a generous amount of filling.  Arrange the mushroom caps on the prepared baking sheet. (At this point you can refrigerate the mushrooms till ready, I made them a day in advance)
  3. Top with bread crumbs.  Bake for 20 minutes or until the mushrooms are hot and liquid starts to form under the caps.  Transfer to a serving platter, garnish with fresh herbs if using and serve immediately

Source: Annie’s Eats who adapted from Allrecipes