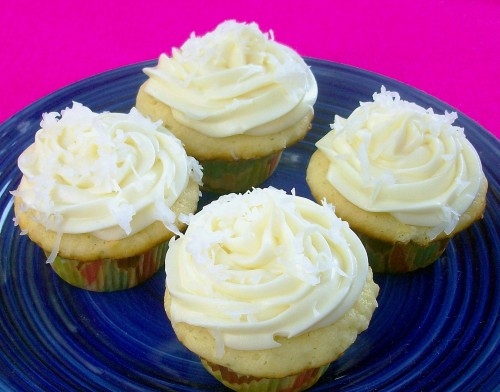
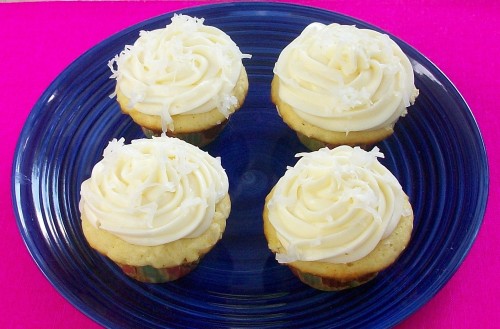
Butterfly Cupcakes

Last weekend we celebrated my nieces 1st birthday. I still can’t believe it’s been a year! Don’t you just want to pinch her cheeks?

Her parents decided to do a butterfly themed party. I got so excited because I’ve been dying to make butterfly cupcakes since I saw them on Annie’s blog. I am going to refer you to her blog on how to make the butterflies. She created a wonderful tutorial. But I will give you a couple of additional tips. I was having a hard time trying to draw out the wing. I finally got one that I really liked and decided to cut it out and trace it on a piece of paper. This worked out great, I was able to have the same looking and same sized wings. Just remember to flip the wing over so you have a right and left wing. The other thing I came up with was after I melted the candy melts in the piping bags. I decided to lay the piping bags on a heating pad. I removed the the fabric cover (glad I did cause it got messy) and set it to a medium temperature. I never had to go back and re-heat the candy melts. It was a huge time saver!

After everything got put together, I was very happy with how it turned out. When trying things for the first time there is a lot of trial and error. I was almost ready to give up but I am glad I didn’t. I did try a new recipe for the vanilla cupcakes. I loved them and will be making those again. I got it from Sweetapolita she makes some of the best looking cakes I have ever seen. This was my first time trying one of her recipes and I can’t wait to try more!

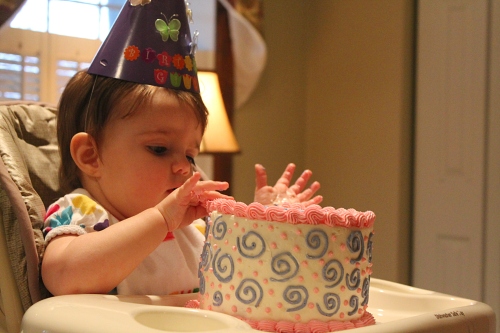
For Tori’s smash cake, I decided to do cake mix from a box. I figured hands and face will be messing it up so need to go crazy on something homemade. Of course the frosting is homemade, it’s my favorite go-to icing. It always gets great reviews!

She liked the frosting! But she ended up being one of the cleanest 1 year old I have ever seen. I’m so glad everything turned out great and Tori had a wonderful time for her first birthday.

Bakery Style Vanilla Cupcakes:

  • 1 1/2 cups self-rising flour
  • 1 1/4 cups all-purpose flour
  • 1 cup unsalted butter, softened
  • 2 cups white sugar
  • 4 large eggs, at room temperature
  • 1 cup milk
  • 1 teaspoon pure vanilla extract
  • 1 batch of favorite icing (sometimes I like to double it so I have a ton of frosting on top of cupcakes)
  1. Preheat oven to 350 degrees F. Line 2 standard muffin tins with cupcake liners of your choice, 24 total.
  2. In a small bowl, combine the flours and set aside.
  3. In a large bowl, on the medium speed of an electric mixer, cream the butter until smooth. Add the sugar gradually and beat until fluffy, about 3 minutes. Add the eggs, 1 at a time, beating well after each addition.
  4. Add the dry ingredients in 3 parts, alternating with the milk and vanilla, ending with the dry ingredients. With each addition, beat until the ingredients are incorporated but do not over beat. Using a rubber spatula, scrape down the batter in the bowl to make sure the ingredients are well blended.
  5. Carefully spoon the batter into the cupcake liners and fill about 2/3 full, and bake in middle of oven until tops turn golden brown and toothpick inserted into center comes out just clean (a few crumbs is okay), about 18 minutes.
  6. Cool the cupcakes in tins for 15 minutes. Remove from the tins and cool completely on a wire rack before icing.

Source: adapted from Sweetoplita
Vanilla Bean Cupcakes

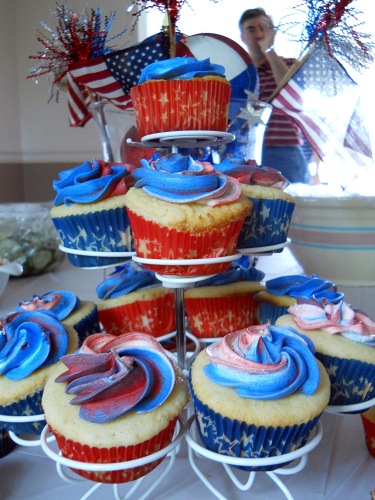
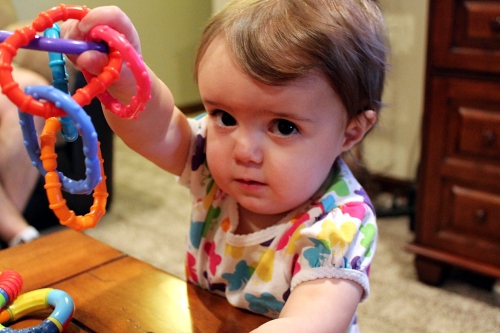
Pay no attention to the man behind the cupcakes. He’s a figment of your imagination. I obviously made these for the 4th of July and sadly the only really good picture of the cupcakes was the one with my brother-in-law Dave photobombing. But that’s ok, now you understand what kind of family I have. It’s a fun one!

I had a vanilla bean that was just itching to be used and I’ve had this recipe bookmarked for quite sometime now. I also couldn’t wait to make it so I could place the used vanilla bean into my sugar container. For those who never know what to do with the leftover vanilla bean, do not throw them away! Place them in sugar and you will have vanilla sugar to be used in all sorts of your baked goods. You will be happy you did it.

These cupcakes are very light in texture and oh, so yummy. I used my favorite buttercream icing and for this occasion I colored the icing red, white and blue to get that swirl on top. Be creative and have fun when making cupcakes, I know I do.

Vanilla Bean Cupcakes:

Yields about 30 cupcakes

  • 3 cups cake flour
  • 1 tbsp. baking powder
  • 1/2 tsp. salt
  • 1 vanilla bean, split lengthwise
  • 16 tbsp. unsalted butter, at room temperature
  • 2 cups sugar
  • 5 large eggs, at room temperature
  • 1 1/4 cups buttermilk, at room temperature
  • 1 tbsp. vanilla extract
  1. Preheat the oven to 350° F.  Line two cupcake pans with paper liners.  Set aside.
  2. In a medium mixing bowl, combine the cake flour, baking powder and salt.  Whisk together and set aside.  Add the butter to the bowl of an electric mixer fitted with the paddle attachment.  Scrape the vanilla bean seeds into the bowl of the mixer with the butter and discard the pod (or reserve for another use.)  Beat on medium-high speed for 3 minutes, until light and creamy in color.  Scrape down the sides of the bowl and beat for one more minute.
  3. Add the sugar to the butter mixture, ¼ cup at a time, beating 1 minute after each addition.  Mix in the eggs one at a time until incorporated.  Scrape down the sides of the bowl after each addition.  Combine the buttermilk and the vanilla extract in a liquid measuring cup.  With the mixer on low speed, add the dry ingredients alternately with the wet ingredients, beginning and ending with the dry ingredients and mixing just until incorporated.  Scrape down the sides of the bowl and mix for 15 seconds longer.
  4. Divide the batter between the prepared paper liners, filling each about 2/3 of the way full (you will likely have batter left over after filling 24 wells.)  Bake 18-22 minutes, or until a toothpick inserted in the center comes out clean.  Allow to cool in the pans 5-10 minutes, then transfer to a cooling rack to cool completely.  Replace paper liners and bake remaining batter if desired.  Frost cooled cupcakes as desired.

Source: Annies Eats via Confections of a Foodie Bride, who adapted it from The Well-Decorated Cake

Tiramisu Cupcakes

Today we are closing on our house and in celebration I want to post these awesome cupcakes. I made them for Mother’s Day, we had a house full of “moms” and I wanted to make something nice for them. I really enjoyed the cupcakes but they didn’t turn out exactly liked I had hoped for. I got a little distracted when they were baking and they ended up baking a little longer than they should have. Sadly, they were a little dry, but that was totally my fault. Even though they were a little dry, the flavor was great. I was a little hesitant about the amount of coffee-marsala syrup that gets put on the cupcakes. I thought for sure there was too much. I was mistaken, you need to make sure you get all that yummy syrup all over those cupcakes. Don’t worry about the cupcakes being too soggy, they won’t be. I am looking forward to making these again and making sure they get pulled out before they get overbaked.

Speaking of Mother’s Day, my sister-in-law celebrated her first Mother’s Day this year. My precious, beautiful, and talented niece Victoria is now 2 months old. For those who have been following my blog, she is the one we were throwing the baby shower for. I am just so thrilled to finally be able to introduce her to you. I am even more thrilled to start making her baby food, once it’s time for her to eat it. I do plan on blogging all about it.

Tiramisu Cupcakes:

Makes about 18 cupcakes

Cupcakes:

  • 1 1/4 cups cake flour, sifted
  • 3/4 teaspoon baking powder
  • 1/2 teaspoon coarse salt
  • 1/4 cup milk
  • 1 vanilla bean*, halved lengthwise, seeds scraped and reserved
  • 4 tablespoons unsalted butter, at room temperature, cut into pieces
  • 3 whole eggs plus 3 egg yolks, at room temperature
  • 1 cup granulated sugar
Coffee-Marsala Syrup
  • 1/3 cup plus 1 tablespoon freshly brewed very strong coffee (or espresso)
  • 1 ounce marsala
  • 1/4 cup granulated sugar

Mascarpone Frosting

  • 1 cup heavy cream
  • 8 ounces mascarpone cheese, room temperature
  • 1/2 cup confectioners’ sugar, sifted
  • Unsweetened cocoa powder, for dusting
  1. Preheat oven to 325 degrees F. Line standard muffin tins with paper liners. Sift together cake flour, baking powder, and salt. Heat milk and vanilla-bean pod and seeds in a small saucepan over medium heat just until bubbles appear around the edge. Remove from heat. Whisk in butter until melted, and let stand 15 minutes. Strain milk mixture through a fine sieve into a bowl, and discard vanilla-bean pod.
  2. With an electric mixer on medium speed, whisk together whole eggs, yolks, and sugar. Set mixing bowl over a pan of simmering water, and whisk by hand until sugar is dissolved and mixture is warm, about 6 minutes. Remove bowl from heat. With an electric mixer on high speed, whisk until mixture is fluffy, pale yellow, and thick enough to hold a ribbon on the surface for several seconds when whisk is lifted.
  3. Gently but thoroughly fold flour mixture into the egg mixture in three batches; stir ½ cup batter into the strained milk mixture to thicken, then fold milk mixture into the remaining batter until just combined.
  4. Divide batter evenly among lined cups, filling each three-quarters full. Bake, rotating tins halfway through, until centers are completely set and edges are light golden brown, about 20 minutes. Transfer tins to wire racks to cool completely before removing cupcakes.
  5. Make the syrup: Stir together coffee, marsala, and sugar until sugar is dissolved. Let cool.
  6. Brush tops of cupcakes evenly with coffee-marsala syrup; repeat until all syrup has been used. Allow cupcakes to absorb liquid 30 minutes.
  7. Make frosting: With an electric mixer on medium speed, whisk heavy cream until stiff peaks form (be careful not to overbeat, or cream will be grainy). In another bowl, whisk together mascarpone and confectioners’ sugar until smooth. Gently fold whipped cream into mascarpone mixture until completely incorporated. Use immediately.
  8. To finish, pipe or dollop frosting onto cupcakes; refrigerate up to overnight in airtight containers. Dust generously with cocoa powder just before serving.

Source: Brown Eyed Baker via Martha Stewart’s Cupcakes

Cupcake Tower with Ganache Filled Cupcakes

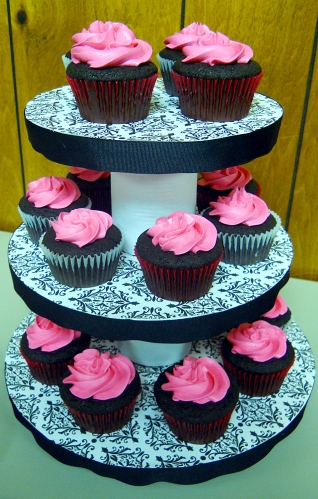
For the bridal shower I hosted a few weeks ago, I knew what kind of cupcakes I was going to make. But how was I going to display them? Then I remembered I had seen a tutorial on how to make your own cupcake tower on Annie’s Eats blog. The nice thing about making your own cupcake tower is that you are able to make it fit whatever theme your party is. I am looking forward to football season so I can make a Penn State cupcake tower.

If you want to make this, Annie has a terrific tutorial on her blog and you can find that here. The one thing I did differently was instead of using a round foam disc, my father-in-law made me a round wooden disc. I felt that would going to give it more stability, but I’m sure using the foam disc will work out just fine. I like the wooden bottom because I can reuse it for other cupcake towers.

For the cupcakes I made Dark Chocolate Cupcakes with Buttercream Frosting and I hollowed out the center and filled it with ganache. To put ganache in the middle of a cupcake is easy. Take a sharp knife and cut a little hole in the top-middle of the cupcake. Take it out, but be careful to leave the top so you can put it back on the cupcake once you are done with the filling. Once you have your hole fill it with desired filling and place the “lid” back on and frost as usual.

Ganache:

  • 1/2 cup heavy cream
  • 8 ounces good semisweet chocolate chips
  • 1 teaspoon instant coffee granules
  1. Cook the heavy cream, chocolate chips, and instant coffee in the top of a double boiler over simmering water until smooth and warm, stirring occasionally.
  2. Let sit in refrigerator for about 30 minutes. Take melon baller or spoon ganache in the middle of the cupcakes.

Source: Ina Garten via Food Network


Dark Chocolate Cupcakes with Buttercream Frosting

This winter we were so busy with my daughters cheerleading activities. She was cheering for basketball, wrestling and competing. Competition cheerleading is still going on but basketball and wrestling has wrapped up for the season. The cheerleaders had an end of the year party and I volunteered to make cupcakes for them. I wanted to incorporate their school colors, black, red and white. I figured the perfect way to do that is to make chocolate cupcakes and make the icing red and white. They turned out exactly how I pictured them and they tasted even better!

I’m proud of my cheerleader and all the hard work she’s done. I feel so blessed that my daughter is surrounded by such a great group of girls. They have all done such a fantastic job this year and deserved a decadent treat like these cupcakes.

Dark Chocolate Cupcakes:

Makes 24 cupcakes*

*I doubled this recipe with no problem

  • 16 tbs (2 sticks) unsalted butter, cut into 16 pieces
  • 4 oz bittersweet chocolate, chopped
  • 1 cup Dutch-processed cocoa powder
  • 1 1/2 cups all-purpose flour
  • 1 1/2 tsp baking powder
  • 1 tsp baking soda
  • 1 tsp salt
  • 4 large eggs, at room temperature
  • 2 tsp vanilla extract
  • 1 1/2 cups sugar
  • 1 cup sour cream
  1. Microwave the butter, chocolate, and cocoa together, whisking often, until melted and smooth, 1 to 3 minutes. Set aside to cool until just warm to the touch.
  2. Meanwhile, adjust an oven rack to the middle position and heat the oven to 350 degrees. Line two muffin pans with cupcake liners. Whisk the flour, baking powder, baking soda, and salt together in a large bowl and set aside.
  3. Whisk the eggs and vanilla together in a large bowl. Slowly whisk in the sugar until combined. Whisk in the cooled chocolate mixture.
  4. Sift one-third of the flour mixture over the batter, then whisk it in. Whisk in the sour cream. Sift the remaining flour mixture over the batter and whisk until completely incorporated. (the batter will be thick).
  5. Fill the cupcake liners about two-thirds full. Bake until a wooden skewer inserted into the center of a cupcake comes out with a few crumbs attached, 18-22 minutes, rotating the pans halfway through baking.
  6. Let the cupcakes cool in the pans on wire racks for 5 minutes. Remove from the pans and let cool completely on the racks before frosting, about 1 hour.

Quick and Rich Vanilla Frosting:

Makes enough to cover 24 cupcakes

  • 2 tbs heavy cream
  • 1 tsp vanilla extract
  • Pinch Salt
  • 2 1/2 sticks unsalted butter, softened
  • 2 1/2 cups confectioner sugar

Stir the cream, vanilla and salt together in a small bowl until the salt dissolves. Beat the butter with an electric mixer on medium-high speed until smooth, 30-60 seconds. Reduce the speed to medium-low, slowly add the confectioners sugar, and beat until smooth, 2 to 5 minutes. Beat in the cream mixture. Increase the speed to medium-high and beat until the mixture is light and fluffy, 4-8 minutes.

Source: America’s Test Kitchen Family Cookbook

Mint Patty Cupcakes

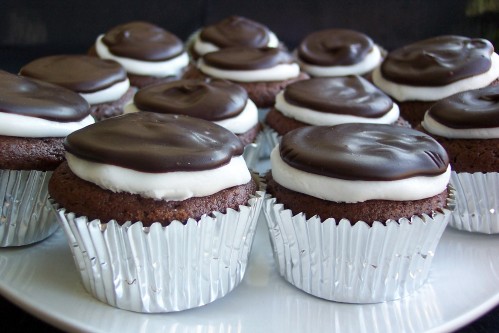
A few weeks ago it was my mother-in-law’s birthday. I presented her a list of cupcakes for her to choose from. She chose these mint patty cupcakes. I’m glad she did, because I was really wanting to make them. Awhile back Food Network Magazine had cupcakes that tasted like popular candy bars. These tasted like a Peppermint Patty. I had a lot of fun making them, especially rolling out the mint patties. It calls for a 2 inch round cookie cutter, and I could not find mine. Instead, I used a shot glass and that worked out perfectly. Once I had them cut out, I shaped them as I layed them on the cupcake. The layer of chocolate on top was a great touch. The one thing I would recommend is taking the cupcakes out just when you think they need a little more time. I left mine in a little too long and they became a little dry. Cupcakes will continue to cook a bit once you take them out of the oven.


Mint Patty Cupcakes:

For the Cupcakes:

  • 3 sticks unsalted butter, cut into pieces
  • 1 cup Dutch-process cocoa powder
  • 3 1/4 cups packed dark brown sugar
  • 3 cups all purpose flour
  • 1 tsp baking powder
  • 1/2 tsp baking soda
  • 3/4 tsp salt
  • 1 1/4 cup buttermilk
  • 2 large eggs, at room temperature
  • 2 tsp vanilla extract

For the topping:

  • 1 1-pound box confectioners’ sugar (about 4 cups)
  • 1/2 cup light corn syrup
  • 1/4 cup vegetable shortening or cocoa butter, softened
  • 2 tsp peppermint extract

For the Glaze:

  • 8 ounces bittersweet chocolate, finely chopped
  • 1/4 cup light corn syrup
  • 1 1/2 tbs unsalted butter
  1. Make the cupcakes: Position a rack in the middle of the oven and preheat to 350 degrees. Line two 12 cup muffin pans with paper liners. Put the butter, cocoa powder, and 3/4 cup water in a medium microwave-safe bowl, cover with plastic wrap and microwave until the butter melts, about 2 minutes. Whisk to combine, then whisk in the brown sugar.
  2. Whisk the flour, baking powder, baking soda and salt in a large bowl. Whisk in the warm cocoa mixture. In another bowl, whisk the buttermilk, eggs and vanilla; stir into the batter until just combined but don’t overmix.
  3. Divide the batter among the prepared cups, filling each about three-quarters of the way. Bake until the cupcakes spring back when touched, 30-35 minute. Let cool in the pans 10 minutes then transfer to racks to cool completely.
  4. Make the topping: Beat the confectioners’ sugar, corn syrup, shortening and peppermint extract with a mixer until a tight paste forms. Gather into a ball, place between two sheets of parchment paper and roll out to 1/4 inch thick (microwave 15 seconds to soften, if necessary). Use a 2 1/2 inch round cutter or juice or shot glass to cut into disks; reroll the scraps. Place a peppermint disk on top of each cupcake.
  5. Make the glaze:Put the chocolate, corn syrup, butter and 1/4 cup water in a microwave-safe bowl, cover with plastic wrap and microwave on 50 percent power until the chocolate melts, about 2 minutes. Whisk to combine, then cool slightly. Spread the glaze over the peppermint topping, leaving some of the peppermint exposed. Refrigerate until set, at least 20 minutes. Serve cold.

Source: Food Network Magazine

Coconut Cupcakes with Pineapple Filling


A few weeks ago was my mother-in-law and father-in-law’s wedding anniversary. They love coconut and pineapple and I set out to find something to combine the two. I saw Ina Garten’s coconut cupcakes and thought a pineapple filling would be great with it. I did some search and found 6 Bittersweets had made coconut cupcakes with pineapple curd. Perfect! I combined Ina’s recipe with the pineapple filling. Side note: I am calling it filling because when I told my friend Kali about the pineapple curd, she said it doesn’t sound appetizing when you say curd.

The way to put the filling into the cupcakes is fairly simple. You need a pastry bag  or ziplock bag and a piping tip. I used a #12 round tip. These cupcakes would be great without the filling too. I also think that this batter would be great without the coconut being added to it and would make a perfect white cupcake. Play around with it, after-all it’s all about having fun in the kitchen!

Coconut Cupcakes with Pineapple Filling

  • 3/4 pound (3 sticks) unsalted butter, room temperature
  • 2 cups sugar
  • 5 extra-large eggs at room temperature
  • 1 1/2 teaspoons pure vanilla extract
  • 1 1/2 teaspoons pure almond extract
  • 3 cups flour
  • 1 teaspoon baking powder
  • 1/2 teaspoon baking soda
  • 1/2 teaspoon kosher salt
  • 1 cup buttermilk
  • 14 ounces sweetened, shredded coconut
  1. Preheat the oven to 325 degrees F.
  2. In the bowl of an electric mixer fitted with the paddle attachment, cream the butter and sugar on high speed until light and fluffy, about 5 minutes. With the mixer on low speed, add the eggs, 1 at a time, scraping down the bowl after each addition. Add the vanilla and almond extracts and mix well.
  3. In a separate bowl, sift together the flour, baking powder, baking soda, and salt. In 3 parts, alternately add the dry ingredients and the buttermilk to the batter, beginning and ending with the dry. Mix until just combined. Fold in 7 ounces of coconut.
  4. Line a muffin pan with paper liners. Fill each liner 3/4 of the way full. Bake for 25 to 35 minutes, until the tops are brown and a toothpick comes out clean. Allow to cool in the pan for 15 minutes. Remove to a baking rack and cool completely.
  5. Put the filling into the pastry bag and plunge the tip into the cupcakes, squeeze and pull up till the filling reaches the top of the cupcake. Frost as desired.

Cream Cheese Frosting:

  • 1 pound cream cheese at room temperature
  • 3/4 pound (3 sticks) unsalted butter, room temperature
  • 1 teaspoon pure vanilla extract
  • 1/2 teaspoon pure almond extract
  • 1 1/2 pounds confectioners’ sugar, sifted
  1. In the bowl of an electric mixer fitted with the paddle attachment, on low speed, cream together the cream cheese, butter, and vanilla and almond extracts. Add the confectioners’ sugar and mix until smooth.

Source: Ina Garten

Pineapple Filling:

  • 2 large eggs plus 2 yolks [or 6 yolks for a richer curd]
  • 2 1/4 cups pineapple juice [I used canned]
  • 3/4 cup sugar
  • 5 Tablespoons cornstarch

Combine all of the ingredients in a saucepan. Cook over medium heat for about 5-10 minutes, whisking constantly, until mixture thickens. Remove from heat and cool. Store in an airtight container in the refrigerator for up to 2 weeks.

Source: 6 Bittersweets