Strawberry Shortcake Cookies

I am so happy to be back blogging. My husband is doing great and we got the news we were looking for on his tumor, it was benign! A weight has been lifted off our shoulders and I am back in the kitchen cooking good stuff. I originally had planned to share another recipe with you, but I just made these cookies and had to give them to you right away.

During the winter months we get together with our neighbors the first Wednesday of the month for soup night. One of our neighbors graciously cooks up two different soups and the rest of us will bring breads or desserts. It’s a great time to get together with everyone and enjoy great food. This past soup night really snuck up on me. I realized the night before that I had not thought about what to bring. So I started researching all my saved recipes for something. I like to try and do something that fits the month or the season. This is the time of year I love going to the grocery store and getting fresh strawberries from my home state of Florida. It takes me back to going to the Strawberry Festival in February. So, when I was looking through my saved recipes, I saw these strawberry shortcake cookies and knew this was what I was making.

The cookies are very delicate and should be eaten the day they are made. Strawberries are very juicy and the cookies will become soggy after sitting for more than a day. The taste of strawberry shortcake in cookie form is pure heaven and makes me miss Florida this time of year. Enjoy!

Strawberry Shortcake Cookies:

  • 12 ounces strawberries, hulled and diced into 1/4-inch pieces (about 2 cups)
  • 1-2 tsp freshly squeezed lemon juice
  • 1/2 cup plus 2 Tablespoons granulated sugar
  • 2 cups all-purpose flour
  • 2 tsp baking powder
  • 1/2 tsp kosher salt
  • 6 tbs cold, unsalted butter, cut into small pieces
  • 2/3 cup heavy cream
  • Sanding sugar, for sprinkling
  1. Preheat the oven to 375.  Line 2 baking sheets with parchment paper.
  2. Combine strawberries, lemon juice, and 2 Tablespoons of granulated sugar in a medium bowl.  Set aside.
  3. Whisk together the flour, remaining sugar, baking powder, and salt in a large bowl.  Using a pastry cutter or your fingers, cut in the butter to the flour mixture until coarse crumbs are formed. Stir in the heavy cream until the dough starts to come together, then gently fold in strawberries. (The dough will not be smooth but a bit crumbly)
  4. Using a 1-1/2 inch cookie scoop, drop dough onto cookie sheets, evenly spaced apart.  Sprinkle with coarse sugar.  Bake for 22-27 minutes, or until cookies are golden brown. (Mine were done at 20 minutes) Transfer to a wire rack to cool completely. Enjoy the day of baking.

Source: Pink Parsley via Martha Stewart Living June 2009

Shortcakes with Strawberries

Football has begun and fall is upon us. But before I start heading into the direction of pumpkins; I must post this shortcake recipe. I like using real shortcakes and not the kind you get in the store. Those are ok, but it is not the true southern way of eating strawberry shortcake. This sweetened biscuit is very fast and easy to make. I used strawberries when I made the shortcakes, but any kind of berry or even peaches will work with this. If using berries, you can macerate them in some sugar or in my case, splenda. Simply cut them up and put a couple tbs of sugar on them and let them sit and get all nice and juicy. Dollop whip cream on top and you have the best strawberry shortcakes ever!

Shortcakes:

  • 2 cups unbleached all-purpose flour
  • 2 tsp baking powder
  • 2 tbs sugar
  • 3/4 tsp table salt
  • 2/3 cup cold buttermilk
  • 1 large egg
  • 8 tbs unsalted butter, melted and cooled slightly
  1. Adjust oven rack to middle positions and heat oven to 475 degrees. Whisk flour, baking powder, 1 tbs sugar, and salt in large bowl.
  2. Whisk together buttermilk and egg in medium bowl; add melted butter and stir until butter forms small clumps.
  3. Add buttermilk mixture to dry ingredients and stir with wooden spoon until dough comes together and no dry flour remains. Continue stirring vigorously for 30 seconds. Using greased 1/3 cup dry measure, scoop up mound of dough and drop onto parchment-lined rimmed baking sheet (if dough sticks to cup use small spoon to pull it free). Repeat with remaining dough, spacing biscuits about 1 1/2 inches apart, to create 6 biscuits. Sprinkle remaining 1 tbs sugar evenly over top of biscuits. Bake until tops are golden brown and crisp, about 15 minutes. Transfer to wire rack and let cool for 15 minutes before assembling.
  4. To Assemble: Split each biscuit in half and place bottoms on individual plates. Spoon berries over each bottom, top with whip cream and place biscuit top on top.
Source: Cooks Illustrated Summer Entertaining

Strawberry Pretzel “Salad” Dessert

I had never tried this kind of dessert before but apparently it’s very popular among the potluck world. I have been to many potluck dinners but somehow missed this dessert. The salty pretzels and the sweet cream cheese mixture and jello really go well together. My brother-in-law said he’s had this with raspberries and I think it would be awesome with frozen raspberries and raspberry jello. I plan to make it with raspberries next time I make this. Either way, it’s a nice refreshing dessert that would go great with your spring gatherings.

Strawberry Pretzel “Salad” Dessert:

Crust:

  • 2 cups crushed pretzels (Do not put in processor)
  • 3/4 cup melted butter
  • 3 tablespoons sugar

Filling:

  • 1 (8-ounce) package cream cheese
  • 3/4 cup sugar
  • 1 (8-ounce) container whipped topping

Topping:

  • 2 (3-ounce) packages strawberry gelatin dessert mix
  • 2 cups boiling water
  • 2 (10-ounce) packages frozen strawberries
  • 1 (8-ounce) can crushed pineapple
  • Whipped topping or whipped cream, to garnish
  1. Preheat oven to 400 degrees F.
  2. For the Crust: Grab a medium bowl, add the pretzels, butter and 3 tablespoons of sugar, and mix them together. Press this mixture into a 9 by 13-inch pan. Bake for 7 minutes. Set aside to cool.
  3. For the Filling: In a mixing bowl, beat together the cream cheese and 3/4 cup of sugar. Fold in the whipped topping, and spread over the cooled crust. Refrigerate for at least 2 hours, until well chilled.
  4. For the Topping: In a small bowl, dissolve the gelatin in boiling water, and allow to cool slightly. Add the strawberries and pineapple, and pour over the cream cheese mixture. Refrigerate until serving time.
  5. Serve slices with a dollop of whipped topping.

Source: Ezra Pound Cake via Paula Deen Food Network

Orange Pound Cake

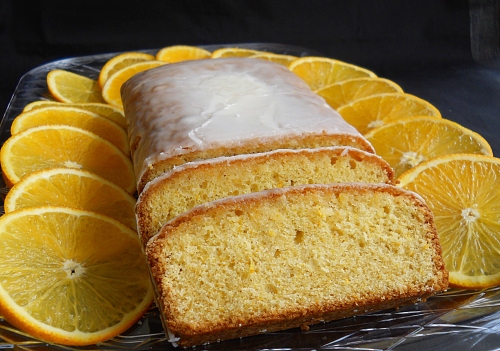
A few weeks ago my brother-in-law and his wife sent a huge box of oranges from Florida. I wanted to make something with them and found this recipe from Ina Garten in one of my cookbooks. I can’t even begin to tell you how fantastic the pound cake is.  This recipe is the perfect way to showcase oranges, which are in season right now. I was a little worried there was too much use of oranges. The pound cake itself has orange zest and orange juice, then you add orange syrup and an orange glaze. But as Ina has proven time and time again, she knows her stuff. It was the perfect amount of oranges and was not overpowering. There is no more Orange Pound Cake left in our house and it makes me sad. I might have to go find more oranges and whip up another couple batches. They freeze well, if they even make it to the freezer.

Orange Pound Cake:

  • 1/2 pound (2 sticks) unsalted butter at room temperature
  • 2 1/2 cups sugar, divided
  • 4 extra-large eggs, at room temperature
  • 1/3 cup grated orange zest (6 oranges)
  • 3 cups all-purpose flour
  • 1/2 teaspoon baking powder
  • 1/2 teaspoon baking soda
  • 1 teaspoonkosher salt
  • 3/4 cup freshly squeezed orange juice, divided
  • 3/4 cup buttermilk at room temperature
  • 1 teaspoon pure vanilla extract

To glaze one loaf:

  • 1 cup Confectioners’ sugar, sifted
  • 1 1/2 tbs freshly squeezed orange juice
  1. Heat the oven to 350 degrees F. Grease and flour 2 (8 1/2 by 4 1/2 by 2 1/2-inch loaf pans. Line the bottoms with parchment paper.
  2. Cream the butter and 2 cups of the granulated sugar in the bowl of an electric mixer fitted with the paddle attachment for about 5 minutes, or until light and fluffy. With the mixer on medium speed, beat in the eggs, 1 at a time, and the orange zest.
  3. In a large bowl, sift together the flour, baking powder, baking soda, and salt. In another bowl, combine 1/4 cup of the orange juice, the buttermilk, and vanilla. Add the flour and buttermilk mixtures alternately to the batter, beginning and ending with the flour. Divide the batter evenly between the pans, smooth the tops, and bake for 45 minutes to 1 hour, until a cake tester comes out clean.
  4. While the cakes bake, cook the remaining 1/2 cup of granulated sugar with remaining 1/2 cup orange juice in a smallsaucepan over low heat until the sugar dissolves. When the cakes are done, let them cool for 10 minutes. Take them out of the pans and place them on a baking rack set over a tray. Spoon the orange syrup over the cakes and allow the cakes to cool completely. At this point you can freeze the pound cakes.
  5. To glaze: Combine the confectioners’ sugar and orange juice in a bowl, mixing with a wire whisk till smooth. Add a few more drops of juice, if necessary to make it pour easily. Pour over the top of one cake and allow the glaze to dry. Wrap well, and store in the refrigerator.

Source: Barefoot Contessa Family Style by Ina Garten

Apple Butter – No Sugar Added

I’m always looking for recipes that have no sugar added or no sugar. My husband is a diabetic and has a sweet tooth. A lot of the recipes I make can be adapted and splenda can be used in place of sugar. But sometimes it doesn’t work well. The chewy chocolate chip cookies do not work well with splenda. The whole texture is changed and has an off flavor. When I saw an apple butter recipe come through my Google Reader, I knew it was something I had to try. It didn’t call for any sugar and relied on the sweetness in the apples and unsweetened apple juice. Perfect!

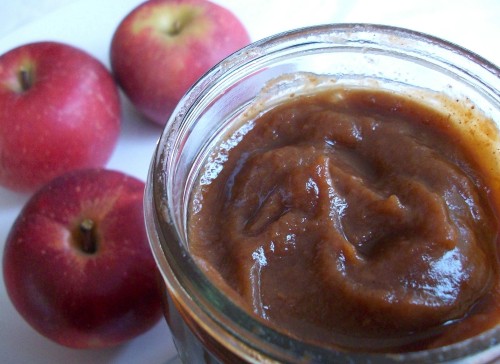
Last week we got a bunch of fresh Pennsylvania apples and I set off to see if this recipe works. I started the process at 8:00pm in the evening. Seeing that it would take 15 hours of cooking time in the crock pot, I knew starting it at night was the wise decision. The apples were done around 11:00am and the house smelled amazing. I was a little unsure if the apples would get that dark color you find in apple butter, but they did. They were a beautiful dark brown and cooked to perfection. One of the things I noticed is that there was a lot of liquid. I decided to take the apples out with a slotted spoon then put them through a blender. If I hadn’t the apple butter would have had more liquid and not be as thick as it should. The apple butter tasted really good. The only thing was that it had a tiny bit of tang to it. Next time I make this I am going to cut down on the apple cider vinegar. I don’t think there is a need for 1/4 cup of vinegar. I’ve adjusted the recipe to reflect those changes.

Challenge For You:

There was another photo I was going to use, but as I was showing my father-in-law the photo he saw something in the apple butter. As soon as he pointed out what he saw, I could no longer use it as my main photo because it ruined it for me. I decided to still put it on here to see if you could see what he did. We had a very good laugh over this, especially since it’s something I had not planned.

Can you spot the unborn piglet?

Apple Butter:

  • 10 whole Medium Sized Apples (I used a mix of Winesap and Empire)
  • 2 cups Unsweetened Apple Juice
  • ¼ cups Water
  • 2 tbs Apple Cider Vinegar
  • ½ teaspoons Pure Vanilla Extract
  • 1 Tablespoon Cinnamon
  • ¼ teaspoons Ground Cloves
  • ¼ teaspoons Ground Nutmeg
  • 1 pinch Sea Salt (I used Kosher)

1. Place cored and sliced apples (not peeled) into a large crock-pot / slow cooker.

2. Pour juice on top of sliced apples. Add water, apple cider vinegar, extract and spices. Stir all ingredients together, cover pot and let it cook for 15 hours on low.

3. The liquid will reduce and the apples will be very soft, darker in color. After 15 hours, turn the crock pot off and let the apples cool down a bit (about 30 minutes), then with slotted spoon, transfer the mixture into a blender and blend until completely smooth.

4. Let the apple butter cool and then transfer into storage containers. It should store well in the fridge for about 3 weeks. You could even freeze it.

Source: slightly adapted from  Tasty Kitchen


Apple Crisp

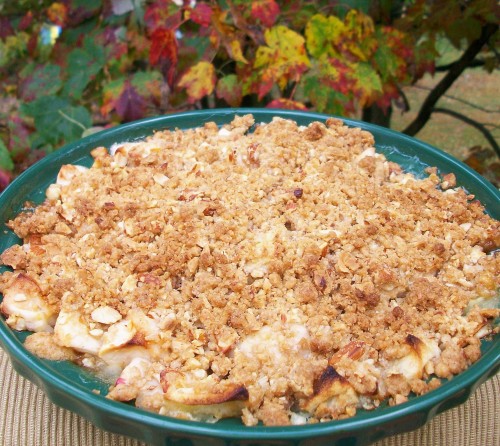
Last week was my father-in-law’s birthday and instead of making him a cake I decided to go with what I know he would love; an Apple Crisp. I have been looking at this recipe in one of my cookbooks for sometime now.

It was really easy to make and no adjustments had to be made. It calls for either almonds, pecans or walnuts but I recommend the almonds. I love the mix of the apples too. The granny smith apples are tart and the McIntosh are sweeter, they break down to make it thick, giving it a great texture.  Served with a big scoop of vanilla ice cream, made the crisp even better.

Apple Crisp

Topping:

  • 6 tbs unbleached all-purpose flour
  • 1/4 cup packed light brown sugar
  • 1/4 cup granulated sugar
  • 1/4 tsp ground cinnamon
  • 1/4 tsp ground nutmeg (I used fresh)
  • 1/4 tsp salt
  • 5 tbs cold unsalted butter, cut into 1/2 inch pieces
  • 3/4 cup coarsely chopped nuts, such as almonds, pecans, or walnuts

Filling:

  • 3 medium Granny Smith apples
  • 3 medium McIntosh apples
  • 1/2 tsp grated zest and 1 1/2 tbs juice from lemon
  • 1/4 cup granulated sugar
  1. For The Topping: Place the flour, sugars, spices and salt in a food processor and process briefly to combine. Add the butter and pulse 10 times, about 4 seconds for each pulse. The mixture will first look like dry sand, with large lumps of butter, then like coarse cornmeal. Add the nuts, then process again, four or five 1 second pulses. The topping should look like slightly clumpy wet sand. Be sure not to overmix or the mixture will become too wet and homogeneous. Refrigerate the topping while preparing the fruit, at least 15 minutes.
  2. Adjust an oven rack to the lower-middle position and heat the oven to 375 degrees.
  3. For The Filling: Peel, quarter, and core the apples, then cut into 1 inch chunks. (You should have 6 cups) Toss the apples, zest, juice and sugar in a medium bowl. Scrape the fruit mixture with a rubber spatula and into an 8 inch square baking pan or 9 inch deep-dish pie plate.
  4. To Assemble and Bake The Crisp: Distribute the chilled topping evenly over the fruit. Bake for 40 minutes. Increase the oven temperature to 400 degrees and continue baking until the fruit is bubbling and the topping turns deep golden brown, about 5 minutes more. Serve warm. (The crisp can be set aside at room temperature for a few hours and then reheated in a warm oven just before serving)

Source: The New Best Recipe by Cook’s Illustrated

Blueberry Mascarpone Turnovers


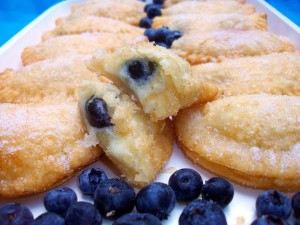
I had on Food Network one day and left it on when I went to go do something. To my surprise my father in law sat and watched it. He came upstairs and said that Giada just made blueberry turnovers and they looked really good. We pulled up the recipe and got the ingredients and made them. They were really good with one minor change. We tried eating one after letting them rest 20 minutes, but the insides were still runny and they just didn’t taste right. I put them in the fridge for 20 more minutes to let the cheese harden up a little and that did it. They were perfect! I made the adjustments to the recipe below.

I used regular sugar to sprinkle over the top but you could also use powdered. My favorite part of the turnovers was the lemon flavor. I didn’t think it would be a big flavor, but it was. It’s why my father in law didn’t like them so much. He isn’t a lemon dessert fan. But if you are, you will love these!

Blueberry Mascarpone Turnovers

  • 1/2 cup mascarpone cheese, at room temperature
  • 2 tablespoons sugar, plus extra for sprinkling
  • 1/2 teaspoon cornstarch
  • 1 teaspoon lemon juice
  • 1 teaspoon lemon zest
  • 1/3 cup fresh or frozen and thawed blueberries
  • 2 (9-inch) refrigerated pie crusts
  • 1 egg, beaten
  • Vegetable oil, for frying

Special equipment: a 3 1/2-inch round cookie cutter

  1. Line a baking sheet with parchment paper. Set aside.
  2. In a small bowl, mix together the cheese, sugar, cornstarch, lemon juice, and lemon zest until smooth. Stir in the blueberries.
  3. Using a 3 1/2-inch round cookie cutter, cut the pie dough into 12 circles. Place the dough on the prepared baking sheet. Using a pastry brush, lightly brush the edges of the dough with the beaten egg. Place about 1 1/2 teaspoons of the cheese mixture in the center of the dough. Fold the dough in half to enclose the filling and pinch the edges to seal. Using the tines of a fork, gently crimp the sealed edges. Refrigerate for 10 minutes.
  4. While the pastry is chilling: In a large heavy-bottomed saucepan, pour enough oil to fill the pan about a third of the way. Heat over medium heat until a deep-frying thermometer inserted in the oil reaches 375 degrees F. (If you don’t have a thermometer a cube of bread will brown in about 3 minutes.) Fry the turnovers for 1 to 1 1/2 minutes until golden. Drain on paper towels and sprinkle with sugar while still hot. Cool on the counter for 5 minutes then place in fridge for 15-20 minutes.

Source: Giada De Laurentiis