Pumpkin Dump Cake

Tomorrow is the start of fall, and that my friends, is my favorite season. I’m going to kick off fall by giving you this great pumpkin recipe. Most of you might already know that pumpkin is something I’m very fond of. I have some great pumpkin recipes planned for the next couple weeks.

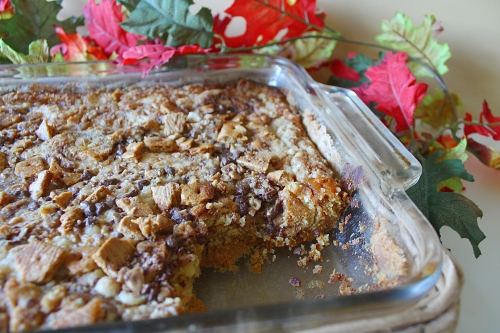
I will start you out on this dump cake. This recipe couldn’t be any easier, take a boxed cake mix and pour it over a delicious pumpkin concoction and top with crushed graham crackers, toffee bits, and butter. YUM! There is a tiny story behind me making this cake. The night before I began to heat up the broiler and heard a pop. My oven has decided to stop heating up. This is very sad news for any baker. Thankfully my parents now live very close to me and I was able to go over to their house and bake this cake for our Sunday dinner. Now I sit and hope that the oven won’t cost a fortune to fix. I can’t wait to get it back!
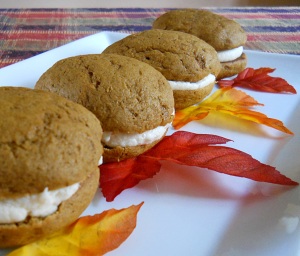
Other pumpkin recipes for you to enjoy.


Pumpkin Whoopie Pies


Pumpkin Cookies


Pumpkin Cheesecake


Pumpkin Scones


Pumpkin Bread


Pumpkin Bars


Pumpkin Dump Cake:

  • 1 15 oz can Pumpkin Puree
  • 1 10 oz can Evaporated Milk
  • 1 cup light brown sugar
  • 3 eggs
  • 3 tsp pumpkin pie spice
  • 1 box yellow cake mix
  • 1 cup (2 sticks) butter melted
  • 1 cup coarsely crushed graham crackers or pecans
  • 1/2 cup toffee bits (optional)
  1. Preheat oven to 350 and spray a 9×13 baking pan lightly with cooking/baking spray
  2. In a large bowl combine the pumpkin, evaporated milk, sugar, eggs and pumpkin pie spice. Stir to combine and pour into the prepared pan.
  3. Sprinkle entire box of cake mix on top, followed by the graham crackers or nuts and toffee chips.
  4. Pour the melted butter evenly on top.
  5. Bake for 45-50 minutes until center is set and edges are lightly browned.

Source: Slightly adapted from Cookies and Cups


Red White and Blue Whoopie Pies

Happy Independence Day! Today is the day we celebrate our nations independence. I’m sure many of you will be out with family and friends celebrating. We are planning to go to my sister-in-laws house for swimming and of course food and fireworks. Earlier in the week I brainstormed on what I could bring that would showcase our nations colors. I started thinking about whoopie pies. I live in Pennsylvania and whoopie pies are a staple here. I decided that I could make a vanilla whoopie pie and dye the batter to make the blue and the red and have the frosting as the white. I was so happy that they turned out exactly like I had imagined.

Here are a few tips to create perfect looking whoopie pies

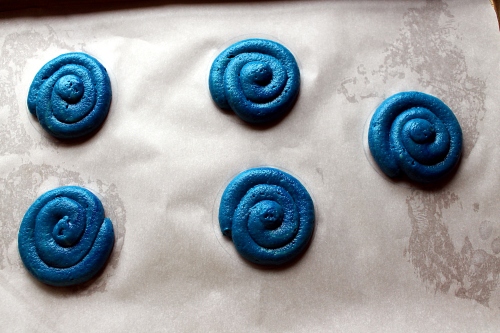
Start out drawing 2 1/4 inch circles on the parchment paper. I used a glass to trace the circles. Turn the paper over when you put it on your baking sheet. That way you don’t have traces of pencil getting on your batter.

Next you will pipe out the batter within the circles. I used a Wilton 2A tip.

They are now ready to go into the oven and get baked.

Red White and Blue Whoopie Pies

  • 1 cup (2 sticks) unsalted butter
  • 1 1/2 teaspoons salt
  • 2 teaspoons vanilla extract
  • 4 1/2 cups Unbleached All-Purpose Flour
  • 1 tablespoon baking powder
  • 1 1/2 cups sugar
  • 3 large eggs
  • 1 cup milk
  • Red and Blue gel food coloring. (I use Ameri-color and Wilton gel)
  1. Preheat oven to 400 degrees and line baking sheets with parchment paper. Using a pencil, outline 2 1/4 – 2 1/2 inch circles spacing them a few inches apart.
  2. In a large bowl, whisk together the flour, salt and baking powder and set aside.
  3. In a bowl of an electric mixer fitted with the paddle attachment (or hand mixer), cream together the butter and sugar, till light and fluffy. Once combined; add the eggs, one at a time, scraping the bowl after each addition. Add the vanilla and mix till just combined.
  4. Add the flour to the wet ingredients alternately with the milk, beginning and ending with the flour. Be gentle and do not overmix. Divide the batter into two bowls. In one bowl add the blue coloring, till desired color is reached, and mix till combined. Repeat with the red coloring in the other bowl.
  5. Place batter into a large piping bag (I used 16 inches) fitted with a large round tip. (I used Wilton 2A). Pipe the batter within the circles on the parchment paper.
  6. Bake for 6-8 minutes or until the center is just firm. Remove from oven and transfer to cooling rack. Cool completely before frosting.
  7. Once the pies are cooled and ready; match up the pies and spread or pipe the icing on one side then sandwich with the matching piece.
Frosting:
  • 3 sticks unsalted butter, softened
  • 1/4 cup milk
  • 1/4 cup flour
  • 2 TBS vanilla
  • 4 cups Confectioners sugar
  1. In a bowl fitted with paddle attachment (or hand mixer), cream together the butter, milk, flour and vanilla. Add the confectioner sugar and beat together till light and fluffy, about 4-5 minutes.

Source: slightly adapted by King Arthur Flour frosting from the Pumpkin Whoopie Pies

Blueberry Crumb Cake

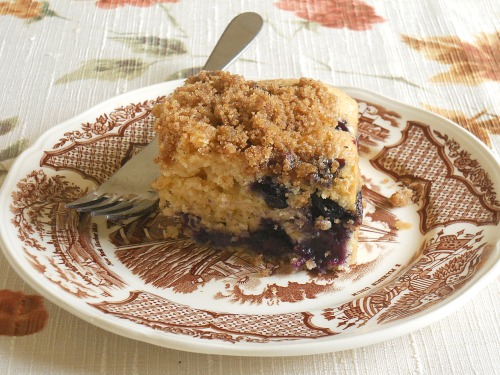
When I see the photos of the blueberry cake, I am very sad. Not because they are some of the last photos I took with my point and shoot camera (I just got a new DSLR camera). But because the cake is all gone and I can’t have another piece. This cake is one of the best I’ve ever had and what makes it even better is that it’s a lightened up recipe.

I must stress to you that when it comes time to check the cake, there must be crumbs on your toothpick. It will continue to bake a bit once it’s removed from the oven. Doing this will ensure that you will have a very moist and delicious cake.

Now, go make your shopping list and be sure to get everything you need to make this cake. That is my plan for the weekend. I must have another piece of the cake, STAT.

Healthier Blueberry Crumb Cake:

  • 1 1/2 cups (7 1/2oz) all-purpose flour
  • 1/2 cup (2 1/4oz) whole-wheat flour
  • 3/4 cup packed (5 1/4oz) light brown sugar
  • 1/2 cup (3 1/2oz) granulated sugar
  • 1/2 tsp salt
  • 1/2 tsp baking powder
  • 1/4 tsp baking soda
  • 6 tbs (3/4 stick) unsalted butter, melted and cooled
  • 1 cup lowfat sour cream
  • 1 large egg
  • 1 tsp vanilla extract
  • 1 cup fresh blueberries
  • 1 tsp ground cinnamon
  1. Adjust an oven rack to the middle position and heat the oven to 350 degrees. Lightly coat an 8-inch square baking pan with baking spray. 
  2. Pulse the all-purpose flour, whole wheat flour, 1/2 cup of the brown sugar, granulated sugar, salt, baking powder, and baking soda together in a food processor to combine. (You should be able to do all this with an electric mixer or stand mixer also but I have not tried it.) With the food processor running, add 5 tbs of the melted butter and process until the flour mixture looks sandy. 
  3. Transfer 1/4 cup of the flour mixture to a medium bowl and set aside for the topping. Add the sour cream, egg, and vanilla to the flour mixture in the food processor and pulse until the mixture just comes together, about 8 pulses. (Do not overmix) If using a stand mixer, stir on low till just combined.
  4. Transfer the batter to a large bowl (or keep in the stand mixer bowl) and gently fold in the blueberries with a rubber spatula. Scrape the batter into the prepared pan and smooth the top. 
  5. Stir the remaining 1/4 cup brown sugar and cinnamon into the reserved flour mixture. Add the remaining 1 tbs melted butter and toss gently with a fork until incorporated and some larger pea-sized crumbs have developed. Sprinkle the crumb mixture evenly over the batter. 
  6. Bake until the topping is golden brown and a toothpick inserted into the center of the cakes comes out with just a few crumbs attached. 30-35 minutes, rotating the pan halfway through baking. 
Serves 12.
Per Serving – Calories: 240 Fat: 7g Sat Fat: 4g Chol: 35mg Carb: 38g Protein: 3g Fiber: 1g Sodium: 170mg
Source: Slightly adapted from Americas Test Kitchen Healthy Family Cookbook

S’mores Cake

I’ve made this cake a couple times now. The first time I made it, was when my son had his cub scout banquet. It was a perfect dessert to feed the hungry cub scouts since s’mores and cub scouts go hand in hand. But, I was very heavy handed on the marshmallow fluff in the middle. The top layer of the cake just about slid off while it was setting up in the fridge. I knew the fluff would expand a little but it expanded more than I was expecting. So, when I went to make this for our 4th of July cookout, I knew to go a little easier on the fluff. This time, I went way to easy and none of the fluff peaked through the graham cracker layers. I piped in more fluff so it would look pretty. I feel like Goldilocks, the first one was too much, the second one was too little, but the third one will be just right.

You will LOVE this cake. It’s a hit no matter how much fluff you put on it.

NOTE:

Tomorrow, I will be posting a special post regarding the giveaway, celebrating my 1 year Anniversary here on Gina Marie’s Kitchen. 

S’mores Cake:

The Cake:

  • 2 cups graham cracker crumbs
  • 2 tsp. baking powder
  • 1/4 tsp. salt
  • 3 large eggs, separated
  • 8 tbsp. unsalted butter, at room temperature
  • 1 cup sugar
  • 1 tsp. vanilla extract
  • 1 cup milk

Filling:

  • Marshmallow Fluff
Chocolate Ganache:
  • 8 oz. milk chocolate, finely chopped
  • 1/4 cup heavy cream
  • 2 tbsp. unsalted butter cut into 4 pieces, at room temperature
  • 2 tbsp. light corn syrup
To make the cake:
  1. Preheat the oven to 375° F.  Line the bottom of two 9-inch round cake pans with parchment or wax paper.  Grease and flour the sides of the pans; set aside.  In a medium bowl, combine the graham cracker crumbs, baking powder and salt; stir together and set aside.
  2. In the bowl of an electric mixer fitted with the whisk attachment, beat the egg whites on medium-high speed until soft peaks form.  Transfer to a separate bowl and set aside.  Replace the mixer bowl and fit with the paddle attachment.  Cream together the butter and sugar and beat on medium speed until light and fluffy, about 2 minutes.  Mix in the egg yolks until well combined.  Stir in the vanilla extract.
  3. Add in the dry ingredients alternately with the milk on low speed, beginning and ending with the dry ingredients and mixing just until incorporated.  Using a rubber spatula, fold in about a third of the egg whites to lighten the batter.  Gently fold in the remaining egg whites until completely incorporated.
  4. Divide the batter evenly between the prepared pans.  Bake the cakes for about 20 minutes or until a toothpick inserted in the center comes out clean.  Allow the cakes to cool in the pans for about 5-10 minutes, then invert onto a wire rack, remove the parchment paper and let cool completely.
Adding the Fluff:
  1. Once the cake has cooled completely, transfer one of the cake layers to a cardboard cake circle and place on a serving platter.  Carefully spread (I used a piping bag) a layer of marshmallow fluff over the cake, not quite reaching the edges.  Top with the remaining cake layer and refrigerate for about 1 hour.
Making the ganache:
  1. Combine the chocolate, cream, butter and corn syrup in a heatproof bowl set over simmering water.  Heat until the chocolate has melted, then whisk the ingredients together until completely smooth.  Pour glaze over the top of the chilled cake, allowing it to run down the sides in some places.  Return to the refrigerator to chill until set and ready to serve.

Easter Lamb Cake

I want to share with you what one of my families Easter traditions are. We have several, but my favorite one is this Lamb Cake. Sadly, this year will be the first year I will not be making one. We are heading to where we will be moving soon, to be with my husband. He’s already started working and the kids and I are waiting for school to end before we are permanently there. Anyway, this picture comes from last years cake so please ignore the lack of decorations around the lamb. I have no idea why I took a picture of the cake before it was completed, but this was before I decided to start doing a blog. The one thing I would like to point out is the platter the lamb is on. This was my Great Grandmother’s and she used it to put her Lamb Cake on. One thing I wished I had of hers was the cast iron lamb mold. I have a very flimsy one, which desperately needs replaced. If you want to make a Lamb cake I highly recommend a good mold, so the cake batter doesn’t flow out the sides (like mine).

Let’s talk about the cake… It’s basically a spice cake and in order for the cake to stand up it has to be firm and dense. The cake has an ingredient in it called ground mace. The only time I ever use ground mace is when I make this cake. I honestly think this is what makes this cake taste wonderful. Whenever I smell the ground mace, it reminds me of my childhood. I can’t tell you how long this recipe has been in my family, but I know that at least my Great Grandmother used it. You don’t have to make this in a lamb cake mold. It would be great as a layered cake too. The recipe makes 2 lamb cakes. If you wanted to make it as a layered cake I would use 2 or 3 9 inch round cake pans. I’ve never made it as a round cake before so I’m unsure exactly how  many pans you would need. But, the cakes really puff up so I am thinking 3 might be good.

Either way you make this, I am just so thrilled to share my family recipe with you. I really hope you make this and enjoy it with your family. Happy Easter!

Lamb Cake Spice Cake:

makes 2 lamb cakes or 2-3 9inch round cakes

  • 4 1/2 cups Sifted Cake Flour
  • 1/2 tsp salt
  • 1/2 tsp ground mace (optional, although I recommend it)
  • 1 lb unsalted butter, softened
  • 2 1/3 cup granulated sugar
  • 7 eggs
  • 1/2 tsp almond flavoring
  • 1/2 tsp vanilla
  1. Prepare cake pans, butter and flour (use the cake flour) the insides of the pans you will be using. Shake out the excess flour.
  2. Preheat oven to 350 degrees.
  3. In a large bowl, or over parchment paper, sift flour once, measure and re-sift with the salt and mace. Set aside.
  4. In another bowl, cream the butter till waxy, then add the sugar gradually and cream together till mixture is light and fluffy. Add the eggs, one at a time, beating well and scraping after each addition, till smooth. Add vanilla, almond extracts and blend.
  5. Gradually add the flour mixture beating and scraping after each addition till well blended. If using round cake pans, pour batter evenly into each prepared pan. Bake for 40-45 minutes, or until a cake tester comes out clean.
  6. *If using Lamb mold* Place the mold, nose side down on baking sheet and fill the batter so it is rounded on top. Cover with the other half of the mold and bake for 1 1/2 hours, but start checking the cake after 45 minutes. You should be able to start testing the cake at this time with a cake tester, it will be done when it comes out clean.
  7. Let cool on rack for at least 30 minutes, before you unmold it to cool down completely. Frost as desired.
Icing:
*enough to ice 1 cake
  • 2 sticks softened butter
  • 1lb confectioners sugar
  • 1 tsp vanilla
  • 4-8 tbs water
  1. Mix together the butter, sugar and vanilla. Start with 4 tbs water, if the consistency is too thick, add another tbs. (You don’t want it too thin, I’ve used no more than 5tbs of water) Beat the frosting for at least 7 minutes on high. You want the frosting to be rich and fluffy.
  2. Ice your cake and enjoy!
Source: Gina Marie’s Family

Orange Pound Cake

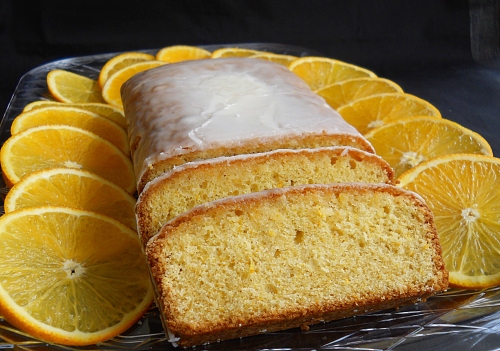
A few weeks ago my brother-in-law and his wife sent a huge box of oranges from Florida. I wanted to make something with them and found this recipe from Ina Garten in one of my cookbooks. I can’t even begin to tell you how fantastic the pound cake is.  This recipe is the perfect way to showcase oranges, which are in season right now. I was a little worried there was too much use of oranges. The pound cake itself has orange zest and orange juice, then you add orange syrup and an orange glaze. But as Ina has proven time and time again, she knows her stuff. It was the perfect amount of oranges and was not overpowering. There is no more Orange Pound Cake left in our house and it makes me sad. I might have to go find more oranges and whip up another couple batches. They freeze well, if they even make it to the freezer.

Orange Pound Cake:

  • 1/2 pound (2 sticks) unsalted butter at room temperature
  • 2 1/2 cups sugar, divided
  • 4 extra-large eggs, at room temperature
  • 1/3 cup grated orange zest (6 oranges)
  • 3 cups all-purpose flour
  • 1/2 teaspoon baking powder
  • 1/2 teaspoon baking soda
  • 1 teaspoonkosher salt
  • 3/4 cup freshly squeezed orange juice, divided
  • 3/4 cup buttermilk at room temperature
  • 1 teaspoon pure vanilla extract

To glaze one loaf:

  • 1 cup Confectioners’ sugar, sifted
  • 1 1/2 tbs freshly squeezed orange juice
  1. Heat the oven to 350 degrees F. Grease and flour 2 (8 1/2 by 4 1/2 by 2 1/2-inch loaf pans. Line the bottoms with parchment paper.
  2. Cream the butter and 2 cups of the granulated sugar in the bowl of an electric mixer fitted with the paddle attachment for about 5 minutes, or until light and fluffy. With the mixer on medium speed, beat in the eggs, 1 at a time, and the orange zest.
  3. In a large bowl, sift together the flour, baking powder, baking soda, and salt. In another bowl, combine 1/4 cup of the orange juice, the buttermilk, and vanilla. Add the flour and buttermilk mixtures alternately to the batter, beginning and ending with the flour. Divide the batter evenly between the pans, smooth the tops, and bake for 45 minutes to 1 hour, until a cake tester comes out clean.
  4. While the cakes bake, cook the remaining 1/2 cup of granulated sugar with remaining 1/2 cup orange juice in a smallsaucepan over low heat until the sugar dissolves. When the cakes are done, let them cool for 10 minutes. Take them out of the pans and place them on a baking rack set over a tray. Spoon the orange syrup over the cakes and allow the cakes to cool completely. At this point you can freeze the pound cakes.
  5. To glaze: Combine the confectioners’ sugar and orange juice in a bowl, mixing with a wire whisk till smooth. Add a few more drops of juice, if necessary to make it pour easily. Pour over the top of one cake and allow the glaze to dry. Wrap well, and store in the refrigerator.

Source: Barefoot Contessa Family Style by Ina Garten

Pumpkin Cheesecake

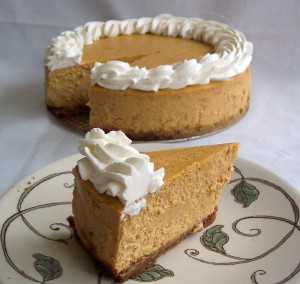
If you haven’t noticed, I am in love with pumpkin. I could have pumpkin every day and not bat an eye. So when I saw this pumpkin cheesecake in the latest Holiday Entertaining issue from Cook’s Illustrated, I knew I had to make it for Thanksgiving. The recipe may seem a little daunting, but it’s totally worth it! One of the steps is to remove the liquid from the canned pumpkin. You won’t believe how much liquid comes out! Releasing the liquid helps make the cheesecake to be not so dense. But, it’s very rich and a little slice goes a long way. This has now become my favorite cheesecake!

I also made a simple thing of whip cream by whipping up 3-4 cups of heavy whipping cream, 2 tbs powdered sugar and 1 tsp of vanilla. I beat it with a mixer till it was a stiff consistency, but not too stiff so it would become butter.


Pumpkin Cheesecake:

Crust:

  • 5 ounces graham crackers (9 whole crackers), broken into large pieces
  • 3 tablespoons granulated sugar
  • 1/2 teaspoon ground ginger
  • 1/2 teaspoon ground cinnamon
  • 1/4 teaspoon ground cloves
  • 6 tablespoons unsalted butter , melted

Filling:

  • 1 1/3 cups granulated sugar (10 1/3 ounces)
  • 1 teaspoon ground cinnamon
  • 1/2 teaspoon ground ginger
  • 1/4 teaspoon ground nutmeg
  • 1/4 teaspoon ground cloves
  • 1/4 teaspoon allspice
  • 1/2 teaspoon table salt
  • 1 can (15 ounces) pumpkin
  • 1 1/2 pounds cream cheese , cut into 1-inch chunks and left to soften at room temperature, about 30 minutes
  • 1 tablespoon vanilla extract
  • 1 tablespoon lemon juice from 1 lemon
  • 5 large eggs , left at room temperature, about 30 minutes
  • 1 cup heavy cream

FOR THE CRUST:

  1. Adjust oven rack to lower-middle position and heat oven to 325 degrees. Spray bottom and sides of 9-inch springform pan evenly with nonstick cooking spray. Pulse crackers, sugar, and spices in food processor until evenly and finely ground, about fifteen 2-second pulses. Transfer crumbs to medium bowl, drizzle melted butter over, and mix with rubber spatula until evenly moistened. Turn crumbs into prepared springform pan and, using hand, spread crumbs into even layer. Using flat-bottomed ramekin or drinking glass, press crumbs evenly into pan bottom, then use a soup spoon to press and smooth crumbs into edges of pan. Bake until fragrant and browned about the edges, about 15 minutes. Cool on wire rack while making filling.

FOR THE FILLING:

  1. Bring about 4 quarts water to simmer in stockpot. Whisk sugar, spices, and salt in small bowl; set aside. To dry pumpkin (see illustrations below): Line baking sheet with triple layer of paper towels. Spread pumpkin on paper towels in roughly even layer. Cover pumpkin with second triple layer of paper towels and press firmly until paper towels are saturated. Peel back top layer of towels and discard. Grasp bottom towels and fold pumpkin in half; peel back towels. Repeat and flip pumpkin onto baking sheet; discard towel.
  2. In standing mixer fitted with flat beater, beat cream cheese at medium speed to break up and soften slightly, about 1 minute. Scrape beater and bottom and sides of bowl well with rubber spatula. Add about one third of sugar mixture and beat at medium-low speed until combined, about 1 minute; scrape bowl and add remaining sugar in two additions, scraping bowl after each addition. Add pumpkin, vanilla, and lemon juice and beat at medium speed until combined, about 45 seconds; scrape bowl. Add 3 eggs and beat at medium-low until incorporated, about 1 minute; scrape bowl. Add remaining 2 eggs and beat at medium-low until incorporated, about 45 seconds; scrape bowl. Add heavy cream and beat at low speed until combined, about 45 seconds. Using rubber spatula, scrape bottom and sides of bowl and give final stir by hand.
  3. Set springform pan with cooled crust on 18-inch-square doubled layer heavy-duty foil and wrap bottom and sides with foil; set wrapped springform pan in roasting pan. Pour filling into springform pan and smooth surface; set roasting pan in oven and pour enough boiling water to come about halfway up side of springform pan. Bake until center of cake is slightly wobbly when pan is shaken, and center of cake registers 145 to 150 degrees on instant-read thermometer, about 1 1/2 hours (see note). Set roasting pan on wire rack and use paring knife to loosen cake from sides of pan. Cool until water is just warm, about 45 minutes. Remove springform pan from water bath, discard foil, and set on wire rack; continue to cool until barely warm, about 3 hours. Wrap with plastic wrap and refrigerate until chilled, at least 4 hours or up to 3 days.

TO SERVE:

  1. Slide thin metal spatula between crust and pan bottom to loosen, then slide cake onto serving platter. Let cheesecake stand at room temperature about 30 minutes, then cut into wedges and serve.

Source: Cook’s Illustrated