Herb Dip and a Sweet 16 birthday party


This is what I’ve been busy with the past couple weeks. My daughter will be turning 16 this week and we wanted to give her a party she won’t ever forget. As you can see, it was a Mad Hatter Tea Party theme. It turned out exactly how I had imagined (despite the rain). Our menu consisted of the chicken salad sliders, spirals (Sam’s Club), salmon and cream cheese tea sandwiches, caprese skewers, fruit and cheese platter, and herb dip served in individual bread cups.


This was the closest shot I got of the herb dip in bread cups. The rain finally stopped after the party was getting started and I was rushing to get the food out while I had a crowd around me cheering me on. The herb dip was a huge hit and went fast. It’s perfect to serve a crowd and with football starting, perfect for your game watching. I took baguettes and cut the ends off, then sliced the bread into 4-5 inch pieces. With those pieces, I sliced them at a diagonal in the middle of the slices, to create the angled bread cups. Hollowed out the inside (leaving enough bread so the dip won’t fall out) then piped the dip in the holes. It looked so beautiful, definitely my favorite part of the food table.

We put drink me tags on all the water bottles. They looked so cute!

The table settings were beautiful even after the rain hit.

My parents were kind enough to get her birthday cake for us. I was planning on making it but was quickly realizing I would have no time to do exactly what I wanted.

I did however make cookies for everyone to take home. I realized the day after the party that I had not taken any pictures of the cookies. I quickly gathered the leftover cookies so I could take a quick photo.

I can’t believe she’s going to be 16!

Happy Birthday to cutest Mad Hatter ever!

Herb Dip:

  • 8 ounces cream cheese, at room temperature
  • 1/2 cup sour cream
  • 1/2 cup mayonnaise
  • 4 scallions, white and green parts, minced
  • 2 tablespoons fresh parsley leaves, minced
  • 1 tablespoon fresh dill, minced
  • 1 teaspoon kosher salt
  • 3/4 teaspoon freshly ground black pepper

Place the cream cheese, sour cream, mayonnaise, scallions, parsley, dill, salt, and pepper in the bowl of an electric mixer fitted with the paddle attachment and blend. Refrigerate overnight or for up to at least 6 hours.


Source: Ina Garten via Food Network


Red White and Blue Whoopie Pies

Happy Independence Day! Today is the day we celebrate our nations independence. I’m sure many of you will be out with family and friends celebrating. We are planning to go to my sister-in-laws house for swimming and of course food and fireworks. Earlier in the week I brainstormed on what I could bring that would showcase our nations colors. I started thinking about whoopie pies. I live in Pennsylvania and whoopie pies are a staple here. I decided that I could make a vanilla whoopie pie and dye the batter to make the blue and the red and have the frosting as the white. I was so happy that they turned out exactly like I had imagined.

Here are a few tips to create perfect looking whoopie pies

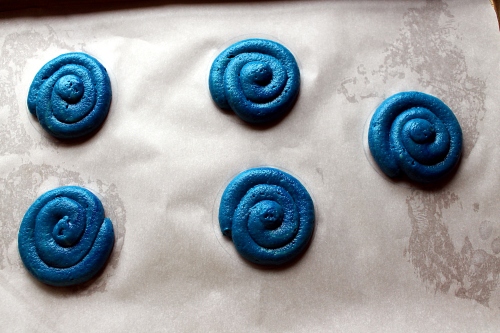
Start out drawing 2 1/4 inch circles on the parchment paper. I used a glass to trace the circles. Turn the paper over when you put it on your baking sheet. That way you don’t have traces of pencil getting on your batter.

Next you will pipe out the batter within the circles. I used a Wilton 2A tip.

They are now ready to go into the oven and get baked.

Red White and Blue Whoopie Pies

  • 1 cup (2 sticks) unsalted butter
  • 1 1/2 teaspoons salt
  • 2 teaspoons vanilla extract
  • 4 1/2 cups Unbleached All-Purpose Flour
  • 1 tablespoon baking powder
  • 1 1/2 cups sugar
  • 3 large eggs
  • 1 cup milk
  • Red and Blue gel food coloring. (I use Ameri-color and Wilton gel)
  1. Preheat oven to 400 degrees and line baking sheets with parchment paper. Using a pencil, outline 2 1/4 – 2 1/2 inch circles spacing them a few inches apart.
  2. In a large bowl, whisk together the flour, salt and baking powder and set aside.
  3. In a bowl of an electric mixer fitted with the paddle attachment (or hand mixer), cream together the butter and sugar, till light and fluffy. Once combined; add the eggs, one at a time, scraping the bowl after each addition. Add the vanilla and mix till just combined.
  4. Add the flour to the wet ingredients alternately with the milk, beginning and ending with the flour. Be gentle and do not overmix. Divide the batter into two bowls. In one bowl add the blue coloring, till desired color is reached, and mix till combined. Repeat with the red coloring in the other bowl.
  5. Place batter into a large piping bag (I used 16 inches) fitted with a large round tip. (I used Wilton 2A). Pipe the batter within the circles on the parchment paper.
  6. Bake for 6-8 minutes or until the center is just firm. Remove from oven and transfer to cooling rack. Cool completely before frosting.
  7. Once the pies are cooled and ready; match up the pies and spread or pipe the icing on one side then sandwich with the matching piece.
Frosting:
  • 3 sticks unsalted butter, softened
  • 1/4 cup milk
  • 1/4 cup flour
  • 2 TBS vanilla
  • 4 cups Confectioners sugar
  1. In a bowl fitted with paddle attachment (or hand mixer), cream together the butter, milk, flour and vanilla. Add the confectioner sugar and beat together till light and fluffy, about 4-5 minutes.

Source: slightly adapted by King Arthur Flour frosting from the Pumpkin Whoopie Pies

Asparagus and Cheese Tart

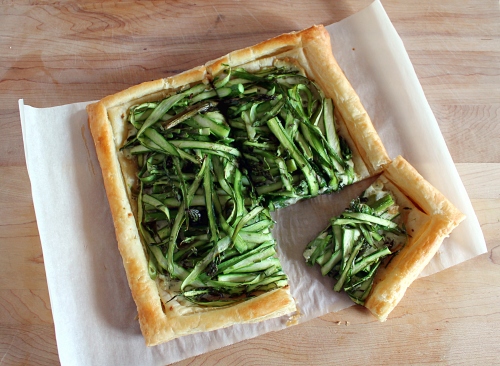
This week I will be posting some recipes that will be great to have on Easter. This recipe would be great for an Easter Brunch. I was brainstorming to come up with something that included shaved asparagus and Boursin Cheese since I had both in my refrigerator. I decided to make a tart using puff pastry. This is really easy to make and has only a few ingredients. I was getting very odd looks from my family, as I was explaining what I was doing. But after they tasted it, they knew that mommy knows what she is doing. I hope you enjoy too!

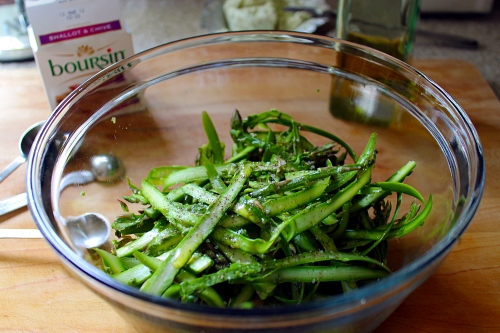
First you will shave the asparagus spears by using a vegetable peeler. Place in a bowl and add the olive oil, salt and pepper to taste. Stir to combine and set aside.

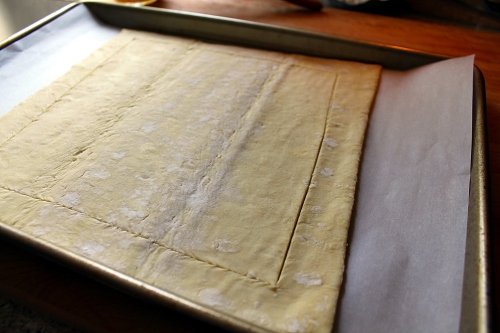
Lay out a sheet of puff pastry dough on a parchment lined baking sheet. With a pairing knife, lightly score the puff pastry about a 1/2 inch in from the edges.

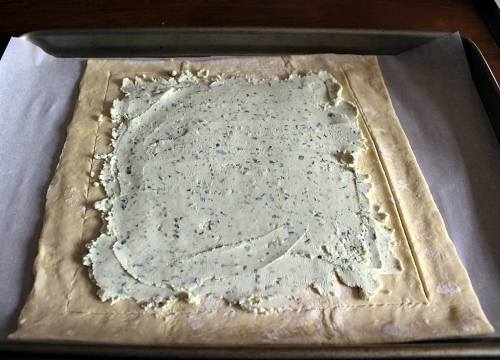
Carefully spread the cheese in the center of the puff pastry dough. Spread to the edges of where you cut the dough. (Do not go to dough edge)

Add the asparagus to the center. Brush the edges of the dough using the egg wash and a pastry brush. Place in oven and bake.

Enjoy!

Asparagus and Cheese Tart:

  • 1 sheet frozen puff pastry dough, thawed in refrigerator
  • 1lb asparagus, shaved
  • 2 tbs olive oil
  • Salt and Pepper
  • 1 5oz Boursin cheese, room temperature (I used shallot and chives)
  • egg wash (whisk one egg with 1tbs of water)
  1. Preheat oven to 375 degrees. Line a baking sheet with parchment paper.
  2. Carefully shave the asparagus spears using a vegetable peeler. Place in a medium bowl. Add the olive oil and salt and pepper to taste. Mix together and set aside.
  3. Lay the puff pastry on the parchment lined baking sheet. Using a sharp paring knife, score a 1/2-inch-wide border around the dough. (make sure to not push the knife all the way through) Spread the cheese from the center of the dough to the edges of where you scored the dough. (it’s ok if you don’t use all the cheese) Lay asparagus on top of cheese.
  4. Brush the edges of the dough using the egg wash and a pastry brush. Bake in the oven for 20-25 minutes, or until dough is light browned and puff and the asparagus is tender. Remove from oven and let cool a couple of minutes before cutting. Slice tart however you would like to serve it and enjoy.

Source: Gina Marie Original

Butterfly Cupcakes

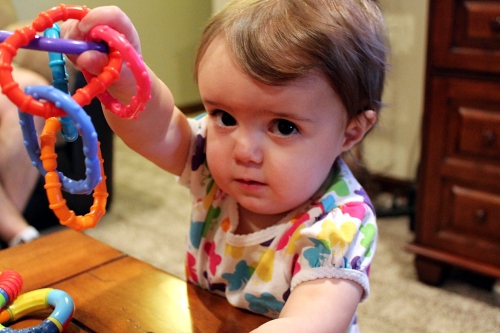
Last weekend we celebrated my nieces 1st birthday. I still can’t believe it’s been a year! Don’t you just want to pinch her cheeks?

Her parents decided to do a butterfly themed party. I got so excited because I’ve been dying to make butterfly cupcakes since I saw them on Annie’s blog. I am going to refer you to her blog on how to make the butterflies. She created a wonderful tutorial. But I will give you a couple of additional tips. I was having a hard time trying to draw out the wing. I finally got one that I really liked and decided to cut it out and trace it on a piece of paper. This worked out great, I was able to have the same looking and same sized wings. Just remember to flip the wing over so you have a right and left wing. The other thing I came up with was after I melted the candy melts in the piping bags. I decided to lay the piping bags on a heating pad. I removed the the fabric cover (glad I did cause it got messy) and set it to a medium temperature. I never had to go back and re-heat the candy melts. It was a huge time saver!

After everything got put together, I was very happy with how it turned out. When trying things for the first time there is a lot of trial and error. I was almost ready to give up but I am glad I didn’t. I did try a new recipe for the vanilla cupcakes. I loved them and will be making those again. I got it from Sweetapolita she makes some of the best looking cakes I have ever seen. This was my first time trying one of her recipes and I can’t wait to try more!

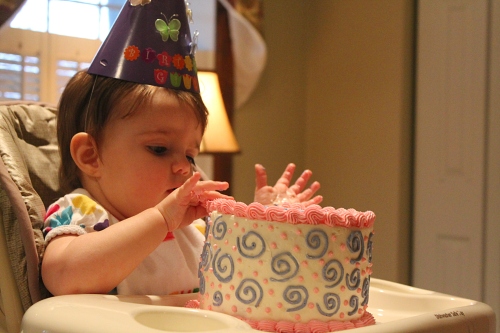
For Tori’s smash cake, I decided to do cake mix from a box. I figured hands and face will be messing it up so need to go crazy on something homemade. Of course the frosting is homemade, it’s my favorite go-to icing. It always gets great reviews!

She liked the frosting! But she ended up being one of the cleanest 1 year old I have ever seen. I’m so glad everything turned out great and Tori had a wonderful time for her first birthday.

Bakery Style Vanilla Cupcakes:

  • 1 1/2 cups self-rising flour
  • 1 1/4 cups all-purpose flour
  • 1 cup unsalted butter, softened
  • 2 cups white sugar
  • 4 large eggs, at room temperature
  • 1 cup milk
  • 1 teaspoon pure vanilla extract
  • 1 batch of favorite icing (sometimes I like to double it so I have a ton of frosting on top of cupcakes)
  1. Preheat oven to 350 degrees F. Line 2 standard muffin tins with cupcake liners of your choice, 24 total.
  2. In a small bowl, combine the flours and set aside.
  3. In a large bowl, on the medium speed of an electric mixer, cream the butter until smooth. Add the sugar gradually and beat until fluffy, about 3 minutes. Add the eggs, 1 at a time, beating well after each addition.
  4. Add the dry ingredients in 3 parts, alternating with the milk and vanilla, ending with the dry ingredients. With each addition, beat until the ingredients are incorporated but do not over beat. Using a rubber spatula, scrape down the batter in the bowl to make sure the ingredients are well blended.
  5. Carefully spoon the batter into the cupcake liners and fill about 2/3 full, and bake in middle of oven until tops turn golden brown and toothpick inserted into center comes out just clean (a few crumbs is okay), about 18 minutes.
  6. Cool the cupcakes in tins for 15 minutes. Remove from the tins and cool completely on a wire rack before icing.

Source: adapted from Sweetoplita

Jalapeno Popper Dip

If you are planning a Super Bowl party, this dip has to be on the menu! Sadly, my Tampa Bay Buccaneers self destructed this season so my team is nowhere near the playoff season. But, I am cheering on the New England Patriots because their Offensive Coordinator is now the head coach for my beloved Penn State Nittany Lions. I am very excited about Coach O’Brien and hopes he does well throughout the playoffs.

Let me get back to the food, if you love jalapeno poppers you are going to LOVE this dip. I wasn’t sure how much of the flavor of regular poppers would come out in the dip, and I was pleasantly surprised that it was strong. You will think you are eating poppers. I think they are best served with tortilla chips but you could use crackers too. You can up the amount of heat by using another jalapeno and the stems and ribs (the white part inside). With not knowing how much heat my guests would like, I took out the seeds and ribs on the jalapeno’s. I also added more cheese because life is better with more cheese. Anyway you make this, your guests will love it!

Jalapeno Popper Dip:

  • 2 (8 oz) packages cream cheese, at room temperature
  • 1 cup mayonnaise
  • 1 (4 oz) can chopped green chiles
  • 3 jalapenos, minced finely
  • 1 cup shredded Mexican style cheese
  • 1/2 cup shredded mozzarella cheese
  • 1 cup Panko breadcrumbs
  • 1/2 cup grated Parmesan cheese
  • nonstick cooking spray
  1. Preheat oven to 375 F.
  2. Combine the cream cheese, mayonnaise, green chiles, jalapenos, and both shredded cheeses in a medium bowl. Stir together until thoroughly combined and smooth. Transfer the mixture to a 9×9 baking dish.
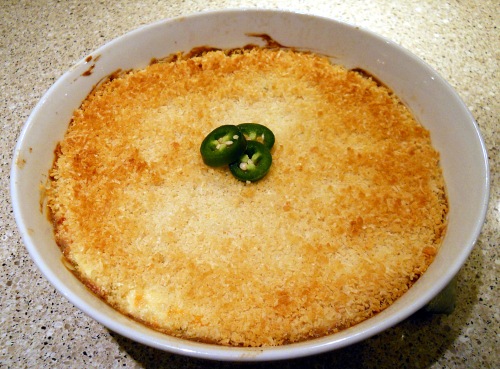
  3. Mix the Panko and Parmesan together in a small bowl using a fork. Sprinkle evenly over the dip in the baking dish. Spray the topping lightly with cooking spray. Bake for 25-30 minutes, or until the topping is golden and the dip is hot. Serve with tortilla chips or crackers.

Slightly adapted from Tracey’s culinary adventures via My Baking Addiction (via Annie’s Eats)

2011 Year In Review

2011 has been a pretty decent year for us. The beginning of the year brought us new and exciting changes. We have been having a wonderful time in our new home and I’ve had fun in my kitchen. I look forward to 2012 and all the things I hope it brings. I will admit that the beginning of 2012 is going to be a bit shaky, my husband will be having surgery to have part of his thyroid removed and checked for cancer. We are very hopeful that it will all work out. I will apologize right now for any lack of postings in the month of January. I will try to not let the downtime be for too long. But if there is, you will understand what is going on.

This past year has been great for the blog. Particularly for the #1 most looked at post of the year. I must thank Pinterest for help with that. For those unsure of Pinterest, it’s a site you can pin your favorite things around the web to. It’s fun and addicting and you must give it a try.

I’ve composed the top ten posts of 2011. Enjoy and have a safe and Happy New Year! Love you all!

#10

 
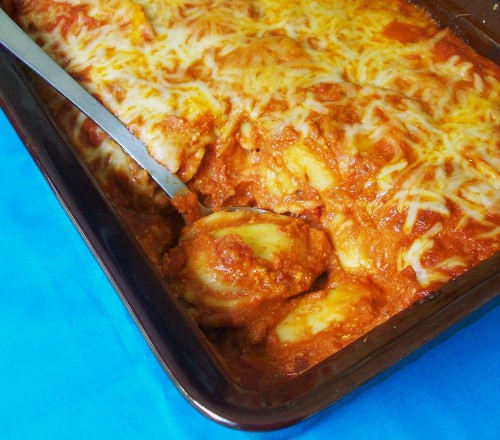
Baked Ravioli is a family favorite. It’s like an easy lasagna.

#9

Loaded Baked Potato Dip is a perfect party dip. It tastes just like baked potatoes.

#8

 
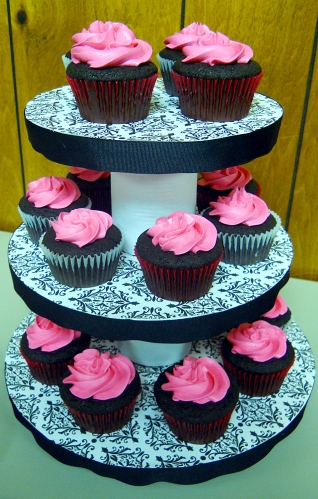
Cupcake Tower with Ganache filled Cupcakes I have a link to how to make a cupcake tower and the recipe for some really yummy chocolate cupcakes

#7

Stuffed Strawberries is a favorite of mine not just because it was my first ever post on the blog. It’s also very delicious!

#6

Onesie Sugar Cookies were so much fun to make. I made them for my sister-in-law’s baby shower. She gave me a beautiful niece in return for these cookies.

#5

Easter Lamb Cake is a family tradition. I can’t wait to make it this year because I got the cast iron lamb mold that my great-great grandfather made.

#4

Stuffed Pork Tenderloin with Feta and Spinach is something I created a long time ago. It’s one of the only ways I can get my son to eat pork.

#3

French Toast Bread Pudding would be perfect to serve for breakfast on New Years Day

#2

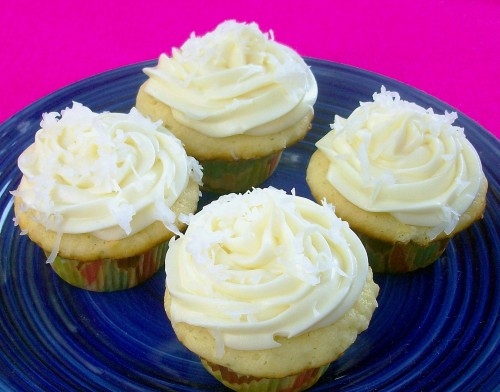
Coconut Cupcakes with Pineapple Filling is a great combination of flavors.

#1

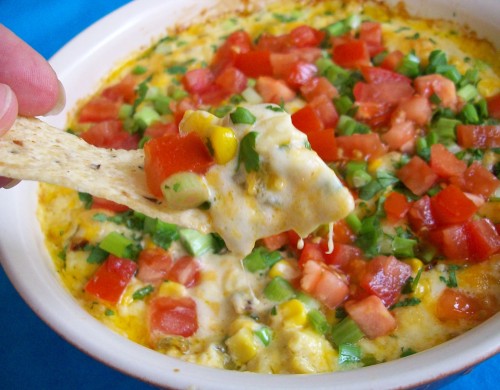
The number one post this year is Hot Corn Dip. I make this a lot because it’s easy to throw together and it’s a real crowd pleaser.


Holiday Baking

Between cooking and baking, family visiting (missing them already), Black Friday shopping, and decorating for Christmas, I am finally feeling like myself again. I’m ready to start thinking of all the baking I want to do for Christmas. While I gather all sorts of new things to make, I will give you a roundup of some really good recipes to make now. Happy Baking!

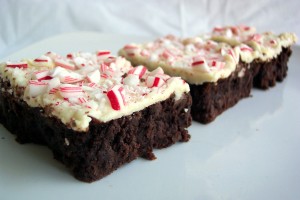
First up are these chocolaty brownies with a peppermint topping

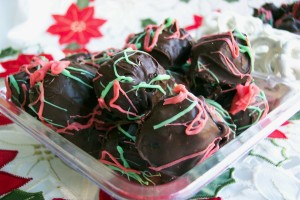
Oreo Truffles

Jam Thumbprint Cookies

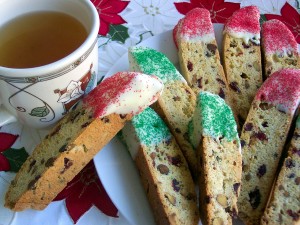
Holiday Biscotti (our favorite)

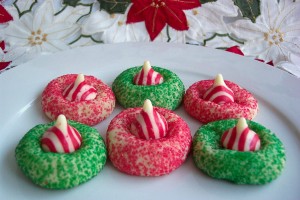
Candy Cane Kiss Cookies

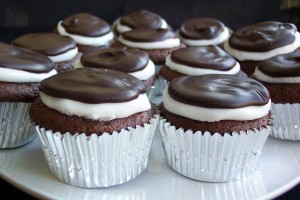
Mint Patty Cupcakes