Hot Reuben Dip

Reuben Dip

I’ve never been a big fan of the Reuben sandwich and I really don’t know why. I love all the ingredients but for some reason when I’ve seen it on the menu, I shy away. I saw this recipe that turns the sandwich into a dip and I decided to try it. What I found was that all the ingredients complemented each other without overpowering one another. I’m so glad I tried this dip, I don’t think I’ll shy away from a Reuben sandwich ever again.


Hot Reuben Dip:

  • 8 ounces cream cheese, softened
  • 1½ cups (6 ounces) shredded Swiss cheese
  • 4 ounces (about 4 slices) deli sliced corned beef, chopped
  • ½ cup Thousand Island dressing
  • ½ cup drained sauerkraut
  1. Preheat oven to 400 degrees F.
  2. In a large bowl mix together the cream cheese, 1 cup of the Swiss cheese, the dressing and corned beef. Spread in a pie plate or other shallow serving dish. Top with the sauerkraut and the remaining ½ cup of Swiss cheese.
  3. Bake for about 15 minutes, or until bubbly around the edges. Serve hot with cocktail-size rye bread squares.

Source: Brown Eyed Baker

Cherry Cheesecake Cookies

Cherry Cheesecake Cookies

I really wanted to get these recipes posted sooner, but we had some personal issues come up and I’ve been very preoccupied with that. But I haven’t forgotten about you! So today, I will be posting two recipes in hopes that gives you enough time to gather the ingredients and make these wonderful treats this weekend. My plan for the weekend is to get together with family and make some more goodies for Christmas Day. I hope you get to do the same.

These cookies taste exactly like the name says, cherry cheesecake! They take some time to make but they are well worth all the work. I did find draining the cherries was a bit of a hassle. Use a good mesh strainer set over a large bowl, the filling slowly does separate from cherries. Just be patient and take out one cherry at a time and you’ll have yourself perfect cherry toppings!

Check back in a few hours for my next treat: Salted Caramels, Yummm!

Cherry Cheesecake Cookies:

  • 3 1/2 cups all-purpose flour
  • 2 tsp baking powder
  • 1 tsp salt
  • 2 (8oz) pkg cream cheese, softened
  • 20 tbs (2 1/2 sticks) unsalted butter, softened
  • 1 1/2 cups granulated sugar
  • 2 large eggs, room temperature
  • 2 tsp vanilla extract
  • 1 cup graham cracker crumbs
  • 3 (20oz) cans cherry pie filling, drained
  1. Combine flour, baking powder, and salt in a bowl. With electric mixer on medium-high speed, beat cream cheese, butter, and sugar until smooth and creamy, 2 minutes. Add eggs and vanilla, and mix until incorporated. Reduce speed to low, add flour mixture, and mix until the just combined. Divide dough in half, wrap in plastic wrap, and refrigerate until firm, 2 hours. 
  2. Adjust oven racks to upper-middle and lower-middle positions and heat oven to 350 degrees. Line 2 baking sheets with parchment paper. Place graham cracker crumbs in shallow dish. Working with one dough half, roll into 1 1/2 inch balls, then roll in graham cracker crumbs. Place balls 2 inches apart on prepared baking sheets. Using rounded tablespoon measure, make indention in center of each ball. Place 3 cherries (don’t be afraid of how large they are compared to cookie, it’ll puff up) in each dimple. Bake until cookies have cracked and are set, 12 to 14 minutes, switching and rotating sheets halfway through baking. Cool 10 minutes, then transfer to wire to cool completely. Repeat with remaining dough.  The cookies will last in the refrigerate for a few days.

Source: Americas Test Kitchen Holiday Cookies 2010


Chocolate Mint Cookies

Chocolate Mint Cookies

I’ve been having a lot of fun the past week with baking up a whole bunch of goodies for you. First up are these amazing Chocolate Mint Cookies. These cookies are very easy to put together. But you will need to plan to make these ahead of time since the dough will need to be refrigerated before you bake them. What I ended up doing was making the dough the night before I wanted to bake them and it worked out great. How these cookies get their mint flavor, is by placing an Andes chocolate mint on top of the cookie as soon as they come out of the oven. The heat coming from the cookie will soften the mint and will easily spread over the top. Let me just say, these will knock your socks off! They are sooo good. Happy Holiday Baking!

Chocolate Mint Cookies:

  • 1 1/4 cup all-purpose flour
  • 1/2 tsp baking soda
  • 1/4 tsp salt
  • 6 tbs (3/4 stick) unsalted butter
  • 3/4 cup packed light brown sugar
  • 6 oz bittersweet chocolate, chopped
  • 1 large egg
  • 36 pieces Andes chocolate mints, unwrapped

To Make Dough Ahead of time:

  1. Combine flour, baking soda, and salt in a medium bowl. Melt butter and brown sugar in a medium saucepan over low heat. Add bittersweet chocolate, cover pan with lid, and let stand off heat until chocolate melts, about 4 minutes. Stir until smooth, transfer chocolate to bowl of electric mixer, and let cool, about 10 minutes.
  2. With electric mixer on medium speed, beat the egg into cooled chocolate mixture until thoroughly combined. Reduce speed to low and mix in flour mixture until just combined, about 1 minute. Cover dough with plastic wrap and refrigerate until firm, about 1 hour or overnight.

Baking cookies:

  1. Adjust oven racks to upper-middle and lower-middle positions and heat oven to 350 degrees. Line 2 baking sheets with parchment paper.
  2. Roll 2 tsp dough into 1-inch balls and place 2 inches apart on prepared baking sheets. Bake until cookies are just set, 10 to 12 minutes, rotating and switching baking sheets halfway through baking time. Remove from oven, top each hot cookie with 1 mint, and allow chocolate to soften, about 1 minute. Using knife, spread softened mint over top of cookies and transfer to rack to cool completely, about 30 minutes. Store cookies in airtight container at room temp for up to 1 week.

Source: Americas Test Kitchen Holiday Cookies 2010

Panera Mac-n-Cheese


Every Friday my kids have a half day of school and one of our favorite things to do is go to Panera for lunch. 9 times out of 10 all of us order the mac-n-cheese. It’s seriously one of the best we have ever had. When I learned that they have the recipe on their website, I jumped for joy. Not only is this one of our favorites to make at home, it’s super easy. It’s just as creamy and full of cheesy goodness like the one you can buy. I’m so happy to be able to make this at home when we have cravings but can’t get out of the house. I know you’ll enjoy as much as we do.

Panera Mac-N-Cheese:

  • 1 (16-ounce) package of rigati pasta (or other small pasta shells)
  • 1/4 cup butter
  • 1/2 cup all-purpose flour
  • 2 1/2 cups 2% reduced fat milk
  • 6 slices white American cheese, chopped
  • 1 cup (8 ounces) shredded extra-sharp white Vermont cheddar
  • 1 tablespoon Dijon mustard
  • 1 teaspoon kosher salt
  • 1/4 teaspoon hot sauce
  1. Prepare pasta according to package directions.
  2. Melt butter over low heat. Whisk in flour and cook 1 minute, whisking constantly.
  3. Gradually whisk in milk (or cream); cook over medium heat, whisking until mixture thickens and bubbles. Remove from heat.
  4. Add cheeses, mustard, salt, and hot sauce, stirring until cheese melts and sauce is smooth.
  5. Stir in pasta and cook over medium heat for 1 minute and serve.

Source: Panera

Pumpkin Dump Cake

Tomorrow is the start of fall, and that my friends, is my favorite season. I’m going to kick off fall by giving you this great pumpkin recipe. Most of you might already know that pumpkin is something I’m very fond of. I have some great pumpkin recipes planned for the next couple weeks.

I will start you out on this dump cake. This recipe couldn’t be any easier, take a boxed cake mix and pour it over a delicious pumpkin concoction and top with crushed graham crackers, toffee bits, and butter. YUM! There is a tiny story behind me making this cake. The night before I began to heat up the broiler and heard a pop. My oven has decided to stop heating up. This is very sad news for any baker. Thankfully my parents now live very close to me and I was able to go over to their house and bake this cake for our Sunday dinner. Now I sit and hope that the oven won’t cost a fortune to fix. I can’t wait to get it back!

Other pumpkin recipes for you to enjoy.


Pumpkin Whoopie Pies


Pumpkin Cookies


Pumpkin Cheesecake


Pumpkin Scones


Pumpkin Bread


Pumpkin Bars


Pumpkin Dump Cake:

  • 1 15 oz can Pumpkin Puree
  • 1 10 oz can Evaporated Milk
  • 1 cup light brown sugar
  • 3 eggs
  • 3 tsp pumpkin pie spice
  • 1 box yellow cake mix
  • 1 cup (2 sticks) butter melted
  • 1 cup coarsely crushed graham crackers or pecans
  • 1/2 cup toffee bits (optional)
  1. Preheat oven to 350 and spray a 9×13 baking pan lightly with cooking/baking spray
  2. In a large bowl combine the pumpkin, evaporated milk, sugar, eggs and pumpkin pie spice. Stir to combine and pour into the prepared pan.
  3. Sprinkle entire box of cake mix on top, followed by the graham crackers or nuts and toffee chips.
  4. Pour the melted butter evenly on top.
  5. Bake for 45-50 minutes until center is set and edges are lightly browned.

Source: Slightly adapted from Cookies and Cups


Herb Dip and a Sweet 16 birthday party


This is what I’ve been busy with the past couple weeks. My daughter will be turning 16 this week and we wanted to give her a party she won’t ever forget. As you can see, it was a Mad Hatter Tea Party theme. It turned out exactly how I had imagined (despite the rain). Our menu consisted of the chicken salad sliders, spirals (Sam’s Club), salmon and cream cheese tea sandwiches, caprese skewers, fruit and cheese platter, and herb dip served in individual bread cups.


This was the closest shot I got of the herb dip in bread cups. The rain finally stopped after the party was getting started and I was rushing to get the food out while I had a crowd around me cheering me on. The herb dip was a huge hit and went fast. It’s perfect to serve a crowd and with football starting, perfect for your game watching. I took baguettes and cut the ends off, then sliced the bread into 4-5 inch pieces. With those pieces, I sliced them at a diagonal in the middle of the slices, to create the angled bread cups. Hollowed out the inside (leaving enough bread so the dip won’t fall out) then piped the dip in the holes. It looked so beautiful, definitely my favorite part of the food table.

We put drink me tags on all the water bottles. They looked so cute!

The table settings were beautiful even after the rain hit.

My parents were kind enough to get her birthday cake for us. I was planning on making it but was quickly realizing I would have no time to do exactly what I wanted.

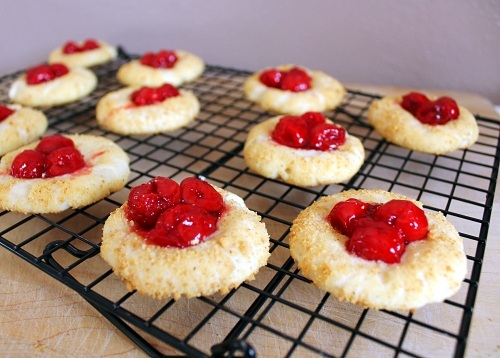
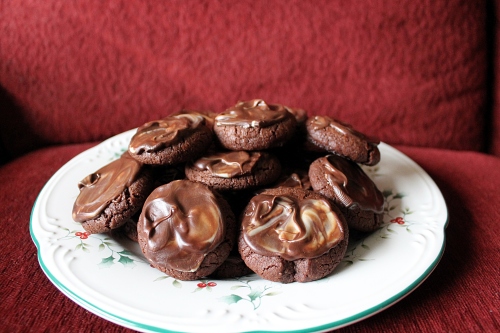
I did however make cookies for everyone to take home. I realized the day after the party that I had not taken any pictures of the cookies. I quickly gathered the leftover cookies so I could take a quick photo.

I can’t believe she’s going to be 16!

Happy Birthday to cutest Mad Hatter ever!

Herb Dip:

  • 8 ounces cream cheese, at room temperature
  • 1/2 cup sour cream
  • 1/2 cup mayonnaise
  • 4 scallions, white and green parts, minced
  • 2 tablespoons fresh parsley leaves, minced
  • 1 tablespoon fresh dill, minced
  • 1 teaspoon kosher salt
  • 3/4 teaspoon freshly ground black pepper

Place the cream cheese, sour cream, mayonnaise, scallions, parsley, dill, salt, and pepper in the bowl of an electric mixer fitted with the paddle attachment and blend. Refrigerate overnight or for up to at least 6 hours.


Source: Ina Garten via Food Network


Chipotle Chicken – Copycat Version

It’s a rare thing for me to make exact copycat recipes. But I’m a huge fan of the popular chain, Chipotle. I’ve already made a cilantro-lime rice that rivals theirs, and a corn salsa. Now it’s time for the main ingredient, the chicken. This chicken is full of strong flavors and you can turn up the heat or turn it down by how many chili’s you put in it. I didn’t put the whole 7oz of chipotle peppers in because I didn’t want it too spicy. I was able to find dried ancho chiles in my local Walmart’s produce department. You should also be able to find the chipotle peppers in adobo in Walmart’s Hispanic section. When you make this, use the leftover peppers in adobo in my hot corn dip. It’s to die for!

I will admit, that while these were really good, nothing can beat the actual burrito’s at Chipotle’s. Maybe it’s the atmosphere. But you can have fun with your family making them at home. I put everything together and then set everything out on a table so people could make their own burrito’s. Make sure you have plenty of lettuce, cheese, sour cream, guacamole, and of course, the cilanto-lime rice and corn salsa. It’ll make your burrito’s shine!

Chipotle Chicken:

  • 5-6 boneless and skinless chicken breasts, pounded flat (about 1/2 inch thickness)
  • 1 (2 ounce) package dried ancho chiles or 4-6 ancho chiles
  • 1 (7 ounce) can chipotle pepper in adobo sauce (discard chipotle pepper, skim out seeds)
  • 1 teaspoon black pepper
  • 2 teaspoons cumin powder
  • 2 tablespoons fresh oregano, chopped
  • 6 cloves garlic
  • 2 teaspoons salt
  • 1 red onion, quartered
  • 1/4 cup oil (canola/vegetable/olive)


  1. Soak the dried chilies overnight in water, until soft. Remove seeds. (If you forget to do this part, like me, pour boiling water over chiles and let soak till soft, about 30 minutes)
  2. Add chilies and rest of the ingredients in blender or food processor. Puree until smooth. Place chicken in a ziploc bag and pour marinade over chicken. Let refrigerate and marinate for at least 2 hours or overnight.
  3. Once chicken is ready, prepare your gas or charcoal grill. Cook over medium-high heat until cooked through, about 8-10 minutes per side. Make sure the chicken is cooked thoroughly. When done, take off heat and chop into small dices. Enjoy!

Source: slightly adapted from Chipotle Fan