Jalapeno Popper Dip

If you are planning a Super Bowl party, this dip has to be on the menu! Sadly, my Tampa Bay Buccaneers self destructed this season so my team is nowhere near the playoff season. But, I am cheering on the New England Patriots because their Offensive Coordinator is now the head coach for my beloved Penn State Nittany Lions. I am very excited about Coach O’Brien and hopes he does well throughout the playoffs.

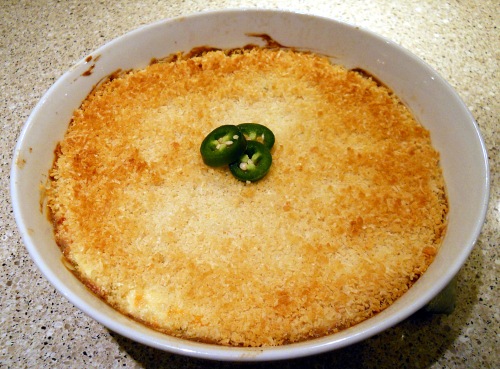
Let me get back to the food, if you love jalapeno poppers you are going to LOVE this dip. I wasn’t sure how much of the flavor of regular poppers would come out in the dip, and I was pleasantly surprised that it was strong. You will think you are eating poppers. I think they are best served with tortilla chips but you could use crackers too. You can up the amount of heat by using another jalapeno and the stems and ribs (the white part inside). With not knowing how much heat my guests would like, I took out the seeds and ribs on the jalapeno’s. I also added more cheese because life is better with more cheese. Anyway you make this, your guests will love it!

Jalapeno Popper Dip:

  • 2 (8 oz) packages cream cheese, at room temperature
  • 1 cup mayonnaise
  • 1 (4 oz) can chopped green chiles
  • 3 jalapenos, minced finely
  • 1 cup shredded Mexican style cheese
  • 1/2 cup shredded mozzarella cheese
  • 1 cup Panko breadcrumbs
  • 1/2 cup grated Parmesan cheese
  • nonstick cooking spray
  1. Preheat oven to 375 F.
  2. Combine the cream cheese, mayonnaise, green chiles, jalapenos, and both shredded cheeses in a medium bowl. Stir together until thoroughly combined and smooth. Transfer the mixture to a 9×9 baking dish.
  3. Mix the Panko and Parmesan together in a small bowl using a fork. Sprinkle evenly over the dip in the baking dish. Spray the topping lightly with cooking spray. Bake for 25-30 minutes, or until the topping is golden and the dip is hot. Serve with tortilla chips or crackers.

Slightly adapted from Tracey’s culinary adventures via My Baking Addiction (via Annie’s Eats)
2011 Year In Review

2011 has been a pretty decent year for us. The beginning of the year brought us new and exciting changes. We have been having a wonderful time in our new home and I’ve had fun in my kitchen. I look forward to 2012 and all the things I hope it brings. I will admit that the beginning of 2012 is going to be a bit shaky, my husband will be having surgery to have part of his thyroid removed and checked for cancer. We are very hopeful that it will all work out. I will apologize right now for any lack of postings in the month of January. I will try to not let the downtime be for too long. But if there is, you will understand what is going on.

This past year has been great for the blog. Particularly for the #1 most looked at post of the year. I must thank Pinterest for help with that. For those unsure of Pinterest, it’s a site you can pin your favorite things around the web to. It’s fun and addicting and you must give it a try.

I’ve composed the top ten posts of 2011. Enjoy and have a safe and Happy New Year! Love you all!

#10

 
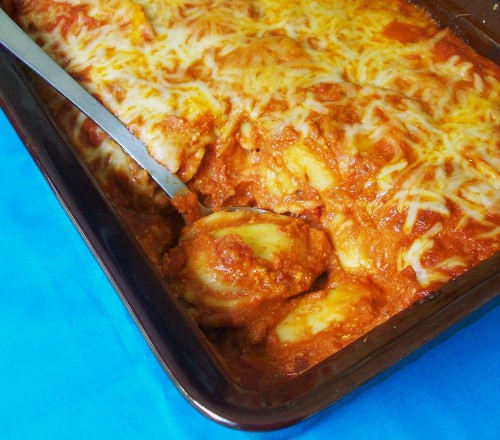
Baked Ravioli is a family favorite. It’s like an easy lasagna.

#9

Loaded Baked Potato Dip is a perfect party dip. It tastes just like baked potatoes.

#8

 
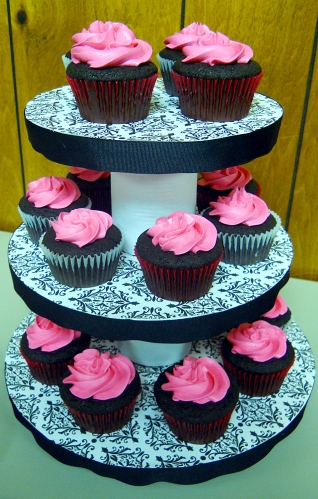
Cupcake Tower with Ganache filled Cupcakes I have a link to how to make a cupcake tower and the recipe for some really yummy chocolate cupcakes

#7

Stuffed Strawberries is a favorite of mine not just because it was my first ever post on the blog. It’s also very delicious!

#6

Onesie Sugar Cookies were so much fun to make. I made them for my sister-in-law’s baby shower. She gave me a beautiful niece in return for these cookies.

#5

Easter Lamb Cake is a family tradition. I can’t wait to make it this year because I got the cast iron lamb mold that my great-great grandfather made.

#4

Stuffed Pork Tenderloin with Feta and Spinach is something I created a long time ago. It’s one of the only ways I can get my son to eat pork.

#3

French Toast Bread Pudding would be perfect to serve for breakfast on New Years Day

#2

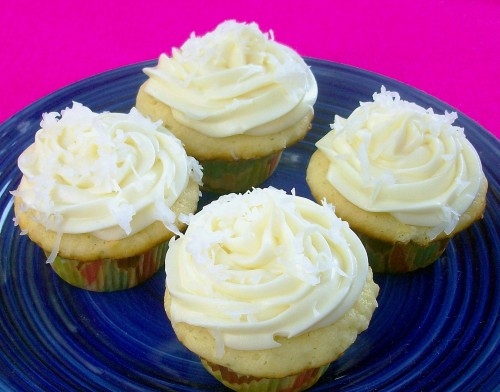
Coconut Cupcakes with Pineapple Filling is a great combination of flavors.

#1

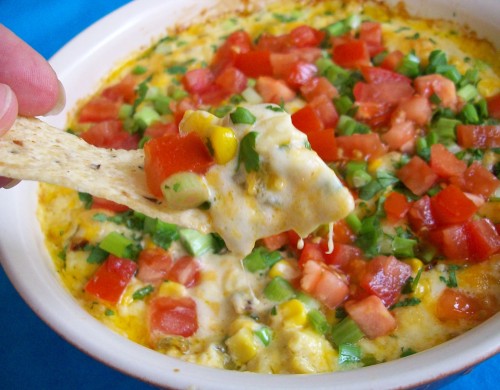
The number one post this year is Hot Corn Dip. I make this a lot because it’s easy to throw together and it’s a real crowd pleaser.


Review: Tostitos® Dip Creations™ Freshly Made Guacamole Dip

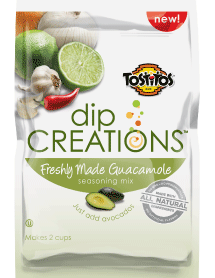
As part of the Foodbuzz Tastemaker Program, I sometimes get products to test out and blog about. This one is Tostitos® Dip Creations™ Freshly Made Guacamole Dip. I have my own personal way of making guacamole but was willing to try out this mix. If you are unsure of how to make a great tasting guacamole from scratch, this mix would be perfect for you.

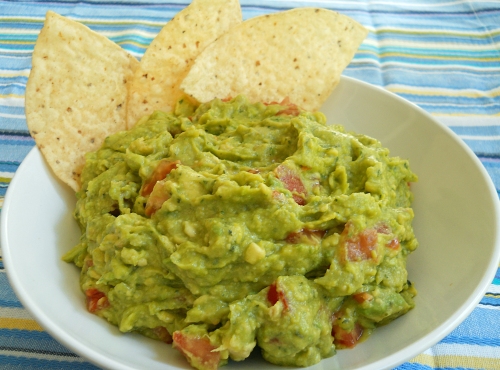
I was a little nervous about how it was going to turn out when I opened up the bag. The directions say to add the mix to three large avocados.  I mashed up my avocados and added the seasonings but thought it looked plain. I love texture in my guacamole so I decided to add tomatoes, something I always do anyway. I set it in the fridge to sit for 30 minutes to let the flavors meld (scared that it would turn brown). When I took it out to taste, I was pleasantly surprised to see it was still nice and green.  I was even more surprised at how good it tasted. The seasonings were dead on and there wasn’t one flavor that overpowered another. I really enjoyed the flavors, as did my family. Within minutes the guacamole was gone.

Overall: I would make it again but of course I’ll be sticking to my regular recipe which doesn’t have a lot of sodium and other things I can’t pronounce. I do suggest this dip mix for people who are unsure of what to put in their guacamole. You will be very happy with the outcome.

Note: I was not paid for this post; the opinions and views are strictly my own.

Stuffed Mushrooms

Last week I catered a Bridal Shower and served these stuffed mushrooms. I apologize for the photo. After I plated them and put them out, I realized I hadn’t taken a picture. The mushrooms were very popular and before they were gone I had to run out and grab a photo of what was left. I made a double batch and by the time I was able to take a photo these 5 were the only ones left. That just shows you how popular and wonderful they are.

I was very excited to make these, I have had this recipe bookmarked for a long time and was waiting for the right time to make them. My kids and I are the only ones in the family who really like mushrooms, so I don’t usually buy them. After making the mushrooms, I told myself that I will make these again for us, I know my son would go crazy over them.

The Bridal Shower was a success and along with the mushrooms I made chicken salad in phyllo cups, pasta salad, meatballs, stuffed strawberries and cupcakes. I can’t wait to show you the cupcake stand I made. I’ll be posting that later this week.

Stuffed Mushrooms:

  • 24 whole fresh button mushrooms
  • 3-4 cloves garlic, coarsely chopped
  • 2 tsp. vegetable oil
  • 8 oz. cream cheese, softened
  • ¼ cup grated Parmesan cheese
  • ¼ tsp. pepper
  • ¼ tsp. onion powder
  • ¼ tsp. cayenne pepper, or less if you don’t want a big kick
  • 2 tbs Bread crumbs
  • minced herbs, for garnish (optional)
  1. Preheat the oven to 350° F.  Lightly grease a baking sheet with cooking spray.  Clean mushrooms with a damp paper towel. Carefully remove the stems from the mushroom caps, setting the caps aside for later.  Add the stems to the bowl of a food processor.  Add the garlic to the food processor as well, and pulse in brief bursts until them mushroom stems and garlic are finely chopped.
  2. Heat the oil in a large skillet over medium heat.  Add the chopped mushroom stems and garlic and cook until all the moisture has disappeared, about 5-7 minutes.  Lower the heat to medium-low.  Stir in the cream cheese, Parmesan cheese and spices.  Stir together until the mixture is smooth and creamy; remove from the heat.  Using a small spoon, fill each mushroom cap with a generous amount of filling.  Arrange the mushroom caps on the prepared baking sheet. (At this point you can refrigerate the mushrooms till ready, I made them a day in advance)
  3. Top with bread crumbs.  Bake for 20 minutes or until the mushrooms are hot and liquid starts to form under the caps.  Transfer to a serving platter, garnish with fresh herbs if using and serve immediately

Source: Annie’s Eats who adapted from Allrecipes

Spinach Dip

I love spinach and this dip is one of my ultimate favorites. It’s a very popular recipe but I will still post it just in case there are those who have never made it before. One of the things I did change was the amount of mayonnaise used. The original recipe calls for 1 cup but I feel that it gives to much of a mayonnaise taste so I cut it back to 3/4 cup. Other than that, I don’t change up the recipe too much and it’s always a hit. I love to double the recipe so I know I will have leftovers.


Spinach Dip:

  • 1 10 ounce pkg chopped frozen spinach, thawed and liquid squeezed out (place spinach in towel and squeeze)
  • 1 16 ounce container sour cream
  • 3/4 cup Mayonnaise
  • 1 package Knorr® Vegetable Soup recipe mix
  • 1 8 ounce can water chestnuts, chopped fine
  • 3 green onions, chopped fine
  1. Mix together the Mayo, sour cream and vegetable soup mix.
  2. Stir in the rest of the ingredients and mix till all combined. Place in refrigerator and chill at least 2 hours. Serve with pumpernickel bread, crackers and veggies.

Source: slightly adapted from Knorr


Shrimp Mousse


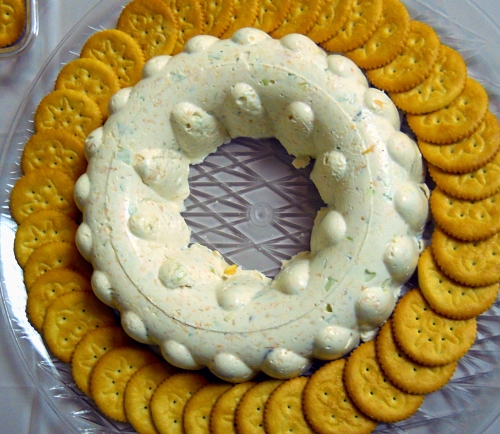
When I first heard shrimp mousse, I will admit I sorta cringed. When I think of mousse I tend to think of a velvety chocolate dessert, something sweet and certainly not savory. But when I tried it, I learned that mousse can be savory and really delicious! We decided to add this to the menu of my sister-in-law’s baby shower. We were wanting food that was a little different than what is typically served at baby shower. We wanted to stay away from lunch meat since that’s become a no-no for pregnant women. The shrimp mousse really added a special something to food table and we didn’t have much leftover.


Shrimp Mousse:

  • 1 envelope unflavored, clear gelatin
  • 2 tbs water
  • 1 can cream of mushroom soup
  • 1 8oz package cream cheese
  • 1 cup mayonnaise
  • 1/4 cup onions, diced small
  • 1 cup celery, diced small
  • 2 4oz cans baby shrimp, drained well


  1. Spray any type of mold, bunt pan, bowl with cooking spray, set aside.
  2. Combine gelatin and water in medium saucepan set over medium heat. When the gelatin is dissolved, add cream of mushroom soup and cream cheese, cook until combined and creamy, about 2-3 minutes.
  3. Take off heat and add the mayo, onion, celery and shrimp, stir till combined. Salt and pepper to taste.
  4. Pour into prepared mold and chill for at least 8 hours or overnight.


Source: Gina Marie’s Kitchen

Chicken Enchilada Wraps

I have had these bookmarked ever since I saw them on Annie’s Eats a year ago. I was waiting for the right time to make them. When I started planning my sister-in-laws baby shower I knew it was time to bring out the chicken enchilada wraps. I decided to triple the recipe to make sure we had enough for our guests. I was a little worried about tripling the spices and ended up cutting back a bit on the Chile powder and Cayenne pepper. When we tasted the chicken filling my daughters and husbands mouth were a tad bit on fire. They are more sensitive to the spicy heat than I am, so I always go by what they tell me when it comes to serving something to others. I sat there trying to figure out what to do. I had already added all the ingredients to the filling and didn’t have anymore cream cheese to add to it. What could I do to take some of the heat away? I looked through the refrigerator and saw sour cream. I added small amounts at a time till it finally worked. I actually think the addition of the sour cream helped round the flavors out even more. I love how things work out just when you think it’s ruined. And thankfully everyone at the shower loved them.

Chicken Enchilada Wraps:

  • 2 chicken breasts, bone-in and skin on
  • Olive Oil
  • Salt and Pepper
  • 1 (8 oz.) pkg. cream cheese, softened
  • 2/3 cup shredded cheese, Mexican blend
  • 1 clove garlic, minced or pressed
  • 2 tsp. chili powder
  • ½ tsp. cumin
  • ¼ tsp. cayenne pepper
  • Salt, to taste
  • Handful of cilantro, chopped
  • 3 green onions, chopped
  • 10 oz. can diced tomatoes with green chiles, drained well
  • 1/4 cup sour cream (optional)
  • 4-6 8-inch tortillas
  1. Preheat oven to 375 degrees.
  2. Place chicken breasts on a baking sheet. Rub each breast with a drizzle of olive oil and sprinkle with salt and pepper. Bake the breasts for 35-45 minutes or until cooked through. Let cool.
  3. Remove the skin and chicken from the bone. Shred the chicken and set aside.
  4. Combine all of the remaining ingredients, except tortillas, in a large mixing bowl.  Mix until well blended. Add the chicken to the filling mixture and stir well to incorporate. Taste and add sour cream, if desired.
  5. Spread a thin layer of the filling mixture over a tortilla, leaving a small border clear around the edge.  Roll the tortilla up tightly into a spiral.  Place the rolled up tortilla on a cutting board and use a sharp knife to cut into 1- to 1½-inch thick segments.  Transfer to a serving platter and serve chilled or at room temperature.

Source: Adapted from Annie’s Eats via Sing for Your Supper, originally from Come On Over Cookbook1 from Gooseberry Patch