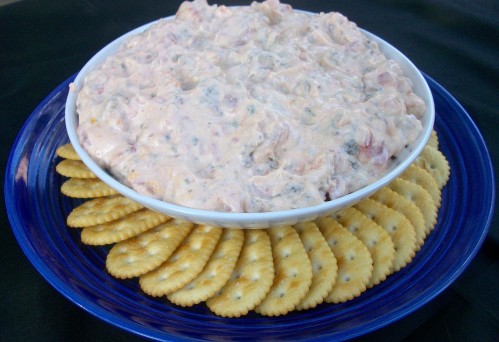
Football Sandwiches aka Ham and Cheese Yumminess

A few years ago one of my best friends, Kali, was telling me about these sandwiches her mother makes for football season, Christmas Eve and just about any other time of the year. Her mother, Patty, has been making them for as long as Kali can remember. They sounded interesting and I asked her to please get the recipe from her mom. I’m so happy that Patty gave me the recipe. These sandwiches are sooooooo good (yes I used more than one o cause that’s how good they are).

The sauce is what takes the sandwiches from plain ole’ ham and cheese to ham and cheese yumminess! It’s made with butter, horseradish mustard, grated onion and poppy seeds. Doesn’t get any better than that! The other great thing about these sandwiches is that you can make them ahead of time and pop them in the oven when you are ready. Kali says they can be put in the freezer. I have yet to try that because they are gone before I need to think about freezing. The sandwiches are great to take to tailgates parties. They are individually wrapped in foil so they stay nice and warm in an insulated bag.

Patty, my family and I thank you for this recipe. It’s become a staple on game days. And when Penn State starts playing Nebraska again after they join the Big Ten; we will be thinking of you as we are eating the sandwiches and watching the Lions run all over the Huskers. 🙂 GO STATE!

Note: I doubled the sauce recipe because I love slathering on a lot of sauce. Also, when using Kaiser rolls, they tend to be a bit bigger than regular hamburger buns and need the extra sauce.

Football Sandwiches:

  • 12 Kaiser rolls or regular buns
  • 1 1/2 – 2lbs sliced ham
  • 1 lb swiss cheese

Sauce:

  • 2 sticks of butter, softened
  • 6 tbs horseradish mustard
  • 2 tbs grated onion
  • 2 tbs poppy seeds
  1. Preheat oven to 300 degrees.
  2. Combine all the ingredients for the sauce. Split the rolls and spread the sauce on the inside of both sides of the buns.
  3. Place a slice or two of ham and a slice of cheese on the buns and replace the top of the bun.
  4. Individually wrap each sandwich in tin foil. At this point you can refrigerate the sandwiches till you need them.
  5. Bake for 20-25 minutes or until the cheese is nice and melted. Serve hot.

Source: Patty and Kali Johnson

Spicy Sausage Dip

Last week was a busy one and I apologize for not posting many recipes. Kids started back to school and I was busy celebrating. Now that we are getting back to a regular schedule I will try and be better about my postings. We are now in the throws of football and I couldn’t be happier. This past weekend I went to the the Penn State/Youngstown State game and had a wonderful time. I made football sandwiches for tailgating and plan to post those later this week.  In the meantime here is a wonderful spicy sausage dip that’s extremely addicting!  The dip goes well with a cold glass of beer and your favorite team on the TV. I like to have the ingredients always on hand so when we are craving it I can make it. It’s only got a few ingredients and within a few minutes you can enjoy a tasty dip.

Spice Sausage Dip

  • 1 (16 ounce) package hot pork sausage
  • 1 (15 ounce) can diced tomatoes with mild green chilies, undrained
  • 2 (8 ounce) packages of cream cheese; room temperature
  • hot sauce to taste
  1. Cook the sausage in a skillet over medium-high heat until evenly browned and no longer pink. Drain off the fat.
  2. Reduce heat to medium, and stir in the tomatoes and cream cheese until evenly blended. Cook just until heated through and the cream cheese is all combined. Serve warm.

Source: My Baking Addiction

Pizza Bites

Fall and Football go together likes peas and carrots. (Forrest Gump was on all weekend) This is my favorite time of year! For those who don’t know…I LOVE FALL! And football is my favorite sport. The best weekends are spent watching Penn State and Tampa Bay Buccaneers, it’s even better when they win! I’ll be posting recipes in the next several weeks that will be perfect for your football watching weekends. Also, I will be doing a lot of fall recipes. Pumpkin season is coming and I have so many things planned for you. Pumpkin cupcakes, Pumpkin bread, Pumpkin whoopie pies, Pumpkin bars, Pumpkin risotto…I really did watch too much Forrest Gump, I feel like Bubba right now.

I’m getting off track and I apologize. I just get so excited when it comes to fall foods. Back to the football food!

Pizza bites are so much fun to make. All you need is some great dough, cubed mozzarella and pepperoni. For those who live in WV it’s like a mini cheese filled pepperoni roll. I do miss those yummy WV pepperoni rolls. Veering off track again… I make my own dough (I’ll post soon) but you can easily buy good store bought dough or even run to a local pizza shop and ask for some dough (not a chain one). Local pizza parlors are more willing to sell you dough than the chain ones. Are you ready for some football? I am!

Pizza Bites

  • 4 oz. mozzarella cheese, cubed (about 20-24 pieces)
  • Sliced pepperoni
  • 1 ball pizza dough (roughly 2 lbs) or 1-2 cans of refrigerated pizza dough
  • 1 small jar pizza sauce

For topping:

  • Olive oil
  • Italian seasoning
  • Grated Parmesan cheese

  1. Preheat the oven to 400˚ F.  Lightly grease a 9-inch pie plate or cake pan.  Divide the pizza dough into 20-24 roughly equal sized pieces.  Take one of the dough pieces, top with a cube of cheese and a slice or two of pepperoni.  Pull the edges of the dough around the fillings and pinch closed.  Place seam-side down in the baking dish.  Repeat with the remaining dough pieces.
  2. Lightly brush the tops of the dough balls with olive oil.  Sprinkle with Italian seasoning and grated Parmesan cheese.  Bake for 20 minutes, or until the tops are golden brown.  Serve warm, with pizza sauce.

Source: adapted by Annies Eats who was inspired by Chaos in the Kitchen