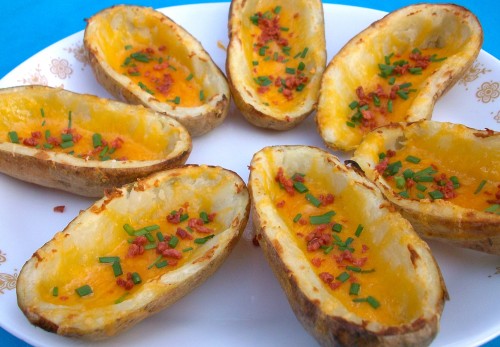
Cheesy Potato Skins

I apologize for the lack of posts last week. It was one of those off weeks for me, with a lot going on and not enough time in the kitchen. To top off my busy week, I end up breaking my camera on Saturday. I will apologize in advance for the photos that will be coming in the near future. Until I get a new camera, I am stuck with my droid camera.

Enough about my crazy life, how about a recipe? Potato skins are super easy and the perfect thing to eat while watching football. They also go great with Buffalo Wings. I’m posting a pretty basic recipe for the skins, you can tweak this anyway you like. You can add a mixture of different cheeses, herbs, meats, etc… So many fun things to create, having a basic platform is what you need and this is it.

Cheesy Potato Skins:

  • 4 Idaho Russet Potatoes, scrubbed
  • 2 cups shredded cheddar cheese
  • 2 tbs melted butter
  • 2-3 tbs chopped chives
  • 2-3 tbs bacon or bacon bits.
  • Salt and Pepper
  • Sour cream for serving
  1. Preheat oven to 375 degrees. Wrap scrubbed potatoes in tin foil and bake in oven for 1 1/2 hours, or until tender. You can test by inserting a knife into the potato, if it goes through with no resistance, it’s done. Let cool for 20 minutes.
  2. If using real bacon, cook the bacon till crisp and crumble, set aside.
  3. Preheat the broiler and put the on the upper middle part of the oven.
  4. Take the potatoes and slice them in half, lengthwise. Scoop out the pulp with a spoon, leaving a little of the pulp near the skin. Be careful not to go through the skin. Place on a baking sheet.
  5. Brush the skins with the melted butter and season with salt and pepper. Broil the skins till they start to crisp up and get a light brown color.
  6. Add the cheese to each skin and put back under the broiler, till the cheese is melted. (Do NOT walk away, cheese will melt fast).
  7. Top each skin with bacon and chives, serve with sour cream.

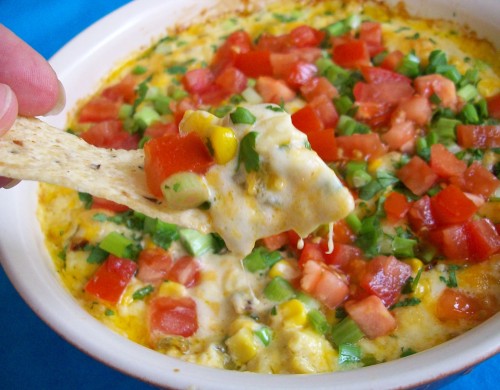
Hot Corn Dip

*If visiting from Pinterest, thank you! Please make sure to check out the rest of my blog as I have many other great recipes on here. Look for me on Pinterest and Instagram – user name @cook1864 I am also on Facebook*

One of my favorite dips to make during football season is this corn dip. I got the recipe a few years ago and it’s become a staple in our house. When someone tries it for the first time, they can’t leave without getting the recipe; it’s that addicting. The key ingredients are corn, cheese and chipotle peppers. You can adjust the heat level by adding or subtracting the amount of chipotle peppers. Personally, I love a lot of chipotle peppers, it gives it a great zing. You can also change up the amount of cheese. I’ve made it with more of the montery jack than the chedder and it’s worked out great. The addition of fresh ingredients at the end of baking, rounds out a perfect party dip.

Hot Corn Dip:

  • 2 cups shredded chedder cheese
  • 1 cup shredded Montery Jack
  • 2 tbs chipotle peppers in adobo sauce, diced small
  • 1 small can (4oz) diced green chilies, undrained
  • 1/2 cup Mayo
  • 1/4 tsp garlic powder
  • 1 11oz can of corn, drained
  • 1 small tomato
  • 2 tbs cilantro, chopped
  • 2 tbs green onions, sliced thin
  1. Preheat oven to 350 degrees.
  2. Mix the cheeses, chiptole and green peppers, mayo, garlic powder and corn together. Pour into an oven safe dish.
  3. Bake 20 minutes or until golden brown and bubbly
  4. Top with diced tomatoes, green onions, and cilantro. Serve immediately with tortilla chips.

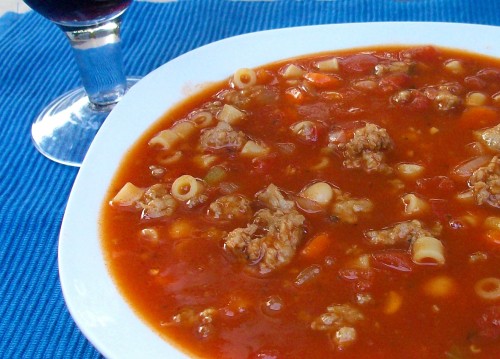
Pasta Fagioli

The colder weather is slowly arriving. There is nothing better than sitting down to dinner with a warm bowl of soup on a chilly night. Pasta Fagioli is a great soup to warm you up. Many people love eating this at a popular chain restaurant, I know I do. But why not make a version of it at home? This recipe is amazing! It’s as good, if not better than what you get at Olive Garden and it doesn’t take that much time to make. This recipe makes a large amount of soup. I would suggest freezing the leftovers, that way you have Pasta Fagioli when you want it.

Pasta Fagioli:

  • 2 tablespoons butter, divided
  • 1 package sweet Italian sausage, casings removed
  • ½ large (or 1 medium) onion, finely chopped
  • 4 cloves garlic, minced
  • 4 carrots, thinly sliced
  • 4 stalks celery, thinly sliced
  • 28 oz. can diced tomatoes
  • 1 can red kidney beans, drained and rinsed
  • 1 can white cannelini beans, drained and rinsed
  • 58 oz. beef broth
  • 28 oz. can tomato sauce (add more if it’s still to beefy tasting)
  • 2 teaspoons dried parsley
  • 1/2 teaspoon dried basil
  • 1 teaspoon salt
  • 4 oz. (1 Cup) small dry pasta
  1. In a large stockpot over medium heat, melt 1 tablespoon of the butter.  Once melted, add the sausage, crumbling it as it cooks. Using a slotted spoon, remove sausage from pot and discard any grease that remains.
  2. Melt remaining 1 tablespoon of butter in the same pot. Add the onion, garlic, carrot, and celery.  Saute over medium heat until the vegetables are soft, about 8 minutes. Carefully add the cooked sausage back into the pot. Add the can of diced tomatoes (do not drain), stir, and simmer for 10 minutes.
  3. Stir in the beans, and add the beef broth and tomato sauce. Stir in all of the seasonings. Turn the heat to high and bring the soup to a boil. Once boiling, turn heat to low, cover, and simmer for at least 30 minutes.
  4. Add the dry pasta and continue to simmer on low for another 30 minutes.

Source: Pennies on a Platter

Sushi- Tampa Roll

Sushi has been apart of my families life for close to 20 years. My parents first got the taste of it back when I was in High School and the parents of one my friends brought some to the big football game. They let my parents try some and that is where it all began. We started going to the local Japanese restaurant to get our new addiction taken care of. Soon after that my dad realized it’s much cheaper to make sushi at home. It’s still nice to go out and get some really good sushi but making it at home can be fun.

When my kids were born and were at the age that fish and solids foods were ok, I introduced them to sushi. They LOVED it and it became their favorite food. They love having sushi making parties, it’s fun letting them pick out what they want in their rolls. That’s what is great about sushi, there are NO rules! You can put whatever your little heart desires into it. Fried Chicken? Why not? I personally haven’t done that, but don’t see why you couldn’t.

My husband never had sushi till he met me. He enjoys sushi, but he likes sushi with cooked ingredients. My kids and I are more of the the raw sushi (sashimi) type. When we lived in Tampa my husband wanted to try the Tampa Roll. It’s made of fried grouper, mayo and scallions and it became a favorite of ours. When we moved away from Florida we missed the Tampa Roll and I thought it would be easy enough to make. I found that grouper is harder to come by when you don’t live in Florida. I tried different types of frozen fried fish, and you will be surprised at what tasted closest to the original. Frozen fish sticks! If you can’t find fresh or frozen grouper in your grocery store, the fish sticks make a great alternative.
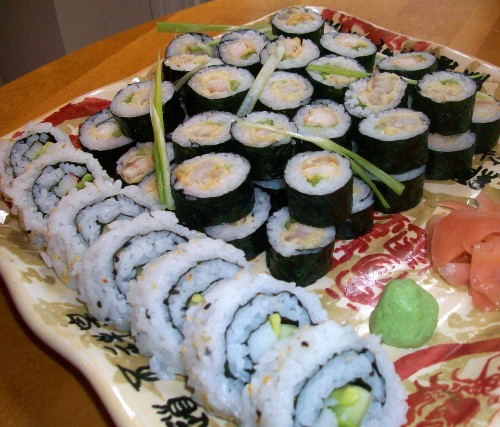
The items you need to get started…

Bamboo Rolling Mat, Nori (package of seaweed paper), sushi rice, fried grouper (or fish sticks), mayonnaise and scallions. Optional: wasabi paste and pickled ginger.

I like to tape plastic wrap around the bamboo rolling mat. It helps with keeping it clean. You can make your own sushi rice at home but that is a process and I will plan on posting that down the road. If you do not want to make the rice at home you have some options. I found that if you have a Chinese buffet that does sushi, they will sell you sushi rice. You could also try a Japanese restaurant. How much you get depends on how much you want to make. A couple pounds of rice will make quite a few rolls.
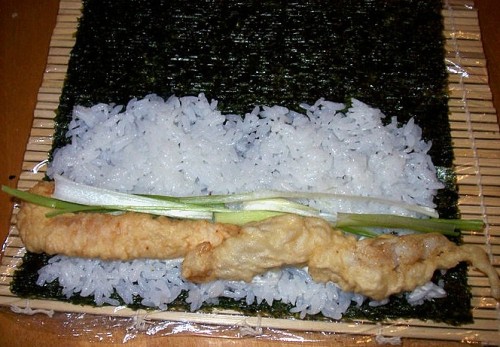
*Keep a bowl of water near you when making these rolls. You want to keep your hands wet while working the rice or else it’ll stick to you.

Lay the Nori down on the bamboo mat, shiny side down. With wet hands, put about a cup of rice on the paper and spread it out. When I make an inside roll (rice on the inside) I don’t put it all over the nori, as you can see above. Next, spread about 1 tbs of mayo on the rice in a thin strip going from one end to the other. Layer the grouper and scallions (see above picture). Work with the ingredients facing you and slowly start rolling the nori over the fish. You will continue rolling it up and when you get to the end, wet your finger and run it across the end of nori so it’ll stick to the roll and the seam won’t open. Slice into about 8 pieces and enjoy!

Fried Grouper:

  • 4 grouper fillets
  • 5 cups peanut oil
  • tempura batter

Heat the oil in a heavy bottom pot till it registers 350 degrees. Slice the grouper fillets into long thin strips and dip into the tempura batter. Place a few strips of battered fish into the hot oil. Cook until lightly browed and place on paper towel to soak up the grease.

Tempura Batter:

  • 1 egg
  • 1 cup ice water
  • 1 cup all purpose flour
  • Pinch of salt

Beat an egg in a bowl. Add ice water in the bowl. Be sure to use very cold water. Add sifted flour and salt in the bowl and mix lightly. Be careful not to overmix the batter.

Spicy Sausage Dip

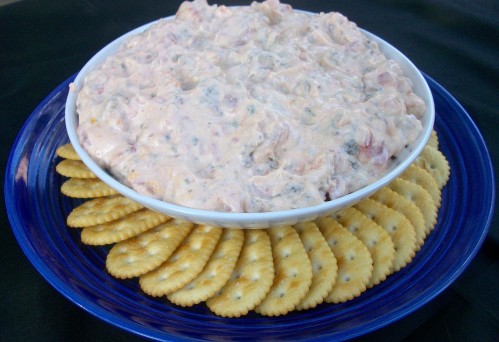
Last week was a busy one and I apologize for not posting many recipes. Kids started back to school and I was busy celebrating. Now that we are getting back to a regular schedule I will try and be better about my postings. We are now in the throws of football and I couldn’t be happier. This past weekend I went to the the Penn State/Youngstown State game and had a wonderful time. I made football sandwiches for tailgating and plan to post those later this week.  In the meantime here is a wonderful spicy sausage dip that’s extremely addicting!  The dip goes well with a cold glass of beer and your favorite team on the TV. I like to have the ingredients always on hand so when we are craving it I can make it. It’s only got a few ingredients and within a few minutes you can enjoy a tasty dip.

Spice Sausage Dip

  • 1 (16 ounce) package hot pork sausage
  • 1 (15 ounce) can diced tomatoes with mild green chilies, undrained
  • 2 (8 ounce) packages of cream cheese; room temperature
  • hot sauce to taste
  1. Cook the sausage in a skillet over medium-high heat until evenly browned and no longer pink. Drain off the fat.
  2. Reduce heat to medium, and stir in the tomatoes and cream cheese until evenly blended. Cook just until heated through and the cream cheese is all combined. Serve warm.

Source: My Baking Addiction

Pizza Bites

Fall and Football go together likes peas and carrots. (Forrest Gump was on all weekend) This is my favorite time of year! For those who don’t know…I LOVE FALL! And football is my favorite sport. The best weekends are spent watching Penn State and Tampa Bay Buccaneers, it’s even better when they win! I’ll be posting recipes in the next several weeks that will be perfect for your football watching weekends. Also, I will be doing a lot of fall recipes. Pumpkin season is coming and I have so many things planned for you. Pumpkin cupcakes, Pumpkin bread, Pumpkin whoopie pies, Pumpkin bars, Pumpkin risotto…I really did watch too much Forrest Gump, I feel like Bubba right now.

I’m getting off track and I apologize. I just get so excited when it comes to fall foods. Back to the football food!

Pizza bites are so much fun to make. All you need is some great dough, cubed mozzarella and pepperoni. For those who live in WV it’s like a mini cheese filled pepperoni roll. I do miss those yummy WV pepperoni rolls. Veering off track again… I make my own dough (I’ll post soon) but you can easily buy good store bought dough or even run to a local pizza shop and ask for some dough (not a chain one). Local pizza parlors are more willing to sell you dough than the chain ones. Are you ready for some football? I am!

Pizza Bites

  • 4 oz. mozzarella cheese, cubed (about 20-24 pieces)
  • Sliced pepperoni
  • 1 ball pizza dough (roughly 2 lbs) or 1-2 cans of refrigerated pizza dough
  • 1 small jar pizza sauce

For topping:

  • Olive oil
  • Italian seasoning
  • Grated Parmesan cheese

  1. Preheat the oven to 400˚ F.  Lightly grease a 9-inch pie plate or cake pan.  Divide the pizza dough into 20-24 roughly equal sized pieces.  Take one of the dough pieces, top with a cube of cheese and a slice or two of pepperoni.  Pull the edges of the dough around the fillings and pinch closed.  Place seam-side down in the baking dish.  Repeat with the remaining dough pieces.
  2. Lightly brush the tops of the dough balls with olive oil.  Sprinkle with Italian seasoning and grated Parmesan cheese.  Bake for 20 minutes, or until the tops are golden brown.  Serve warm, with pizza sauce.

Source: adapted by Annies Eats who was inspired by Chaos in the Kitchen

Cheese Straws


I made these to go along with the Cheeseburger Macaroni. They are full of Parmesan flavor and what I love about them is their lightness. It’s not a heavy bread stick since it’s made with puff pastry so you don’t feel like you are eating tons of carbs. There are endless possibilities for these little babies, Chedder and adobo cheese straws, sun dried tomato, caper, and garlic cheese straws, everything cheese straws, etc… So many choices and they all will be great.

These are perfect for a weeknight dinner because they are quick to put together and quick to bake. Just make sure to have the puff pastry thawing in the refrigerator in the morning before you leave for work.

Cheese Straws

  • 1 (9 by 9 1/2-inch) sheet frozen puff pastry, thawed
  • 2 oz Parmesan or Asiago cheese, grated (1 cup)
  • 1/4 tsp salt
  • 1/8 tsp pepper
  1. Adjust the oven racks to the upper- and lower- middle positions and heat the oven to 425 degrees.
  2. Lay the puff pastry on a sheet of parchment paper and sprinkle with the Parmesan, salt and pepper.
  3. Top with another sheet of parchment and, using a rolling pin, press the cheese into the dough, rolling to shape the dough into a 10-inch square.
  4. Remove the top layer of parchment and, using a sharp knife (or pizza cutter), cut the dough into thirteen 3/4 inch wide strips. Gently twist each strip of dough and transfer to a baking sheet lined with parchment paper, spacing the strips about 1 inch apart.
  5. Bake until the straws are fully puffed and golden brown, about 10 minutes, reversing the position of the baking sheet from top to bottom halfway through baking. Cool for 5 minutes before serving.

Source: The America’s Test Kitchen Family Cookbook