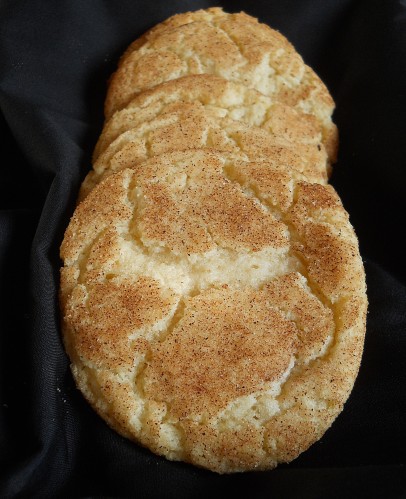
Snickerdoodles

Snickerdoodles are a classic cookie that everyone loves. It’s easy to make and fun to eat or should I say fun to make and easy to eat? Either way they are the perfect cookie to make around the holiday’s; especially if you have kids. My kids love to roll the dough into a ball and roll it into the cinnamon sugar. We had a really good time in the kitchen baking these and I know you will too.

Snickerdoodles:

  • 2 1/2 cups all-purpose flour
  • 2 tsp cream of tartar
  • 1 tsp baking soda
  • 1/2 tsp salt
  • 8 tbs (1 stick) unsalted butter, softened
  • 1/2 cup vegetable shortening
  • 1 3/4 cups granulated sugar
  • 2 large eggs, room temperature
  • 1 tbs ground cinnamon
  1. Adjust oven rack to middle position and heat oven to 375 degrees. Line 2 baking sheets with parchment paper. Combine flour, cream of tartar, baking soda, and salt in a bowl. With electric mixer on medium-high speed, beat the butter, shortening, and 1 1/2 cups sugar until light and fluffy, 2 minutes. Add eggs, 1 at a time, mixing after each until well incorporated. Reduce speed to low, add flour mixture, and mix until just combined.
  2. Combine cinnamon and remaining sugar in a bowl. Roll dough into 1 1/2 inch balls with moistened hands (we found that we did not need to have wet hands) toss in cinnamon sugar to coat, then place 2 inches apart on prepared baking sheets. Bake each sheet separately until edges are light golden brown and centers are soft and puffy, 10 to 12 minutes, rotating each sheet halfway through baking. Cool 10 minutes, then transfer to wire rack to cool completely.

Source: Americas Test Kitchen Holiday Cookies 2010

Beef and Barley Soup

I love making soup because it’s so versatile. You can adjust any of the ingredients to your own personal liking or add things as you wish. Beef and Barley is one of my families favorites. When I make soup I usually just throw it together. But I wanted to share with you our favorite soup so I made sure to write down everything I did so I could pass it on to you. Please feel free to adjust this to your taste.

Beef and Barley Soup:

Serves 4-6 people.

  • 1 1/2 – 2lbs cubed stew meat
  • 4 tbs Olive Oil
  • Salt and Pepper
  • 2 carrots, diced small
  • 1 onion, diced small
  • 1 garlic clove chopped finely
  • 1/2lb-3/4lb fresh green beans, ends cut off and cut into small pieces
  • 1 (15oz) canned corn, drained
  • 1 bay leaf
  • 1/2 tsp fresh thyme, chopped
  • 1 (14oz) can diced tomatoes
  • 1/4 cup red wine (or beef broth to deglaze)
  • 2 (32oz) Beef Broth
  • 1 (32oz) Chicken Broth
  • 3/4 cup instant barley
  1. Heat a large pot over medium-high heat, add 2tbs olive oil. Salt and Pepper the cubed beef. Once the oil is hot, add the cubed beef in batches and brown on all sides, about 2 minutes per side. Remove from pan and continue browning the meat till all the meat is browned.
  2. Lower the heat to medium and add the remaining 2tbs of olive oil and the carrots and onion; saute till softened, about 7-8 minutes. Add the garlic and cook till fragrant, about 30 seconds. Add the wine (or beef broth) to deglaze the pan. Let simmer for about 2 minutes.
  3. Add the beef and chicken broth,(If you need to add more broth, use chicken broth) bay leaf, fresh thyme, canned corn, green beans, and diced tomatoes. Let simmer on low for about 1 1/2 hours. Add the barley for the last 20 minutes of cooking. Remove the bay leaf before serving. Enjoy!

Source: Gina Marie Original

Pot Roast with Creamy Mashed Potatoes

Not sure how many of you are like I was when it came to pot roast. I’ve made it every which way and I was never thrilled about any of them. Some turned out good but there were things missing in it that didn’t give it the punch I was searching for. Turns out I was over-thinking it too much and putting too many things in it. Pot Roast needs only simple ingredients and minimal spices. When I saw Pioneer Woman’s recipe for pot roast I figured I’d give it try. She has created what I believe to be the perfect pot roast. I used to always cook the potatoes with the roast but I never really did like them. They were always mushy and somehow flavorless. Instead of cooking the potatoes with the roast, serve the roast over mashed potatoes. It’s brilliant and exactly how this meal should always be served.

The biggest test of the meal was my husband. He’s not a big pot roast fan but the guy does love his food to be saucy and this recipe creates a wonderful sauce. He really liked it and he won’t wince anymore when I tell him we are having pot roast for dinner.

*Side note* The recipe for mashed potatoes is perfect to serve for holiday’s. I made them the day before Thanksgiving and when I served them for dinner they were just as creamy as the day I made them.

Pioneer Woman’s Pot Roast:

  • 1 whole (4 To 5 Pounds) Chuck Roast
  • 2 Tablespoons Olive Oil
  • 2 whole Onions
  • 6 whole Carrots (Up To 8 Carrots)
  • Salt To Taste
  • Pepper To Taste
  • 1 cup Red Wine (optional, You Can Use Beef Broth Instead)
  • 2 cups To 3 Cups Beef Stock
  • 3 sprigs Fresh Thyme, or more to taste
  • 3 sprigs Fresh Rosemary, or more to taste
  1. Salt and pepper your chuck roast (make sure to get a nice marbled piece of meat, the fat adds flavor). Heat a large pot or Dutch oven over medium-high heat. Then add 2 to 3 tablespoons of olive oil (or you can do a butter/olive oil split).
  2. Cut two onions in half and cut 6 to 8 carrots into 2-inch slices (you can peel them, but you don’t have to). When the oil in the pot is very hot (but not smoking), add in the halved onions, browning them on one side and then the other. Remove the onions to a plate.
  3. Throw the carrots into the same very hot pan and toss them around a bit until slightly browned, about a minute or so.
  4. If needed, add a bit more olive oil to the very hot pan. Place the meat in the pan and sear it for about a minute on all sides until it is nice and brown all over. Remove the roast to a plate.
  5. With the burner still on high, use either red wine or beef broth (about 1 cup) to deglaze the pan, scraping the bottom with a whisk to get all of that wonderful flavor up.
  6. When the bottom of the pan is sufficiently deglazed, place the roast back into the pan and add enough beef stock to cover the meat halfway (about 2 to 3 cups). Add in the onion and the carrots, as well as 3 or 4 sprigs of fresh rosemary and about 3 sprigs of fresh thyme.
  7. Put the lid on, then roast in a 275F oven for 3 hours (for a 3-pound roast). For a 4 to 5-pound roast, plan on 4 hours. Serve over mashed potatoes.

Creamy Mashed Potatoes:

  • 5 pounds Russet Or Yukon Gold Potatoes
  • 3/4 cups Butter
  • 1 package (8 Oz.) Cream Cheese, Softened
  • 1/2 cup (to 3/4 Cups) Half-and-Half
  • 1/2 teaspoon (to 1 Teaspoon) Lawry’s Seasoned Salt
  • 1/2 teaspoon (to 1 Teaspoon) Black Pepper
  1. Peel and cut the potatoes into pieces that are generally the same size. Bring a large pot of water to a simmer and add the potatoes. Bring to a boil and cook for 30 to 35 minutes. When they’re cooked through, the fork should easily slide into the potatoes with no resistance, and the potatoes should almost, but not totally, fall apart.
  2. Drain the potatoes in a large colander. When the potatoes have finished draining, place them back into the dry pot and put the pot on the stove. Mash the potatoes over low heat, allowing all the steam to escape, before adding in all the other ingredients.
  3. Turn off the stove and add 1 ½ sticks of butter, an 8-ounce package of cream cheese and about ½ cup of half-and-half. Mash, mash, mash! Next, add about ½ teaspoon of Lawry’s Seasoning Salt and ½ a teaspoon of black pepper.
  4. Stir well and place in a medium-sized baking dish. Throw a few pats of butter over the top of the potatoes and place them in a 350-degree oven and heat until butter is melted and potatoes are warmed through.
  5. Note: When making this dish a day or two in advance, take it out of the fridge about 2 to 3 hours before serving time. Bake in a 350-degree oven for about 20 to 30 minutes or until warmed through.


Source: Pioneer Woman’s Pot Roast and Mashed Potatoes

Thanksgiving Menu

I have been working on my Thanksgiving menu and I’m so excited about it. If you are stumped with what to make I am here to help. I will share with you what I’ll be serving and other recipes that you might like. There are some recipes I do not have links to and those are the ones that I have yet to post about but I do plan to.

If this is your first time hosting Thanksgiving, please don’t stress. It’s really all in the planning. Plan your menu ahead of time and then break it down. You do not need to be cooking all day on Thanksgiving. I like to enjoy the day and spend time with my family and watch the Macy’s Thanksgiving Day Parade along with football. To help you out, I will share with you how I’ll be planning the days to Thanksgiving.

Sunday:

  • Make Parker House Rolls and Freeze

Monday:

  • Make Spinach Dip
  • Make Cranberry Compote
  • Prepare napkins and table cloths (iron if necessary)

Tuesday:

  • Make Pumpkin Cream Pie
  • Make Apple Pie
  • Make Cranberry and Apple Cake

Wednesday:

  • Brine the Turkey
  • Make Green Rice and Bake
  • Make Mashed Potatoes
  • Make Spiced Apple Cider
  • Make Sweet Potatoes and Apples and Bake
  • Cut veggies for tray
  • Set the tables

Thanksgiving Day:

Morning:

  • Roast Turkey
  • Make Brie en Croute
  • Make Stuffing
  • Mix the Spiced Apple Cider with Wine to make Sangria
Afternoon:
  • Roast Brussel Sprouts
  • Reheat All Side Dishes
  • Throw rolls into oven
  • Carve Turkey and enjoy dinner
Now here is my menu along with other dishes you might like. 

Appetizers:
*Brie en Croute
*Veggie tray
*Cocktail Shrimp (already cooked and frozen)
Special Drink:
*Spiced Apple Cider Sangria
Main Course and Sides:
*Brined Turkey
*Mashed Potatoes
*Roasted Brussel Sprouts
*Cranberry Compote
Dessert:
*Pumpkin Cream Pie
*Apple Pie
*Cranberry and Apple Cake
*I will be serving

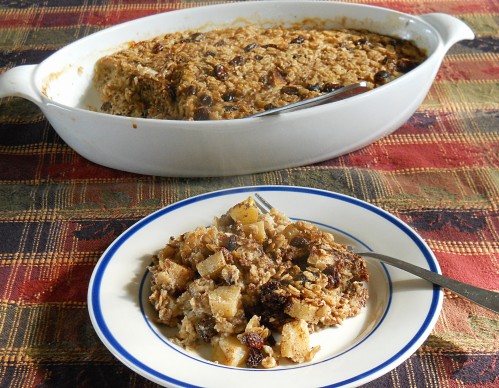
Baked Apple Cinnamon and Raisin Oatmeal

The holiday’s are fast approaching and most of us will either be visiting family or family will be visiting you. If it’s the latter, you will want a fast and easy breakfast to put together for your crowd.

This baked oatmeal is just the thing. If you aren’t a huge fan of oatmeal, I think you might like this. It does not taste like your typical bowl of flavorless oatmeal. It takes only minutes to put together and the combination of oatmeal, cinnamon, apples and raisin’s makes it taste amazing.


On a side note: I don’t do this sort of thing but in light of the recent events surrounding my beloved Penn State, I feel compelled to post this. I am truly sad and heartbroken about the abuse and cover-up of the sex-abuse allegations. I believe we need to keep remembering the victims in all of this and I am proud to see a movement by Penn State alumni to raise money for abuse victims. I am providing a link to the organization of RAINN which provides help to sexual abuse victims. If you want to donate, please do. If not, that’s ok too. Please keep all victims in your prayers. Thank you.

#ProudPSUforRAINN

Baked Apple Cinnamon and Rasin Oatmeal:

  • 1 cup old fashioned oats
  • 1.25 tsp. cinnamon
  • 1/4 tsp. cloves
  • 1/8 tsp. ginger
  • a couple grates of whole nutmeg or 1/8 tsp. ground nutmeg
  • pinch of salt
  • 1/2 tsp. baking powder
  • 1/4 cup Tbsp. maple syrup
  • 1 cup milk (I used skim)
  • 1 large egg
  • 2 Tbsp. unsalted  butter, melted and slightly cooled
  • 1 tsp. vanilla
  • 1 apple, peeled, cored and diced into 1/2 inch pieces
  • 1/2 cup raisins
  1. Preheat oven to 375 degrees.  Grease or spray a 2-quart casserole dish with either butter or cooking spray.
  2. In a medium bowl, toss together the oats, baking powder, cinnamon, and salt.  In a separate small bowl, whisk together the maple syrup, milk, egg, the melted butter, and the vanilla.
  3. Place the diced apples in a single layer in the bottom of the prepared casserole dish.  Sprinkle about two-thirds of the raisins over the top of the apples, then cover the fruit with the oat mixture.  Drizzle the milk mixture over the oats, making sure to distribute the milk as evenly as possible.  Sprinkle the remaining raisins over the top of the oats.  Bake the oatmeal for 35-45 minutes, until the top is golden brown and the oats have set.
  4. Remove the oatmeal from the oven and serve hot with more maple syrup.

Source: Ella Says Opa via Supernatural Everyday by Heidi Swanson, and Smells Like Home


Chicken and Dumplings

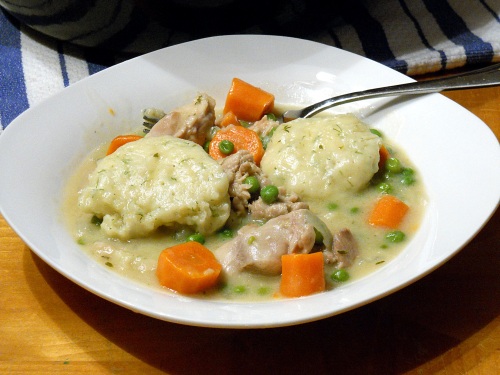
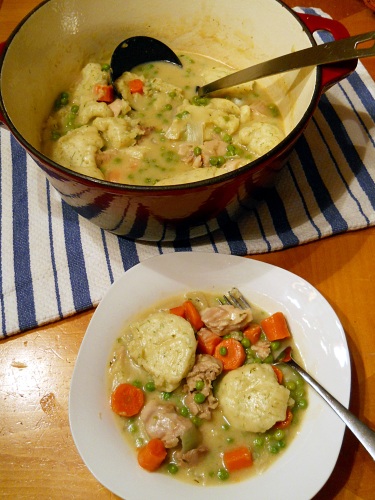
I’ve been on a sweet kick lately so it’s time for something savory. The weather has turned cold and we even had our first big snow storm of the season last week. When there is 5-6 inches of snow in your yard you want something warm and comforting. This is where chicken and dumplings comes into play. Most chicken and dumplings can be very bland and not at all impressive. I’ve found a recipe that is neither one of those. Everything is full of flavor even down to the dumplings. I was impressed how the dill dumplings complimented the chicken stew. My whole family loved this and it’s now a regular in our house.

Chicken and Dumplings:

  • 3 tablespoons butter
  • 1 medium onion, cut into 1-inch pieces
  • 5 medium carrots, cut crosswise into 1 1/2-inch pieces
  • 1/2 teaspoon dried thyme
  • 1 cup (spooned and leveled) all-purpose flour
  • 1 can (14.5 ounces) reduced-sodium chicken broth
  • Coarse salt and freshly ground pepper
  • 1 1/2 pounds boneless, skinless chicken thighs, cut into 2-inch pieces
  • 2 tablespoons chopped fresh dill, or 3/4 Teaspoon dried dill weed
  • 1 3/4 teaspoons baking powder
  • 1/2 cup plus 2 tablespoons milk
  • 1 package (10 ounces) frozen peas
  1. In a Dutch oven (or a 5-to-6-quart heavy pot with a tight-fitting lid), heat butter over medium. Add onion, carrots, and thyme. Cover and cook, stirring occasionally, until onion is soft, about 5 minutes. Add 1/4 cup flour and cook, stirring, 30 seconds. Add broth and bring to a boil, stirring constantly; season with salt and pepper. Nestle chicken in pot; reduce heat to medium-low. Cover and cook, stirring occasionally, 20 minutes.
  2. Meanwhile, make dumplings: In a medium bowl, whisk together remaining 3/4 cup flour, dill, baking powder, and 1/2 teaspoon salt. With a fork, gradually stir in 1/2 cup milk to form a moist and soft batter. It should be just a little thicker than pancake batter and should easily drop from the tip of a spoon. (Add additional 2 tablespoons milk if too thick.) Set aside.
  3. Stir peas into pot. Drop batter in simmering liquid in 10 heaping tablespoonfuls, keeping them spaced apart (dumplings will swell as they cook). Cover, and simmer until chicken is tender and dumplings are firm, 20 minutes. Serve.

Pumpkin Whoopie Pies

Do you know what today is? It’s National Pumpkin Day!! Yes, only the coolest food day of the year. I have to tell you, I was on the phone with my best friend this morning while I was at the grocery store. I was passing the canned pumpkins and said to her that I could never have enough of canned pumpkin. She called me out on my pumpkin obsession. The first step is to admit when you have a problem, but to me this is not a problem. Being obsessed with pumpkin is very sane. Pumpkin has many vitamins and other qualities that are really good for you. So, having a healthy obsession is good. How can you turn something so good into something so sinful? Make these pumpkin whoopie pies.

I’ve been searching for the perfect pumpkin whoopie pie. I’ve made several different recipes from Martha Stewart to old Amish recipes and I was never really happy with any of them. My dear friend Angie from Florida has been perfecting the whoopie pie. She is now selling her pies in a restaurant and I am so proud of her. I asked if she would share her recipe for the pumpkin one with me. And I was so happy she was willing to give it to me and that I can pass them off to you.

I don’t even know where to begin, these are seriously the best pumpkin whoopie pies you ever make/eat. They are moist and full of flavor and just plain awesome. I love the icing the best. The vanilla flavor in the icing compliments the pumpkin very nicely. I did keep them in the refrigerator and I loved eating them cold. You can also make any size whoopie pies you want. I experimented and made small ones (with a cookie scoop) and big ones (with an ice cream scoop). They all turned out perfect.

If you are wanting to pumpkin whoopie pies, do not use any other recipe, this is the one you want.

Pumpkin Whoopie Pies:

  • 2 sticks unsalted butter, softened
  • 2 cups dark brown sugar
  • 2 eggs
  • 1 15oz can of pumpkin
  • 1/2 cup buttermilk
  • 2 tsp baking soda
  • 2 tsp salt
  • 1 tsp cinnamon
  • 1 tsp nutmeg
  • 1/2 tsp cloves
  • 1/4 tsp ground ginger
  • 4 cups flour
  1. Preheat oven to 400 degrees and line baking sheets with parchment paper.
  2. In a large bowl, whisk together flour, baking soda, salt, cinnamon, cloves, nutmeg and ground ginger, set aside.
  3. In a bowl of an electric mixer fitted with the paddle attachment (or hand mixer), cream together the butter and the brown sugar. Once combined; add the eggs, pumpkin and buttermilk, scraping the sides of the bowl as needed.
  4. Add the flour mixture in a couple batches; scraping down the sides of the bowl between additions. Do not over-mix.
  5. Using an ice cream scoop (or any size scoop you want) scoop out the batter on the lined cookie sheets, spacing them 2 inches apart. With slightly wet fingers, flatten the tops and shape them if you need to. (they really puff up) Bake for 8-10 minutes or until the center is firm and comes out clean with a toothpick and the bottoms are a light brown. Do Not Overbake! Let cool on the baking sheet for a couple minutes and transfer to a cooling rack.
  6. Once the pies are cooled and ready; match up the pies and spread or pipe the icing on one side then sandwich with the matching piece. Enjoy!
Icing:
  • 3 sticks butter, salted softened (I only had unsalted and it tasted great)
  • 1/4 cup milk
  • 1/4 cup flour
  • 2 TBS vanilla
  • 4 cups Confectioners sugar
  1. In a bowl fitted with paddle attachment (or hand mixer), cream together the butter, milk, flour and vanilla. Add the confectioner sugar and beat together till light and fluffy, about 4-5 minutes.
Source: My dear and wonderful friend Angie Scarpelli