Creamy Chicken and Spinach Casserole

I think I might have a new goal; trying to make as many dishes I can out of the America’s Test Kitchen Healthy Family Cookbook. I have made a handful of recipes so far and they all have been really good. The biggest plus is that they are healthier for you. The newest one I tried was the Creamy Chicken and Spinach Casserole. I ended up doubling the recipe to make sure we had enough for everyone and it doubled nicely. The only thing I didn’t double was the spinach. I felt the one box of frozen chopped spinach I had was just enough for the dish. If I would have added another 10 oz box, it would have overpowered the dish. The kids and hubby really enjoyed it and my son had more than his fair share so I’m glad I doubled it.

Creamy Chicken and Spinach Casserole:

Serves 4

  • 1 1/2 tbs olive oil
  • 12 ounces boneless, skinless chicken breasts, trimmed and sliced thin
  • 1 onion, minced
  • 3 garlic cloves, minced
  • 1/8 tsp red pepper flakes
  • 2 tbs all-purpose flour
  • 4 cups 1% lowfat milk
  • 1 bay leaf
  • 1/2 cup grated Parmesan cheese
  • 2 tsp fresh lemon juice
  • 10 oz frozen spinach, thawed, squeezed dry and chopped coarse. (chopped spinach is also good)
  • Salt and Pepper
  • 8 oz whole-wheat penne
  • 1/2 cup shredded part-skim mozzarella cheese (about 2 oz)
  1. Adjust an oven rack to the middle position and heat the oven to 425 degrees. Lightly coat an 8 inch square baking dish with vegetable oil spray and set aside.
  2. Heat 1 1/2 tsp of the oil in a 12 inch nonstick skillet over high heat until just smoking. Add the chicken, break up any clumps, and cook until lightly browned but not fully cooked, about 3 minutes. Transfer to a bowl.
  3. Add the remaining tablespoon oil to the skillet and return medium heat. Add the onion and cook until softened, about 5 minutes. Stir in the garlic and red pepper flakes and cook until fragrant, about 30 seconds.
  4. Stir in the flour and cook for 1 minute. Slowly whisk in the milk and bay leaf and bring to a simmer. Cook, stirring occasionally, until the sauce has thickened slightly, about 10 minutes.
  5. Return the chicken with any accumulated juice to the skillet. Simmer until the chicken is cooked through, about 1 minute. Off the heat, discard the bay leaf and stir in the Parmesan and lemon juice. Stir in the spinach, breaking up any clumps, until well combined. Season with salt and pepper to taste.
  6. Meanwhile, bring 4 quarts water to a boil in a large pot. Add the pasta and 1 tbs salt and cook, stirring often, until almost al dente but still firm to the bite. Reserve 1/4 cup of the cooking water, then drain the pasta and return it to the pot.
  7. Add the chicken-spinach mixture and reserved cooking water to the pasta and toss to combine. Pour the pasta into prepared baking dish and sprinkle evenly with the mozzarella. Bake until the sauce is bubbling and the cheese is lightly browned, about 15 minutes. let cool for 5 minutes before serving.

Source: America’s Test Kitchen Healthy Family Cookbook

Chicken Enchilada Wraps

I have had these bookmarked ever since I saw them on Annie’s Eats a year ago. I was waiting for the right time to make them. When I started planning my sister-in-laws baby shower I knew it was time to bring out the chicken enchilada wraps. I decided to triple the recipe to make sure we had enough for our guests. I was a little worried about tripling the spices and ended up cutting back a bit on the Chile powder and Cayenne pepper. When we tasted the chicken filling my daughters and husbands mouth were a tad bit on fire. They are more sensitive to the spicy heat than I am, so I always go by what they tell me when it comes to serving something to others. I sat there trying to figure out what to do. I had already added all the ingredients to the filling and didn’t have anymore cream cheese to add to it. What could I do to take some of the heat away? I looked through the refrigerator and saw sour cream. I added small amounts at a time till it finally worked. I actually think the addition of the sour cream helped round the flavors out even more. I love how things work out just when you think it’s ruined. And thankfully everyone at the shower loved them.

Chicken Enchilada Wraps:

  • 2 chicken breasts, bone-in and skin on
  • Olive Oil
  • Salt and Pepper
  • 1 (8 oz.) pkg. cream cheese, softened
  • 2/3 cup shredded cheese, Mexican blend
  • 1 clove garlic, minced or pressed
  • 2 tsp. chili powder
  • ½ tsp. cumin
  • ¼ tsp. cayenne pepper
  • Salt, to taste
  • Handful of cilantro, chopped
  • 3 green onions, chopped
  • 10 oz. can diced tomatoes with green chiles, drained well
  • 1/4 cup sour cream (optional)
  • 4-6 8-inch tortillas
  1. Preheat oven to 375 degrees.
  2. Place chicken breasts on a baking sheet. Rub each breast with a drizzle of olive oil and sprinkle with salt and pepper. Bake the breasts for 35-45 minutes or until cooked through. Let cool.
  3. Remove the skin and chicken from the bone. Shred the chicken and set aside.
  4. Combine all of the remaining ingredients, except tortillas, in a large mixing bowl.  Mix until well blended. Add the chicken to the filling mixture and stir well to incorporate. Taste and add sour cream, if desired.
  5. Spread a thin layer of the filling mixture over a tortilla, leaving a small border clear around the edge.  Roll the tortilla up tightly into a spiral.  Place the rolled up tortilla on a cutting board and use a sharp knife to cut into 1- to 1½-inch thick segments.  Transfer to a serving platter and serve chilled or at room temperature.

Source: Adapted from Annie’s Eats via Sing for Your Supper, originally from Come On Over Cookbook1 from Gooseberry Patch

Baby Shower 2011

Over the weekend we had my sister-in-law’s baby shower. I co-hosted the shower with my mother-in-law. We have been planning for months and finally it all came together exactly how we planned. Later this week I’ll post the recipes to some of the dishes we served but for now I’m going to give you highlights from the day.

Here I am with the beautiful and pregnant Mandi. My niece is there too but you can’t see her yet, she’s still baking.

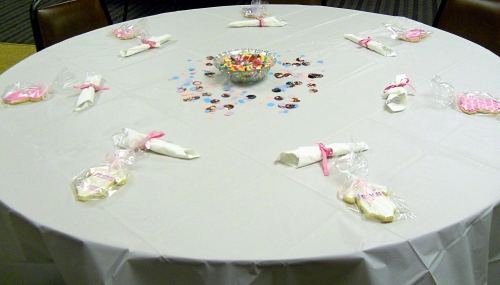
The place settings were onesie sugar cookies and wrapped silverware. I forgot to get a photo of the tables once the white onesies were on them. We put a white onesie with a paper plate placed inside of the onsie at every table, along with fabric markers. Each guest got to draw or write whatever they wanted on the onesie. (I forgot to get photos of that too and will update once I get those). They turned out so dang cute!

Some of the cookies that were placed around the tables. Yumm

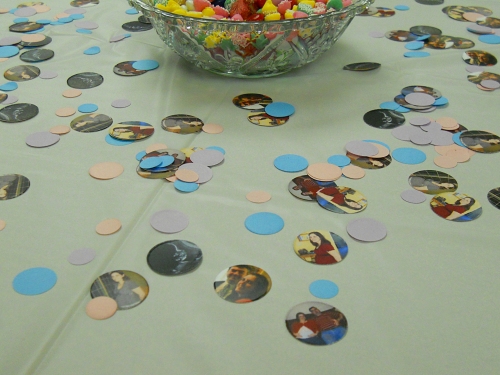
One of the things I was really excited about was this photofetti. You can use any photos you have and have them made into confetti. I got some photos of Mandi pregnant and even used a sonogram photo. They turned out great and were a huge hit.

Let’s get to the important part, the food. Chicken Enchilada Wraps was one of the first things I thought about serving. They turned out so good. I did have to make a few adjustments to the recipe and I’ll get into that later this week.

Spinach Dip was next on the list. Mandi loves it and what mommy wants, mommy gets.

These meatballs are the easiest to prepare and yet taste like you have spent hours on them. Most of you have probably made them or eaten them. The sauce is grape jelly and chili sauce and that’s it. Pour over frozen Italian meatballs, place in crock pot and in a few hours you have the best tasting meatballs.

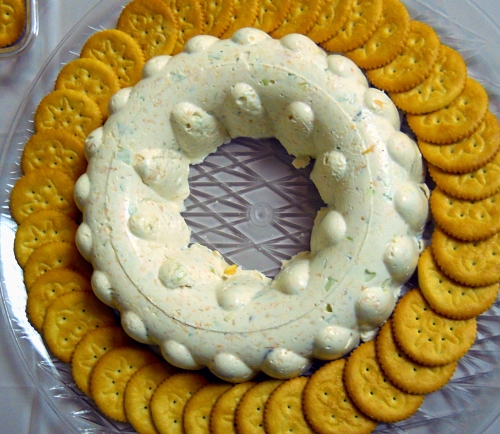
My mother-in-law made the shrimp mousse. The first time I had shrimp mousse was this past Christmas Eve. It’s really easy to put together and it turns out so pretty. Tastes pretty darn good too.

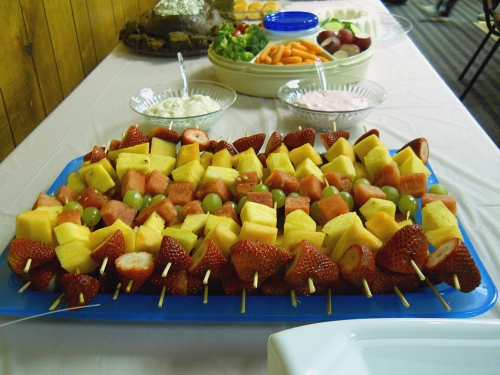
Fruit kabobs are a fun way to present fresh fruit. They are fun to put together even though my daughter kept sticking herself with the skewers.

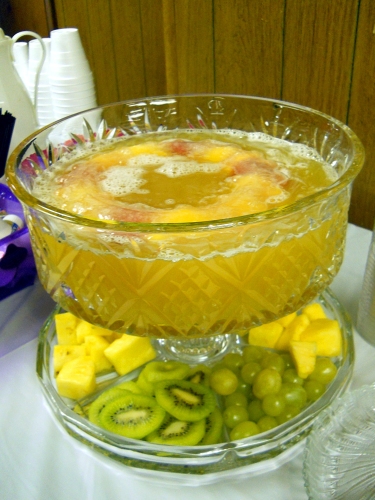
To wash it all down we served “Mock Champagne Punch”. You can find the recipe at Delish. She posted this recipe as I was looking for something other than the typical red fruit juice and 7-up punch. We made a fruit ring to keep the punch cold. We took frozen fruit and filled it with white grape juice so it wouldn’t dilute the punch.

I love this picture. Mandi got so many wonderful things and I hope we gave her a baby shower to remember. Now I sit here patiently waiting for the little bambina to arrive.

Stovetop Chicken Fajitas

We love fajitas in our family and the best way to make them is on the grill. I know there are people out there who will continue to use their grill in the snow and freezing cold; but I am not one of them. That’s why when I saw this recipe I knew I had to try it. Making fajitas on the stove is a great to enjoy them on those really cold snowy days. I had been craving fajitas and these hit the spot. The whole dish came together nicely and we had no leftovers. I served these with a fresh tomato salsa. I can’t wait to make them again.


Stovetop Chicken Fajitas:

  • 2 tsp canola oil
  • 2 red bell peppers, stemmed, seeded, and sliced thin
  • 1 red onion, halved and sliced thin
  • Salt and Pepper
  • 4 (6oz) boneless, skinless chicken breasts, trimmed, pounded so the chicken is all the same thickness
  • 1/2 cup orange juice
  • 3/4 cup minced fresh cilantro
  • 1 tbs Worcestershire sauce
  • 4 garlic cloves
  • 2 tsp minced canned chipotle chile in adobo sauce
  • 1 tsp yellow mustard
  • 1 tomato, cored, seeded and chopped medium
  • 3 scallions, sliced thin
  • 8 whole-wheat flour tortillas, warmed
  1. Heat the oil in a 12-inch skillet over medium high heat until just smoking. Add the bell peppers and onion and cook, stirring occasionally, until softened and well-browned, 5-7 minutes. Transfer to a bowl, season with salt and pepper to taste, and cover to keep warm.
  2. Pat the chicken dry with paper towels and season with salt and pepper. Combine the orange juice, 1/2 cup of the cilantro, Worcestershire, garlic, and chipotles in the skillet. Add the chicken and bring to a simmer over medium-low heat, about 5 minutes. When the liquid is simmering, flip the chicken over, cover, and continue to cook until the chicken registers 160-165 on an instant-read thermometer, 10-12 minutes longer.
  3. Transfer the chicken to a plate and shred it into bite-sized pieces when cool enough to handle. Meanwhile, continue to simmer the sauce over medium heat until slightly thickened and reduced to 1/4 cup, about 5 minutes.
  4. Off the heat, stir in the mustard, tomato, scallions, remaining 1/4 cup cilantro and shredded chicken. Season with salt and pepper to taste, and serve with the pepper-onion mixture and warm tortillas.

Source: America’s Test Kitchen Healthy Family Cookbook

Chicken In A Pot With Thyme and Lemon

The flu bug has officially visited my house. I was the second person to get hit and hopefully the last. I can finally look and think about food again. I was wanting to post this recipe earlier but there was no way I could even think about it. Thankfully I’m on the mend and can start giving you wonderful recipes again.

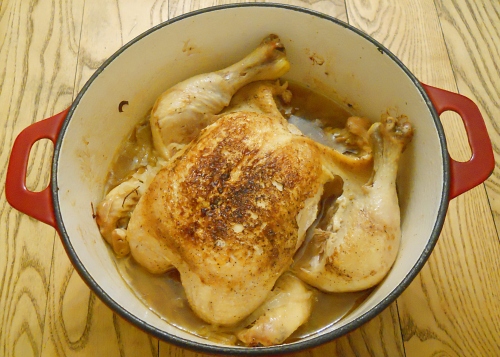
Cooking a whole chicken in a pot is the classic French way to cook a chicken. I’ve never tried it before and I’m so glad I finally made it. I now have my favorite way to cook chicken. The recipe comes from my new America’s Test Kitchen Healthy Family Cookbook, which is now one of my favorites. I loved that everything is cooked in one pot. You brown the chicken with the onions and then throw it in the oven. After 2 hours of baking, I checked the chicken to find it was not done. I decided to crank the temp on the oven to 350 and let it go for 40 minutes. That did the trick, the chicken was cooked perfectly. The sauce was my favorite part of the meal! We spooned it over the chicken and the basmati rice pilaf I made to go along side it. I could have kept eating the sauce with a spoon. This made a great Sunday night dinner for us, but could easily be made during the week.


Chicken in a pot with Thyme and Lemon:

  • 1 (4lb) whole chicken, neck and giblets removed
  • Salt and Pepper
  • 1 tbs extra-virgin olive oil
  • 1 onion, halved and sliced thin
  • 6 garlic cloves, peeled and crushed
  • 1 bay leaf
  • 2-4 sprigs fresh thyme
  • 1 tsp fresh lemon juice
  1. Adjust oven rack to the lower position and heat the oven to 250 degrees. Pat the chicken dry with paper towels, tuck the wings under the chicken. Season with salt and pepper.
  2. Heat the oil in a large Dutch oven over medium-high heat until just smoking. Add the chicken, breast-side down, and scatter the onion, garlic, bay leaf and thyme around the chicken. Brown the chicken on both sides, 10-12 minutes. Turn the chicken breast-side up.
  3. Off the heat, place a large sheet of aluminium foil over the pot and press to seal, then cover tightly with the lid. Transfer the pot to the oven and cook until the breast registers 160 to 165 degrees and the thighs register 175 degrees on an instant-read thermometer, 1 hour 20 minutes to 1 hour 50 minutes.
  4. Transfer the chicken to a carving board, ten loosely with foil, and let rest for 20 minutes. Strain the juices from the pot into a fat separator (if you don’t have one strain them into a bowl and skim off the fat), reserving the strained vegetables. Let the juices settle for about 5 minutes.
  5. Add the defatted juices, strained vegetables, and any accumulated chicken juice back to the pot and bring to a simmer over medium heat. Off the heat, discard the bay leaf and thyme sprigs, stir in the lemon juice, and season with salt and pepper to taste. Carve the chicken and remove the skin. Serve, passing the sauce separately.

Source: America’s Test Kitchen Healthy Family Cookbook

Lemon Chicken Breasts

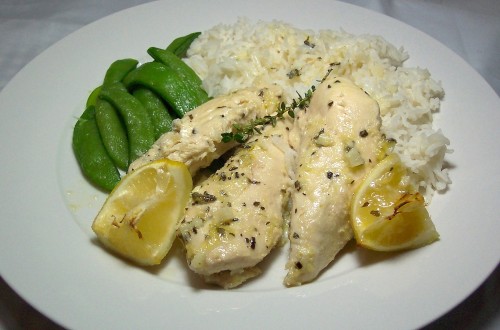
I’m on an Ina Garten “How Easy Is That?” kick. I love her new cookbook! There are so many great and easy recipes in it. I wish now that I had already bought all my Christmas gifts for family, because this cookbook would make a perfect gift for a lot of them. Anyway, I saw the recipe for lemon chicken breasts and I had a lot of the ingredients already. I knew I had bought chicken breasts from Costco a few week backs and pulled them out of the freezer. As I go to make the dish, I realize I didn’t buy chicken breasts but instead bought chicken tenders. Ugh! Well, gotta make the best of the situation so I used the tenders and I don’t think it made one bit of difference. I ended up doubling the recipe because I had a lot of tenders. The sauce is amazing and really made those chicken tenders taste great. I’m looking forward to trying this with chicken breasts next time to see how those turn out.


Lemon Chicken Breasts or Tenders:

  • 1/4 cup olive oil
  • 3 tbs minced garlic (9 cloves)
  • 1/3 dry white wine
  • 1 tbs grated lemon zest (2 lemons)
  • 2 tbs freshly squeezed lemon juice
  • 1 1/2 tsp dried oregano
  • 1 tsp minced fresh thyme leaves
  • Kosher salt and freshly ground pepper
  • 4 boneless chicken breasts, skin on or 1 package of chicken tenders
  • 1 lemon
  1. Preheat oven to 400 degrees.
  2. Warm the olive oil in a small saucepan over medium-low heat, add the garlic, and cook for just 1 minute but don’t allow the garlic to turn brown. Off the heat, add the white wine, lemon zest, lemon juice, oregano, thyme, and 1 tsp salt and pour into a 9×12 inch baking dish.
  3. Pat the chicken breasts dry and place them skin side up over the sauce. Brush the chicken breasts with olive oil and sprinkle them liberally with salt and pepper. Cut the lemon in 8 wedges and tuck it among the pieces of chicken.
  4. Bake for 30-40 minutes, depending on the size of the chicken breasts, until the chicken is done and the skin is lightly browned. If the chicken isn’t browned enough, put it under the broiler for 2 minutes. Cover the pan tightly with foil and allow to rest for 10 minutes. Sprinkle with salt and serve hot with the pan juices.

Source: How Easy is That? by Ina Garten

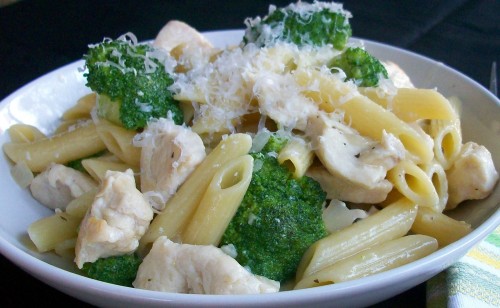
Penne with Chicken and Broccoli

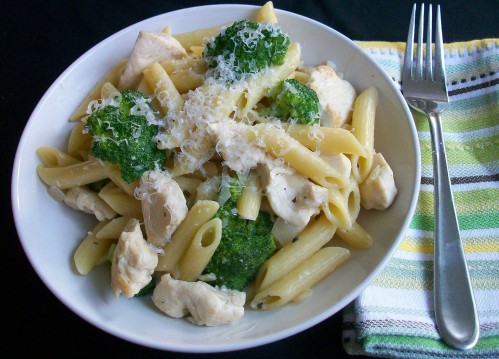
I got a new cookbook awhile back called The Best Skillet Recipes from the editors of Cook’s Illustrated. I love this cookbook! It’s filled with easy recipes you can do in a 12 inch skillet, which makes it perfect for weeknight meals. I have a long list of recipes I want to try and decided to start with Penne with Chicken and Broccoli. Turns out it was a great recipe to begin with. Simple pasta dishes always makes me happy. The whole dish comes together nicely and packs more flavor than I had anticipated. My kids loved this dinner and we didn’t have any leftovers!

Penne with Chicken and Broccoli:

  • 1/4 cup olive oil
  • 1 lb boneless, skinless chicken breasts (about 3 medium) trimmed and sliced thin
  • 1 medium onion, minced
  • Salt
  • 6 medium garlic cloves, minced or pressed through a garlic press (about 2tbs)
  • 1/4 tsp red pepper flakes
  • 1/4 tsp dried oregano
  • 1/2 cup dry white wine
  • 2 1/2 cups water
  • 2 cups low-sodium chicken broth
  • 8 ounces (about 2 1/2 cups) Penne
  • 8 ounces broccoli florets, cut into bite sized pieces (about 3 cups)
  • 2 ounces Parmesan cheese, grated (1 cup) plus extra for serving
  • Ground black pepper
  1. Heat 1 tbs of the oil in a 12-inch nonstick skillet over high heat until just smoking. Add the chicken, break up any clumps, and cook, without stirring, until beginning to brown, about 1 minute. Stir the chicken and continue to cook until cooked through, 2 to 3 minutes longer. Transfer the chicken to a bowl, cover to keep warm, and set aside.
  2. Add 1tbs more oil to the skillet and heat over medium heat until shimmering. Add the onion and 1/2 tsp of salt and cook, stirring often, until softened, 5 to 7 minutes. Stir in the garlic, red pepper flakes, and oregano and cook until fragrant, about 30 seconds. Stir in the wine and simmer until nearly evaporated, 1 to 2 minutes.
  3. Stir in the water and broth, then add the pasta. Increase the heat to high and cook at a vigorous simmer, stirring often, for 12 minutes.
  4. Stir in the broccoli and continue to simmer, stirring often, until the pasta and broccoli are tender and the liquid has thickened, 3 to 5 minutes.
  5. Return the chicken, along with any accumulated juices, to the skillet and cook until warmed through, about 1 minute. Off the heat, stir in the remaining 2 tbs olive oil, Parmesan, and season with salt and pepper to taste. Serve, passing extra Parmesan separately.

Source: The Best Skillet Recipes from the editors of Cook’s Illustrated