Butterscotch Chip Cookies

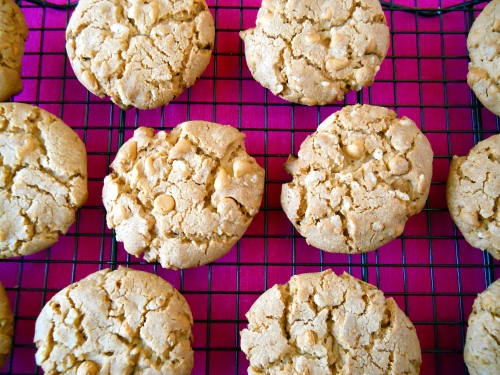
I made these cookies for one of my very best friends. She lives in Omaha and has been a smoker for a very long time. She decided it was time to quit and for several months she has been smoke free. I’m extremely proud of Kiki and asked her what kind of cookies she is craving. She gave me a list of cookies but the one that topped her list was Butterscotch Chip.

So, I began my search for the best recipe I could find. I’ve never made them before so it was kinda new territory for me. But I figured it wouldn’t be much different than chocolate chips cookies. I didn’t want to substitute butterscotch chips in a regular chocolate chip cookie, I wanted the butterscotch flavor to come through. One of the other things Kiki mentioned was a cookie from an old family recipe, she remembered it had rice cereal, coconut and whole bunch of other things. As I was searching I found a recipe that included butterscotch instant pudding and rice cereal, score! It did call for chocolate chips, but this time substituting them for butterscotch would work since there is butterscotch pudding to help enhance that flavor. As I was making the cookies, I realized that the brown sugar I had was as hard as a brick, but I did have Splenda brown sugar. Thankfully that worked out really nice and I ended up with a low sugar cookie that tastes amazing!

Kiki says the cookies tasted great and that they shipped well.

Butterscotch Chip Cookies:

  • 1 1/2 c flour
  • 1 c whole wheat flour
  • 1 tsp baking powder
  • 1 tsp baking soda
  • 1/2 tsp salt
  • 3/4 c  sugar
  • 1 1/4 c brown sugar or 1/2 cup plus 2 tbs Splenda brown sugar
  • 2 eggs, room temp
  • 2 tsp vanilla
  • 1 Tbsp milk
  • 1 tsp nutmeg
  • 1 c butter flavored shortening
  • 1 pkg butterscotch-flavored sugar free instant pudding mix
  • 2 Tbsp honey
  • 1 1/2 c rice cereal
  • 1 1/2 – 2 c butterscotch chips
  1. Preheat the oven to 350F and line two baking sheets with parchment paper.
  2. In a large bowl, mix together the flours, baking soda, baking powder and salt. Set aside.
  3. In a small bowl, combine the sugars using a fork to break up any lumps in the brown sugar. Set aside.
  4. In yet another small bowl, beat the eggs, vanilla, milk and nutmeg, on high until light and fluffy.
  5. In the bowl of a stand mixer fitted with paddle attachment, beat the shortening until it’s fluffy. Add half of the sugar and beat until incorporated, then add the second half. Beat on high until grainy, about 3 minutes. Add in the pudding mix and beat until combined.
  6. Pour in half of the egg mixture and beat until incorporated. Repeat with the second half, being sure to scrape the bowl. Drizzle in the honey and beat until fluffy.
  7. Add 1/3 of the dry ingredients and mix on low speed until just incorporated. Scrape the sides of the bowl and repeat, adding the rest of the dry ingredients in two portions. Gently fold in the oats and chocolate chips.
  8. Portion dough into approximately 1/4 c balls (or use a 1 3/4 oz disher) and place on baking sheets about 2 inches apart. Bake for 15-17 minutes, until the edges just begin to brown. Transfer sheets to cooling racks and allow cookies to cool on the sheets for about 5 minutes before transferring to cooling racks.

Source: Slightly adapted from Whisk-Kid
Onesie Sugar Cookies

I had been planning on making these onesie sugar cookies as soon as my sister-in-law said she was pregnant. I knew they would make the perfect party favor for everyone to take home from the shower. Making decorative sugar cookies takes time and devotion. You just can’t roll, cut, bake and decorate in one day. It takes a lot planning ahead of time. I had never made 55 cookies at one time before so I was unsure how much time I needed. I spent roughly 9 hours working on the cookies. That is from beginning to end. Knowing this, I’ll be able to plan even better for the next time I have to make so many.

One of my biggest set backs while making the cookies was the first batch I was trying to roll out. The darn cookies wouldn’t come together. They kept crumbling even though I kneaded and kneaded them like crazy. I went back to review the recipe and found I did a few things wrong. First, I didn’t cream the butter and sugar long enough. As I was kneading the cookies I could feel a lot of grit on my fingers, that tells me the creaming wasn’t done properly. Second, the original recipe calls for at least 1 tsp of vanilla and I was using half that. Once I creamed the butter and sugar better and added more vanilla, the rest of the batches worked out great.

The most fun I had was trying to figure out patterns and designs for the cookies. I wanted them all to be different and unique in their own way.

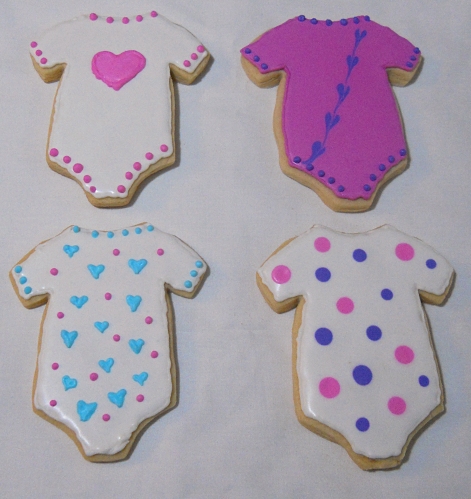
Polka dots are so much fun. I work with 6 cookies at a time. After all the cookies are outlined with the stiffer icing, it’s time to flood. Thinned out royal icing is what you use to “flood” the cookies. Once you have 6 cookies flooded, go back to the first one; take another color of thinned icing and put one drop of that on the already wet cookie. The drop will blend into the icing. Continue to do that till you have it like you want.

Accidents happen and when they do you just go with the flow. That’s what I did with the cookie in the upper right. My original plan was a polka dot cookie, but the last drop I did had a tail on it. There was no way I could leave it that way. I took a toothpick and connected all the dots by dragging the toothpick to each dot. I used the same method to make the hearts. I dropped 5 drops of pink thinned icing on the white cookie and dragged a toothpick down to create those hearts you see on the cookie in the lower left corner.

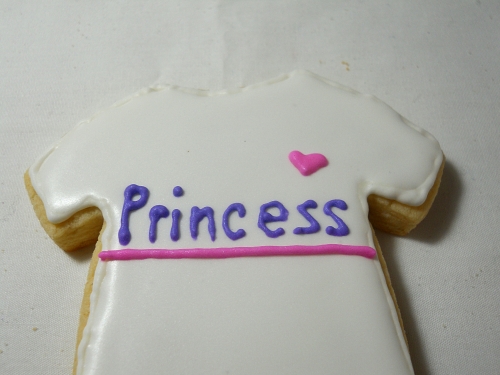
I’m still working on the writing part. Not quite happy with how some of the ones I wrote on turned out. But as I tell my kids, practice makes perfect.

Sugar Cookies:

  • 3 c unbleached, all-purpose flour
  • 2 tsp baking powder
  • 1 c sugar
  • 2 sticks cold butter, cut into cubes
  • 1 egg
  • 1 tsp pure vanilla extract
  • 1/2 tsp pure almond extract
  1. Preheat oven to 350.
  2. Combine the flour and baking powder, set aside. Cream the sugar and butter. Add the egg and extracts and mix. Gradually add the flour mixture and beat just until combined, scraping down the bowl, especially the bottom.
  3. Roll onto a floured surface and cut into shapes. Place on parchment lined baking sheets and bake for 10-12 minutes. Let sit a few minutes on the sheet, then transfer to a cooling rack.


Royal Icing:

  • 4 TBSP meringue powder
  • scant 1/2 c. water
  • 1 lb. powdered sugar
  • 1/2 tsp light corn syrup
  • few drops clear extract (I use almond extract)
  1. Combine the meringue powder and water. With the paddle attachment of an electric mixer, beat until combined and foamy.
  2. Sift in the powdered sugar and beat on low to combine. (Do NOT skip the sifting!)
  3. Add in the corn syrup and extract.
  4. Increase speed to med-high/high and beat for about 5 minutes, just until the icing is glossy and stiff peaks form.
  5. Cover with plastic wrap touching the icing or divide and color using gel paste food colorings.

Source: Cookies Bake at 350 Royal Icing and Techniques Bake at 350


Baby Shower 2011

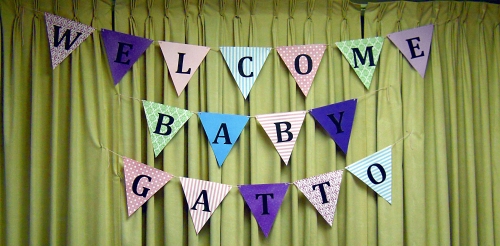
Over the weekend we had my sister-in-law’s baby shower. I co-hosted the shower with my mother-in-law. We have been planning for months and finally it all came together exactly how we planned. Later this week I’ll post the recipes to some of the dishes we served but for now I’m going to give you highlights from the day.

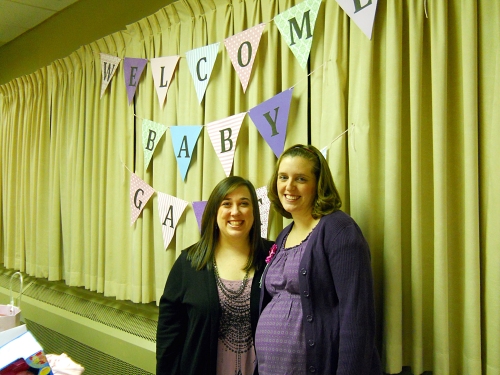
Here I am with the beautiful and pregnant Mandi. My niece is there too but you can’t see her yet, she’s still baking.

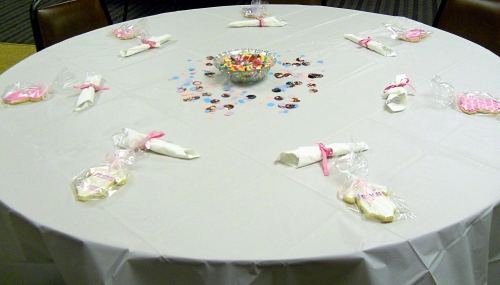
The place settings were onesie sugar cookies and wrapped silverware. I forgot to get a photo of the tables once the white onesies were on them. We put a white onesie with a paper plate placed inside of the onsie at every table, along with fabric markers. Each guest got to draw or write whatever they wanted on the onesie. (I forgot to get photos of that too and will update once I get those). They turned out so dang cute!

Some of the cookies that were placed around the tables. Yumm

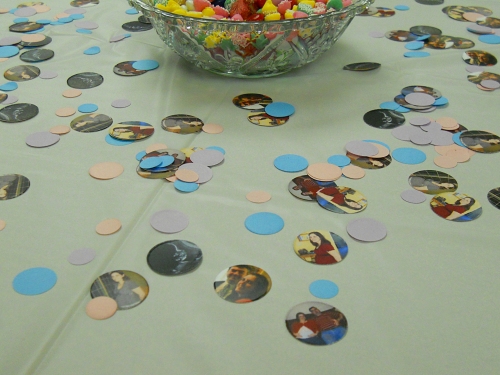
One of the things I was really excited about was this photofetti. You can use any photos you have and have them made into confetti. I got some photos of Mandi pregnant and even used a sonogram photo. They turned out great and were a huge hit.

Let’s get to the important part, the food. Chicken Enchilada Wraps was one of the first things I thought about serving. They turned out so good. I did have to make a few adjustments to the recipe and I’ll get into that later this week.

Spinach Dip was next on the list. Mandi loves it and what mommy wants, mommy gets.

These meatballs are the easiest to prepare and yet taste like you have spent hours on them. Most of you have probably made them or eaten them. The sauce is grape jelly and chili sauce and that’s it. Pour over frozen Italian meatballs, place in crock pot and in a few hours you have the best tasting meatballs.

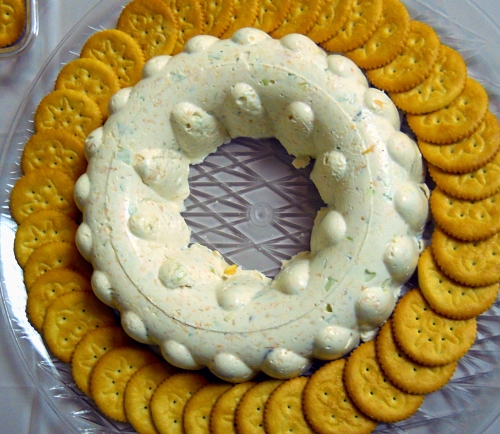
My mother-in-law made the shrimp mousse. The first time I had shrimp mousse was this past Christmas Eve. It’s really easy to put together and it turns out so pretty. Tastes pretty darn good too.

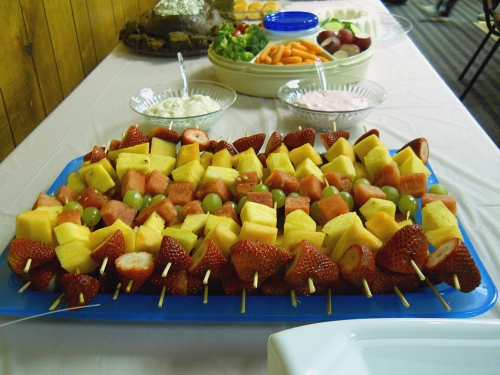
Fruit kabobs are a fun way to present fresh fruit. They are fun to put together even though my daughter kept sticking herself with the skewers.

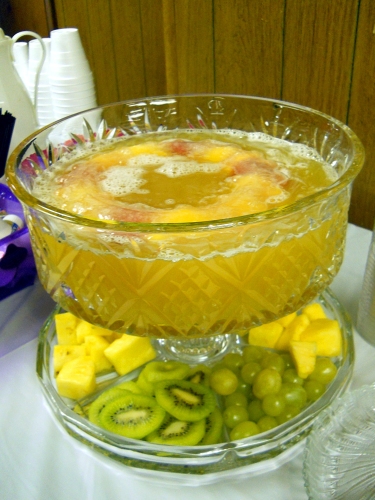
To wash it all down we served “Mock Champagne Punch”. You can find the recipe at Delish. She posted this recipe as I was looking for something other than the typical red fruit juice and 7-up punch. We made a fruit ring to keep the punch cold. We took frozen fruit and filled it with white grape juice so it wouldn’t dilute the punch.

I love this picture. Mandi got so many wonderful things and I hope we gave her a baby shower to remember. Now I sit here patiently waiting for the little bambina to arrive.

Peanut Butter and Jelly Bars

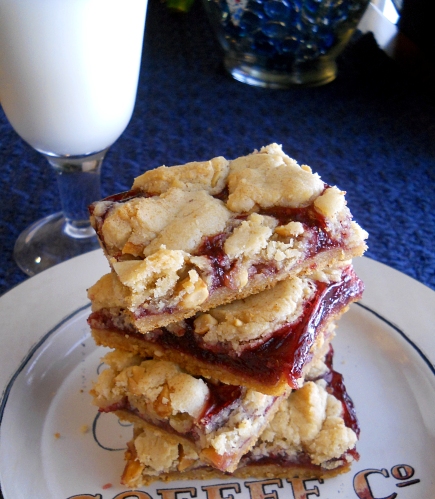
I made these yesterday and there was no way I could wait to share it with you. I’ve been wanting to make PB&J bars for awhile now but I was looking for the right recipe. For Christmas, I got three awesome new cookbooks. One of them is the America’s Test Kitchen Healthy Family Cookbook. I have the regular one and thought the healthy would make a great addition. Man, was I right! The recipes in the cookbook are fantastic! They did a great job at lowering fat and calories on a lot of popular dishes. The PB&J bars have less butter which cut down on the fat. As I was making them I was getting excited, everything was looking really good and smelling even better. It made the whole house smell like one big PB&J sandwich.

I regret only one thing…Not making a double batch! From now on I will be doubling the recipe and baking them in a 9×13 dish instead of an 8×8. When you make these, I recommend you do the same.


Peanut Butter and Jelly Bars:

  • 3/4 cup unbleached all-purpose flour
  • 1/2 tsp baking powder
  • 1/2 tsp salt
  • 3/4 cup sugar
  • 3 tbs unsalted butter, softened
  • 1 large egg
  • 1/4 cup crunchy peanut butter, room temperature
  • 1/2 tsp vanilla extract
  • 1/4 cup salted dry-roasted peanuts, coarsely chopped
  • 1 cup raspberry jam (I used sugar free )
  1. Adjust oven rack to the middle position and heat the oven to 350 degrees. Line an 8-inch square baking pan with aluminum foil, with enough overhang to be able to lift the bars out when cooked. Lightly coat the foil with vegetable oil spray. Whisk the flour, baking powder, and salt together in a bowl.
  2. In a large bowl, beat the sugar and butter together using an electric mixer on medium speed until uniform and creamy, 3 to 6 minutes. Beat in the egg, followed by the peanut butter and vanilla, until incorporated, about 30 seconds, scraping down the bowl and beaters as needed. Reduce the mixer speed to low and slowly add the flour mixture until just incorporated, about 30 seconds.
  3. Reserve half of the dough for the topping. Using damp hands, press the remaining dough evenly into the prepared baking pan. Bake until the crust is light golden, about 20 minutes, rotating the pan halfway through baking. Meanwhile, stir the peanuts into the reserved dough for the topping.
  4. Transfer the pan to a wire rack and spread the jam evenly over the hot crust, leaving a 1/2 inch border on all sides. Drop small pieces of the topping evenly over the top. Bake the bars until the jam is bubbling and the topping is golden, about 25 minutes, rotating the pan halfway through baking.
  5. Let the bars cool completely in the pan set on a wire rack, about 2 hours. Remove the bars from the pan using the foil, cut into 16 squares, and serve.

Source: America’s Test Kitchen Healthy Family Cookbook

Happy New Year…

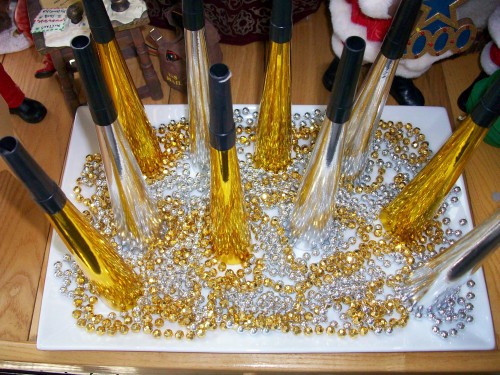
Here are some party horns to get you started. I want to wish everyone a Happy New Year and I hope that 2011 brings everyone better things. What are some of your traditions for New Years? My husbands family traditional food is pork and sauerkraut. My families is black eye peas and collard greens. I love how we have a North and South thing going on in my house. Tomorrow I will be making a pork loin stuffed with hopping john stuffing (look for that this week). My mother-in-law will be making the pork and sauerkraut. I love that we are teaching my kids the different traditions from around the country. I’d love to hear what yours are.

Along with ringing in the New Year, I’ll be busy watching football. Our Penn State Nittany Lions will be taking on the Florida Gators in the Outback Bowl. That bowl brings back so many memories for me. Growing up in Florida and then meeting my husband, we have gone to many Outback Bowls to cheer on Penn State. I do miss Florida this time of year. But I’m in PA right now and will be watching it at home. But we won’t be alone, we will have family with us.

If you will be like me and will be watching football all weekend, I have some great recipes for you. I’m going to be trying some new ones along with some oldies. Here is a great list of things to make for either your New Years parties or Football parties.

This is a fabulous dip and I’ll be serving it tonight with our New Years get together. Hot Spinach and Artichoke Dip

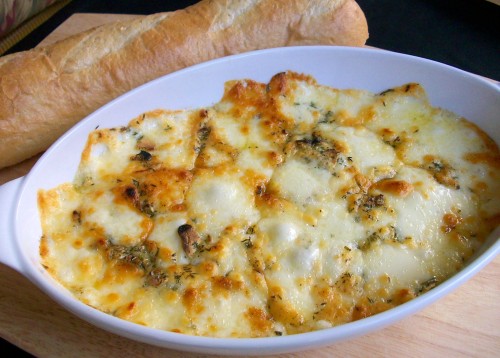
Baked Fontina is my new favorite.

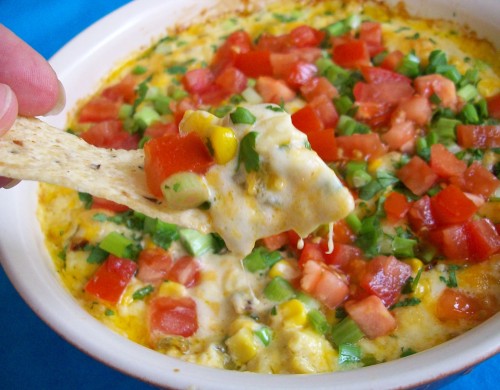
Hot Corn Dip is a must for any football party

Football Sandwiches can be served as little sliders for New Years Eve parties or regular sandwiches for football watching. Either way, you will LOVE them.

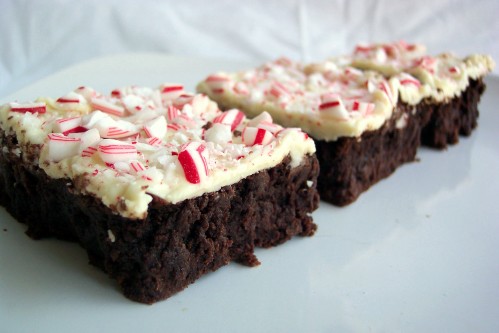
We can’t forget about the sweet tooth. You could make these brownies without the white chocolate and candy canes. They would even be cute cut into football shapes.

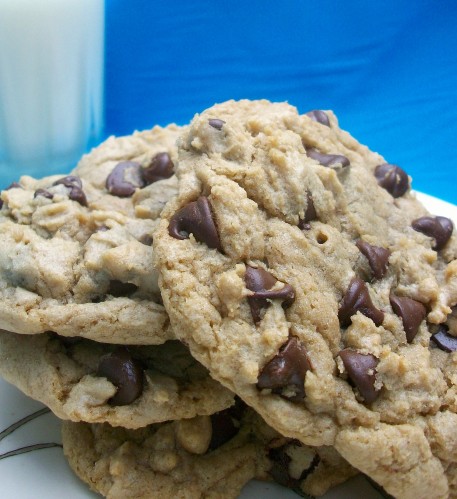
What is better than good old fashioned chocolate chip cookies? These are amazing and you won’t make them any other way once you try them.

I have so many other great recipes that you would love. Take a look over on the right side of your screen and click on the categories to find more.

Again, I wish you all a Happy New Year!

Outrageous Brownies with Crushed Candy Cane

Before I get into the brownies, I hope everyone had a wonderful holiday weekend like I did. My parents and brother were here and I couldn’t have asked for a better time with them and the rest of the family. My mother-in-law and father-in-law gave me a new camera and I can’t wait  to start using it. I got some of the most thoughtful gifts from my husband and sister-in-law. I have to share them with you, their gifts made me cry.

My wonderful husband worked together with his cousins to get this for me. His cousins are very talented and do beautiful embroidery work. I now have an apron and an awesome tote with my website name and url embroidered on it. As soon as I opened it I started to tear up. The thought put behind it meant more than the gift itself.

My sister-in-law and her husband gave me the next most thoughtful gift. A recipe book that has some of my recipes and family photos all through it.

She did a beautiful job on it, which I’m not surprised. The girl is a scrapbook professional!

There was one page that made me cry like a baby. For years I have been bugging my mother and my Aunt for my great-grandmother’s pierogi recipe. I had never gotten a copy of it. Christmas Eve I find that my mother and Mandi have been talking and she had the recipe printed in the book. I can’t even begin to explain how much that has meant to me.

The final gift was passed on to me from my mom. She developed her fudge recipe about 25 years ago. I have only made it once or twice in my life because it was always my mom’s fudge and it just tasted better when she made it. She has given me everything she ever uses for making the fudge. She gave me the pot, candy thermometer and most of the ingredients needed. My dad wrote a beautiful poem about how this will be passed to me and then onto my kids.

Thank you to all my family who made this a memorable Christmas. I love you all!


Were you wanting a recipe for these yummy looking brownies?

I made the brownies for the huge Christmas Eve gathering we had. My husband’s family is really big and every Christmas Eve everyone gathers in one place. I wanted something special for the evening and I turned to Ina Garten. I took Ina’s outrageous brownies recipe and kicked it up a bit. I added white chocolate chips to the brownies as soon as they came out of the oven. I let the chocolate chips sit on the hot brownies for a few minutes to melt. I then took an off-set spatula and spread the white chocolate all over and added the crushed candy cane. I honestly think the brownies tasted better the next day. These would be great for a New Years Eve party!

Outrageous Brownies with Crushed Candy Canes

  • 1 pound unsalted butter
  • 1 pound plus 12 ounces semisweet chocolate chips
  • 6 ounces unsweetened chocolate
  • 6 extra-large eggs
  • 3 tablespoons instant coffee granules
  • 2 tablespoons pure vanilla extract
  • 2 1/4 cups sugar
  • 1 1/4 cups all-purpose flour
  • 1 tablespoon baking powder
  • 1 teaspoon salt
  • 2 11.5 oz bags white chocolate chips (I used Ghiradelli)
  • 34 mini candy canes, crushed (place them in a ziplock bag and lightly pound them till crushed)
  1. Preheat oven to 350 degrees F.
  2. Butter and flour a 12 x 18 x 1-inch baking sheet.
  3. Melt together the butter, 1 pound of chocolate chips, and the unsweetened chocolate in a medium bowl over simmering water. Allow to cool slightly. In a large bowl, stir (do not beat) together the eggs, coffee granules, vanilla, and sugar. Stir the warm chocolate mixture into the egg mixture and allow to cool to room temperature
  4. In a medium bowl, sift together 1 cup of flour, the baking powder, and salt. Add to the cooled chocolate mixture. Toss the 12 ounces of chocolate chips in a medium bowl with 1/4 cup of flour, then add them to the chocolate batter. Pour into the baking sheet.
  5. Bake for 20 minutes, then rap the baking sheet against the oven shelf to force the air to escape from between the pan and the brownie dough. Bake for about 15 minutes, until a toothpick comes out clean. Do not overbake! Remove from oven and add the white chocolate chips evenly on top of the brownies. After 4 minutes, or until the white chocolate is soft, spread the white chocolate evenly over the top of the brownies. Sprinkle the crushed candy canes evenly on top.
  6. Allow to cool thoroughly, refrigerate, and cut.


Slightly Adapted from Ina Garten via Food Network


Oreo Truffles

I’m going to be super busy the next couple days. My parents and brother will be here on Thursday. If I don’t have the sugar cookies done, I will be grounded. Why is it your parents still scare you even after you are all grown up and moved away? I wanted to get one more recipe out to you before I head back in the kitchen and slave away on a few more desserts.

I saw these Oreo Truffles the other day and got so excited about them. Oreo cookies, Cream Cheese and melted chocolate, what could go wrong? Well, let me tell you! Processing the cookies and cream cheese gave me no troubles. It was the melted chocolate and dipping those darn Oreo truffles into it. Every which way I tried would not work. I did not want a huge pool of chocolate on the bottom of each truffle. I finally decided to take my clean hands and go straight for the chocolate. With tons of melted chocolate on my hands I took the Oreo truffle and gently rolled them around so they would have chocolate all over. It was very messy and I was really wishing I had latex free gloves to use. I think the chocolate would work better with the gloves. Later that night, I realized a toothpick inserted into a truffle would probably have worked. It would allow the chocolate to drip nicely off the Oreo truffle. I’ll save that for next time.

After letting them sit and harden, I finally tried one. Everything I had been feeling earlier about the truffles melted away. They were amazing! It was worth all the swearing.

Mom, I’m done and will go work on the sugar cookies.

Oreo Truffles:

  • 1 Package Oreo Cookies
  • 8 oz Cream Cheese
  • 2 bags Semi-Sweet Chocolate Chips
  • 12 oz good-quality white chocolate, chopped (optional)
  • red and green food coloring (optional)
  1. Add Oreos and cream cheese to food processor. Pulse 2-3 minutes until sticky and shiny.
  2. Refrigerate for 1 hour or more to harden.
  3. Roll into 1-inch balls. Refrigerate till chocolate is ready.
  4. Stir the semi-sweet chocolate in a bowl set over a saucepan of simmering water until the chocolate melts.
  5. Coat Oreo balls in chocolate, place on baking sheet lined with parchment paper.
  6. If using… Melt white chocolate in a bowl set over a saucepan of simmering water until the chocolate melts. Transfer to two bowls.
  7. Add the green food coloring to one of the bowls with the white chocolate. Use as much as you like to get the color you want. Do the same for the red food coloring. Drizzle over the truffles.
  8. Refrigerate until ready to serve.

Source: slightly adapted from The Culinary Couple